A brief note to celebrate the release of Apache POI 6.0.0! I started contributing to this project last year, and this is the first release since I joined the Project Management Committee.
Apache POI is a Java library that allows reading and writing Office documents, both in binary and XML formats (OOXML). My main contributions have been adding API to access properties in docx documents that were previously hidden (table indent, embedded charts, right-to-left, among others), improved support for pptx rendering (transparent bitmaps, theme colors as highlight, fix table style rules) and, additionally, general bugfixing.
We at Igalia are best known for our work in browsers, compilers, multimedia, kernel or graphics, but this is an example of our wider contribution to Open Source Software. One of the things we do is contributing fixes and features to the projects our customers rely on, to make their lives easier and at the same time improve OSS for everyone.
This year I started working on Vulkan Video and the Vulkan Conformance Test Suite (CTS) as part of my role as a multimedia developer at Igalia. I'm also a member of the Khronos Vulkan Video Technical Subgroup (TSG), the group that develops the Vulkan Video extensions.
I want to share in a blog series what I've learned along the way, starting from my first task: write the conformance tests to identify a parser bug.
CTS in one paragraph
The Vulkan Conformance Test Suite is necessary to verify whether a Vulkan driver is conformant with regards to the specification. It lives in the VK-GL-CTS repository, alongside tests for other graphics APIs like OpenGL and OpenGL ES. It is built on a framework called drawElements Quality Program (dEQP). Hence the prefix dEQP-VK seen in the test cases. The video tests live under dEQP-VK.video.*, where I focus the most.
The problem
My first task started with a bug in Vulkan Video Samples, a set of sample applications from the Khronos Group. Its parser library is used by CTS for the decode tests.
According to the AV1 specification, a frame can be broken into tiles that can be decoded independently of each other, allowing decoders to process them in parallel. Tiles are divided internally into a matrix of superblocks (SB), square regions of 64x64 or 128x128 luma samples. At the bottom of this hierarchy is the mode info (MI) unit, a 4x4 block of luma samples.
The following example shows a frame split into 2x2 tiles, with superblocks of size 64x64 luma samples. The start column and start row of a tile are specified in MI units, in MiColStarts and MiRowStarts respectively.
  MiColStarts[1] = 3 SB × 16 MI = 48
  MiRowStarts[0] = 0 SB × 16 MI = 0

  1 SB = 64 pixels = 64 ÷ 4 = 16 MI
When an application asks a Vulkan driver to decode an AV1 frame, it passes the tile information in a struct called StdVideoAV1TileInfo, which contains the fields pMiColStarts and pMiRowStarts corresponding to MiColStarts and MiRowStarts in the AV1 specification. For Tile 1, the driver received a start column of 3 instead of 48, since the Vulkan Video Samples parser assigned MiColStarts as follows (and the same for MiRowStarts):
pic_data->MiColStarts[i] = start_sb;
The parser was passing superblock indices instead of MI units (Thanks @zzoon for reporting and fixing it! Issue #152).
A driver doesn't actually need the application to provide MiColStarts and MiRowStarts. It already has enough information to calculate the tile starts from the tile sizes, the superblock size and the frame dimensions. That's exactly what the Vulkan specification now recommends in a note added in version 1.4.344:
"Historically some applications incorrectly specified the values in pMiColStarts and pMiRowStarts in terms of superblocks instead of mode info blocks, therefore it is recommended for implementations to ignore the values specified in pMiColStarts and pMiRowStarts. Instead, the values should be calculated based on flags.uniform_tile_spacing_flag, pWidthInSbsMinus1, pHeightInSbsMinus1, the sequence header parameter flags.use_128x128_superblock, and the coded extent of the decoded picture."[1]
Mesa's RADV[2] and ANV[3] drivers now follow this recommendation.
Fixing the parser and the drivers solves part of the problem. But other applications might still be sending superblock units, and those applications will only work on drivers that ignore the fields. My task was to write a CTS test that checks whether a driver ignores them.
The tests
CTS decodes video with the same parser as Vulkan Video Samples, which after the fix sends tile starts in the correct unit, MI. Therefore, the existing AV1 decode tests already cover correct usage: the driver gets the right values, and the decoded frames must match. What was missing was an additional test for incorrect usage, a test that still sends superblock units.
For that, I added an option to the CTS decoder, ForceSbTileUnits. If enabled, it converts the tile starts back into superblock units right before each frame is submitted.
const uint32_t sbShift = seq->flags.use_128x128_superblock ? 5u : 4u;

for (uint32_t i = 0; i < p->tileInfo.TileCols; ++i)
    p->MiColStarts[i] = static_cast<uint16_t>(p->MiColStarts[i] >> sbShift);
for (uint32_t i = 0; i < p->tileInfo.TileRows; ++i)
    p->MiRowStarts[i] = static_cast<uint16_t>(p->MiRowStarts[i] >> sbShift);
If the clip is single tile, every start is 0, and 0 is the same in either unit, so the test wouldn't check anything. For this reason, it's important to test on clips with multiple tiles.
Every decoded frame is hashed and compared against a known-good checksum. In the existing AV1 tests, which send MI units, a mismatch is a failure. In the new tests, which send superblock units, there are two possible outcomes:
Pass: the driver ignores the superblock values, as the specification note recommends, and decodes the same frames as the existing test.
QualityWarning: the driver reads the values as MI units, places the tiles in the wrong positions, and the checksums don't match.
It's a warning and not a failure because ignoring these fields is only a recommendation, not a requirement. A driver that trusts those fields is still conformant. The goal is to push drivers to accept both units, so they keep working with applications that still send the wrong units.
What I learned
One test is really several. Every decode test runs in four variants: the decoded picture buffer (DPB) is either layered or separated, and images use either general or video-specific layouts. Two clips × four variants gave me eight new test cases, with names like:
New tests go in the mustpass list. That's the list of tests a driver has to run to be conformant. Despite the name, not every test has to pass: on a driver without AV1 decode support, these tests report NotSupported, and that's fine. A QualityWarning is also an accepted result. It doesn't block conformance, but it shows up in the results for driver developers to see.
Hunting bugs and developing tests to catch them can lead you through the whole stack: from the AV1 and Vulkan specifications, to the sample application and CTS, down to the drivers.
Linux cgroups has been used for a while to group processes and control their access to certain system resources. One of those resources is memory, through the use of memcg. That control is dynamic, allowing for cgroups to setup a minimal and a maximal amount of memory, as well as low and high thresholds, which will control the reclaim process.
But what about device memory that is not available as system RAM? Memory that is not available to the Linux page allocator? One of those device memories is GPU VRAM.
That's where the dmem cgroup controller comes in. Introduced in Linux 6.14, it was first adopted by the Intel Xe driver. In Linux 6.15, AMD amdgpu driver also adopted it. In 7.3, it was adopted by nouveau.
Such a cgroup controller allows the system to be configured such that a workload, be it a browser, a game, or another GPU rendering process can have some minimal VRAM available. Or it can prevent one of these processes from using all VRAM, preventing your compositor from using it, for example.
Let's go through the system knobs that are available to control this and what's new in Linux 7.3.
dmem regions and dmem.capacity
Since a given system might have multiple GPUs, there might be multiple device memory regions. So, on dmem, each such region is described by a name. Every dmem cgroup setting file will contain one line per region. One of those files shows the capacity of each region in bytes and is present only in the root cgroup.
After enabling the dmem cgroup with the following command:
Here, we can check that total system usage is above 311 MB.
dmem.max
Excluding the root cgroup, dmem cgroups can control the maximal number of bytes that can be allocated from a region by processes in that cgroup. If an allocation moves the usage above the max setting, it will be refused. In that case, the allocation might be attempted at system memory or it might trigger eviction, depending on the allocation parameters and the driver.
Here, the max value has special meaning, which is unrestricted usage.
dmem.min, also not available on the root cgroup, will control the eviction process - when memory needs to be moved out of VRAM to make room for other VRAM allocations. If an object belongs to a cgroup which is using less than its min setting, it will not be considered for eviction. It effectively works as a hard protection such that the cgroup can use at least the minimal setting.
Given multiple cgroups may set a minimal value that exceeds the device memory capacity, it computes an effective minimal depending on the hierarchy.
dmem.low
While dmem.min works as a hard limit, dmem.low is a soft limit that will prevent eviction in case other objects from different cgroups are available for eviction. That is, the system will try to evict from different, possibly unprotected cgroups, before it tries to evict from a cgroup if evicting would leave its usage below the value set as dmem.low.
Recent developments in Linux 7.3
Some new changes have been recently introduced in the dmem cgroup controller and its integration with GPUs.
One of those is a new read-only file, dmem.peak, which was introduced to allow the peak usage of a region in a cgroup to be inspected.
Also, Linux 7.3 fixed certain scenarios where a given cgroup would not be able to allocate VRAM up to its minimal or low limits if other processes had already allocated most of VRAM, even though they had no such limits set.
Changing multiple regions' settings in a single write was possible before 7.3, but it was prone to failures which would not be reported to userspace and might have left the values partially updated. Starting with 7.3, only one region may be updated per write.
And, finally, prior to 7.3, setting dmem.max in a cgroup that was using more than the new setting would silently fail. Now, there is a mechanism that allows a reclaim mechanism to be triggered. That way, when a process writes to dmem.max and sets a maximal value below the current usage, it will wait (unless O_NONBLOCK is used) for the reclaim process to move objects out of VRAM until the usage gets below the maximal value. If that is not possible for some reason, the setting will still be in place, restricting further alloctions by that cgroup.
I recently added a universal selector for CSS custom highlights, ::highlight(*), to the relevant CSS Specifications (the bulk of it is actually in CSS Pseudos not CSS Custom Highlights) and implemented it in Chromium.
It will ship in Chrome 158. This post introduces what it is and why it’s useful.
What are CSS Custom Highlights?
CSS Custom Highlights allow you to style arbitrary ranges of text without wrapping them in extra elements.
For example, you can write it for searching text:
// ::highlight(search) { background-color: yellow } constranges=matchOffsets.map(([start,end])=>newStaticRange({startContainer:textNode,startOffset:start,endContainer:textNode,endOffset:end}))CSS.highlights.set("search",newHighlight(...ranges))// No DOM mutation: re-running the search replaces the registry entry
Note that this is a pseudo-element, so you can scope it to an element, like span::highlight(awesome) or #foo::highlight(bar).
Custom Highlights have been Baseline newly available since June 2025, so every browser is shipping support for the above.
What’s the problem?
Until now, authors had to give a specific custom highlight name.
But… what if we want to create a global rule that applies to all of the highlights?
The result is the same as the above duplicated version, because all named custom highlights (spelling, punctuation) will use the styles from the universal (*) one.
Simple, isn’t it?
::highlight(*) has zero specificity
CSS Selectors has a specificity algorithm that is used to calculate the “weight” of each rule, in order to determine which selector has more priority.
Simply, when two rules set the same property, the cascade uses specificity to decide which one wins. See the detail in the MDN docs.
Highlights as widely deployed today (with a custom ident) have a specificity equivalent to using a tag name. However, we have modified that so that highlights using * have zero specificity.
On the implementation side, I explicitly return 0 when the argument is *:
Since zero is the lowest specificity, named custom highlights always win. (But p::highlight(*) ties with ::highlight(foo), since p has the equivalent specificity.)
So foo ends up with color: green and background-color: blue.
A fallback for every highlight
A highlight with no matching ::highlight() rule paints nothing.
With ::highlight(*), every registered highlight falls back to the universal rule, like a default custom highlight.
On October 20, 2026, the Intent to Ship received three LGTMs from the Blink API owners, and I merged the shipping CL. This feature will be shipped in Chrome M158, scheduled for November 4, 2026.
I’m thrilled to have worked on this from spec to shipping.
Thanks to fantasai for reviewing the specification, to Rune for reviewing the Chromium patches, and to my colleague Stephen at Igalia. This work was funded by Bloomberg.
Update on what happened in WebKit in the week from October 12 to October 19.
Another busy week for the team! This week we had a variety of fixes,
including the regular batch on the Layer-Based SVG Engine, a new pair
of properties for WPE WebKit, and a new ApplicationManifest API which
improves support for progressive web applications.
Fixed the repaint rects of SVG text using vector-effect: non-scaling-stroke, first by taking the scale into account in the Layer-Based SVG Engine (LBSE), which used to repaint a larger area than it paints for scaled-up text. A follow-up made the decision per text run, since vector-effect is not inherited and a <tspan> inside a non-scaling <text> paints a regular scaling stroke, and unified the computation so that the legacy SVG engine and LBSE now report identical repaint rects.
Fixed the composited bounds of layers below pixel-moving CSS filter effects such as blur() and drop-shadow(), whose backing store previously missed the pixels the filter samples outside the clip. The clips above a layer are now expanded by the filter outsets of the layer and its ancestors, and a change to those outsets updates the composited bounds of all descendants. This change fixes the cross-platform part, and the CoreAnimation based ports, as well as GTK/WPE.
Fixed repaints when an SVG element switches to a wider clip-path, mask or filter in the Layer-Based SVG Engine (LBSE), which previously only repainted the area it covered before the change and left the newly revealed area stale. Style changes that alter the visual overflow now trigger a repaint of the new bounds as well.
Fixed the repaint region of elements clipped by a <clipPath> with a transform attribute in the Layer-Based SVG Engine (LBSE), where changing that transform repainted the wrong area.
Fixed mix-blend-mode on a document-root <svg> element in the Layer-Based SVG Engine (LBSE), which wrongly blended the page background along with the SVG contents. The blend mode is now applied to the SVG contents only, matching the legacy SVG engine.
Fixed elements staying clipped on screen after their <clipPath> was removed in the Layer-Based SVG Engine (LBSE), because the clipped elements were never repainted. Destroying an SVG resource now notifies its clients, which repaint the area the resource used to cover.
Fixed hit testing of children inside transformed layered SVG groups in the Layer-Based SVG Engine (LBSE), where points outside a shape could hit it and transformed children could be missed entirely.
Stopped recomputing the transform twice on nearly every layout of an SVG container without a layer in the Layer-Based SVG Engine (LBSE). The transform reference box is now remembered for such renderers when transform-box is view-box (the default), so the post-layout update only runs when the box actually moved.
Fixed repaints of SVG groups and their content in the Layer-Based SVG Engine (LBSE), which previously left stale content on screen when something inside a <g> moved or when the <g> itself changed (a new transform / changed clip-path etc.). Images, text and shapes now compute their final position during their own layout, and groups with a layer remember their transform so they repaint both the old and new area on change, which brings text repaints in transformed groups in line with the legacy SVG engine.
Fixed painting of descendants with visibility: visible inside hidden <text> and <foreignObject> elements in the Layer-Based SVG Engine (LBSE), which skipped the whole subtree, unlike the legacy SVG engine. Hidden <g> and <text> containers now also run the mask and clipping mask phases, so such descendants are masked and clipped as well.
WPE WebKit 📟
On WPE exposeWindowProperties:geometry and WindowProperties:has-custom-geometry like GTK.
On the surface the new vectorized code looks pretty reasonable, but in reality the vectorized code takes 51.9M cycles whilst the original scalar only takes 12.3M. vluxei64.v and other indexed memory operations are pretty slow on most available RISC-V hardware today, typically only processing elements one at a time, and to make matters worse we have to do a bunch of 64-bit pointer arithmetic at a wide LMUL too.
So there was somewhere where we weren’t taking this into account in the cost model, either in the RISC-V backend or in the SLP vectorizer. Just as I was about to crank up the cost for vluxei64.v I took a step back and looked at the original C source for that function.
As it turns out, this function is just popcount: it computes the number of bits set in a 32-bit integer x. And we have an instruction for this on RISC-V, cpop! So why aren’t we lowering to it?
AggressiveInstCombine can recognise some forms of popcount that directly manipulate the bits of the input, but the twist in arithmetic-bitcount is that it uses a table lookup on precomputed values instead.
x comes in as a long but is cast to a 32-bit int. The function then breaks up the 32-bit int into 4-bit nibbles, shifting and masking it with 0xF, and looks up the popcount of each 4-bit nibble. Then it returns the sum of the 4-bit popcounts.
Doing it per-nibble is a nice approach as it keeps the accessed part of the lookup table small at just 16 bytes, so it should all fit inside a single cache line. But even if all 8 loads are L1 cache hits, it’s not as fast as a native cpop on RISC-V. So how can we match this pattern? Here’s the IR before we reach AggressiveInstCombine:
You could write one big optimisation to recognise the whole chain, but it’s often better practice to do things as smaller, composable chunks. Lets start with a smaller chunk of the IR, focusing on a single table lookup:
What’s important to note is that any read outside of @bits is undefined behaviour, so we’re free to assume that %x lies somewhere within it. So given a load from some global variable @bits and an index into it %x, if every element in the global variable maps to bits[i] = popcount(i), then we can replace bits[%x] with popcount(%x). Here’s the implementation in AggressiveInstCombine, landed in #231225:
staticbooltryToRecognizeTableBasedCtpop(LoadInst*LI,Type*AccessType,GlobalVariable*GVTable,Value*GepIdx,constAPInt&GEPScale,constDataLayout&DL,constTargetTransformInfo&TTI){Type*IdxTy=GepIdx->getType();unsignedIdxBits=IdxTy->getIntegerBitWidth();if(!LI->isSimple()||!isPowerOf2_32(IdxBits)||TTI.getPopcntSupport(IdxBits)!=TargetTransformInfo::PSK_FastHardware)returnfalse;// GEPScale = the i8 in getelementptr [256 x i8]// AccessSize = the i8 in load i8uint64_tTableSize=DL.getTypeAllocSize(GVTable->getValueType());unsignedAccessSize=DL.getTypeStoreSize(AccessType);if(GEPScale!=AccessSize)returnfalse;uint64_tNumEntries=TableSize/AccessSize;// Is this a popcount table?for(uint64_tI=0;I<NumEntries;I++){auto*C=dyn_cast_or_null<ConstantInt>(ConstantFoldLoadFromConst(GVTable->getInitializer(),AccessType,I*GEPScale,DL));if(!C||C->getValue()!=popcount(I))returnfalse;}// Zero extend or truncate as neededreplaceWithPopCount(*LI,GepIdx);returntrue;}
With a quick profitability query and a check to make sure we’re loading from a popcount table, we collapse a lookup into a call to the dedicated popcount intrinsic @llvm.ctpop (plus a truncate to get it back to the right size):
We’re still using 8 ctpops to compute 1 ctpop though, so the next step is to merge these together.
If we have ctpop(X) + ctpop(Y) we can fold that into ctpop(X | Y) if X and Y don’t share any set bits. For example, if X = 0b11110000 and Y = 0b00001111, because they’re disjoint we have ctpop(X) + ctpop(Y) = ctpop(0b11111111) = 8. This combine already exists in InstCombine:
// ctpop(A) + ctpop(B) => ctpop(A | B) if A and B have no bits set in common.if(match(LHS,m_OneUse(m_Ctpop(m_Value(A))))&&match(RHS,m_OneUse(m_Ctpop(m_Value(B))))&&haveNoCommonBitsSet(A,B,SQ.getWithInstruction(&I)))returnreplaceInstUsesWith(I,Builder.CreateIntrinsic(Intrinsic::ctpop,{I.getType()},{Builder.CreateDisjointOr(A,B)}));
But our motivating IR is slightly different. We have ctpop(X & 0xf) + ctpop((X >> 4) & 0xf) + ctpop((X >> 8) & 0xf) + .... Each 4-bit nibble overlaps in the same least significant bits which prevents the fold above, but:
the individual bits that we extract from X are distinct.
it doesn’t matter where the bits are placed in ctpop. ctpop(X) and ctpop(X << 4) give the same result as long as no bits of X are shifted out.
we know that we can fold ctpop(X) + ctpop(Y) -> ctpop(X | Y) when the bits are distinct.
So what we can do is shift back up the bits of X up so that they’re now in distinct bit positions, which allows us to do the earlier fold that combines the add:
ctpop(X & 0x0f) + ctpop((X >> 4) & 0xf)
=>
; shift the bits back up so they don't overlap
ctpop(X & 0x0f) + ctpop(((X >> 4) & 0xf) << 4)
=>
ctpop(X & 0x0f) + ctpop(X & 0xf0)
=>
ctpop(X & (0x0f | 0xf0))
=>
ctpop(X & 0xff)
We can generalise this to arbitrary shifts and masks, and then we get this code in InstCombine (#231321):
/// Given (X >> C) & M, returns {X, M << C} (the source and a mask of what bits/// of the source are in \p V).staticstd::pair<Value*,APInt>matchMaskedBits(Value*V){unsignedBitWidth=V->getType()->getScalarSizeInBits();APIntMask=APInt::getAllOnes(BitWidth);Value*Src;constAPInt*M;uint64_tShAmt;if(match(V,m_And(m_Value(Src),m_APInt(M)))){V=Src;Mask=*M;}if(match(V,m_LShrOrSelf(m_Value(Src),ShAmt))&&ShAmt<BitWidth){V=Src;Mask<<=ShAmt;}return{V,Mask};}/// ctpop((X >> C1) & M1) + ctpop((X >> C2) & M2)/// =>/// ctpop(X & ((M1 << C1) | (M2 << C2))) if M1 << C1 and M2 << C2 are disjointstaticValue*foldAddOfMaskedCtpops(BinaryOperator&I,InstCombiner::BuilderTy&Builder){Value*A,*B;if(!match(I.getOperand(0),m_OneUse(m_Ctpop(m_Value(A))))||!match(I.getOperand(1),m_OneUse(m_Ctpop(m_Value(B)))))returnnullptr;auto[XA,MaskA]=matchMaskedBits(A);auto[XB,MaskB]=matchMaskedBits(B);if(XA!=XB||MaskA.intersects(MaskB))returnnullptr;Value*Masked=Builder.CreateAnd(XA,MaskA|MaskB);returnBuilder.CreateUnaryIntrinsic(Intrinsic::ctpop,Masked);}
If we try this out: Nothing changes! We don’t actually match the ctpop(X & 0x0f) + ctpop((X >> 4) & 0xf) pattern here because there’s truncates in between.
As an added bonus, ntbl_bitcount is inlined within the loop its called from. So if we’re compiling with Zvbb (which rva23u64 contains), the loop vectorizer is able to kick in and we get a vectorized reduction using vcpop.v:
The final vcpop.v reduction is a mighty 115x times faster than the original SLP vectorized version as measured on a SpacemiT-K3. Not bad!
Now with all this said, automotive-bitcount as a benchmark is very artificial. It just consists of a bunch of different implementations of popcount, each executed in a loop. However out of the 8 implementations, with these patches LLVM is able to lower 6 of them to llvm.ctpop intrinsics. In fact LLVM’s AggressiveInstCombine can already recognise various implementations of popcount, and there’s a whole zoo of different formats that tryToRecognizePopCount/tryToRecognizePopCount1/tryToRecognizePopCount2n3 detect:
Try as you might to be clever with your magic constants and fancy bit shifts, LLVM sees through it all and steamrolls over it it with relish.
I invite anyone to try and tackle the remaining two, bitcount and bit_shifter, since even though this series of patches stemmed from an artificial benchmark the table lookup popcount pattern shows up in a few places in the real world, notably Redis and GCC. So sometimes chasing down these benchmarks can be for both fun and profit!
I’ve spent most of my career working on Gecko, the browser engine behind
Firefox. Years in a big, mature codebase teach you a lot. You learn how things
fit together, where the hard problems hide, and which ideas have already been
tried (sometimes more than once).
They also change how you think, and you don’t really notice it happening. Some
abstractions become so familiar that they stop looking like design choices.
Threading models, IPC boundaries, ownership rules, API layers: after a while,
that’s just how things are done. Most of the time this helps. But it also makes
it harder to imagine doing things any other way.
Getting involved with Servo was one of the reasons I joined Igalia. Early in my
career, there was a point where I finally understood enough of Gecko to make
real changes in it. It took a while, and I remember how good that felt.
Working on Servo gave me some of that feeling again. Obviously I knew a lot
more this time. Still, I was back to reading unfamiliar code and slowly
figuring out how a browser engine works, only now most of it was Rust. A lot of
the problems looked familiar to me, mostly storage, concurrency and async
stuff. But the code around them was organized differently, and I kept running
into things I’d stopped thinking about years ago.
Rust is a big part of why. The compiler wants you to be explicit about who owns
what and how long it lives. In C++, I’ve become used to certain ownership
patterns over the years. Rust made me think about some of them again, and a
few times I realized that the design I had in mind wasn’t as obvious as I
thought.
Comparing the two engines is interesting in itself. Gecko has decades of
development, compatibility requirements and real-world experience behind it.
Servo tackles many of the same problems with different abstractions and
constraints. I think Servo has a lot of potential, and working with both
engines has made me rethink some of the assumptions I’d developed over the
years.
After so many years of maintaining production code, it’s refreshing to be a
beginner again in some areas. The experience is still there, but it’s easier to
ask basic questions. Why is this boundary here? Does this operation really need
to be async? Do we actually need this lock?
I especially enjoyed asking those questions while helping with IndexedDB in
Servo. I’ve worked on IndexedDB in Gecko for many years, so seeing it built in
another engine made me look at old decisions differently.
Threading is a good example. In Gecko, IndexedDB work can be spread across a
pool of up to 20 threads, and I’d always assumed more parallelism was better.
Then I ran some cross-browser comparisons under heavy multi-database load and,
out of curiosity, limited Firefox to a single thread. In that test, the
single-threaded configuration finished fastest. I didn’t expect that at all. It
opened up questions about responsiveness and scheduling that I’d like to
explore in Servo some day. That’s probably worth a separate post.
Lately, other projects, mostly on Firefox, have kept me busy, so I haven’t had
much time for Servo. But I’m looking forward to getting back to it. Some of the
work there was new to me, but what I enjoyed most was seeing familiar things
again, from a different angle.
The proposal period for Interop 2027 closed in late September, which
means the Interop team is now in the process of working through all the
proposals and ultimately deciding which will be taken on next year. Part
of that process is looking at “developer signals”, which is a loose
amalgamation of “State of…” survey results, feedback gathered by
developer relations teams, blog posts, YouTube videos, and so on.
A relatively new tool is Jake Archibald’s ranking
tool, where anyone with a Github login can add any of the ~150
proposals to a ranking list, then order them in the priority you would
give them if the decision were solely yours. The results will be
anonymized and shared with the Interop team.
A number of people (like
Ana,
Declan,
Paweł,
Sara,
Stuart,
and
Tyler)
have blogged about their rankings, and I love a good web standards
bandwagon, so here’s my bloggery! And if you’d like to hear me talk about all this,
head on over to Igalia Chats to give it a listen. And maybe even a subscribe!
To be crystal clear: these are my personal
rankings, and do not predict or even affect how I will vote as Igalia’s representative to Interop. In
fact, it’s almost certain that I will, at some point in the process,
vote to cut more than one of the things I’ve ranked here, or at least
will not vote to advance them to the next step in the process. That’s
how Interop goes, given that there are an order of magnitude more
proposals than the teams have the resources to accept.
You might think I’m picking this one because Igalia has been a large
part of getting the standard finished and support into browsers, but I
actually ranked it first because it is it just such a huge step forward. I don’t write much JS, but even I know the Date object is
terrible. The Temporal API is so much better, it’s hard to overstate. It
understands time zones, summer times, and even historical changes like
the exact moment a given country changed time zones. I can’t find
anything else in the list that I think is more deserving of all-browser
all-out effort to implement and make interoperable.
This gets my second-place ranking because it is, to me, the essence
of the perfect Interop proposal. In Jake’s ranking tool, the summary for
this proposal is literally “Fix remaining test failures.” The proposal
itself says “These functions are shipped in all engines, but all have
[WPT] failures.” That’s what Interop is
for, in my opinion. The thing exists, but needs a bit more work
to be truly interoperable.
This proposal gets the bronze medal from me for similar reasons the
previous proposal grabbed silver. In this case, we have a long-supported
feature that still has a vendor prefix clinging to it. Unprefix it,
already!
This one’s emblematic of another role Interop has taken on over the
years, which is to get an up-and-coming feature interoperable from the
outset. Here, the ability to use HTML attributes to shift how heading
levels are treated is already behind flags in two browsers. Having the
browser teams agree to all work on the same thing at the same time would
help find any problems early, and get them fixed before the feature
comes out from behind the flags. I’ll also admit my personal ranking of
this is a little bit influenced by the fact that it would help me fix
problems on this very web site — indeed, in this very blog post — but it
would help a lot of others as well, such as Github.
Okay, I cheated a little here by combining two proposals for this
article. In my actual ranking in Jake’s tool, I ranked them #5 and #6,
because I think if you’re going to clamp lines, you’re probably also
going to want to trim margins. I like the capabilities line-clamping
enables (and I’d think that even if Igalia weren’t one of the drivers of
its implementation), and I imagine that if you’re limiting an element’s
height to a certain number of lines of text, you’re probably trying to
make things on the page adhere to a vertical rhythm and you don’t want
inner margins possibly messing things up. Maybe I’m off base conflating
the two, but it feels right to me.
So there you go, that’s my top five or six rankings. I ended up
ranking twenty proposals in all, triggering a friendly “whoooa there,
big fella” warning from the ranking tool. Here are the rest of what I
put on the list, grouped by high-level area and then sub-sorted in
roughly alphabetical order, with exceptions to group like topics
together:
Trusted
Types — Support is already pretty good, but there are gaps, and this
helps a lot with security.
CSS
color gamut mapping — It turns out that the visual appearance of
color varies greatly depending on a thousand factors, and gamut mapping
would help resolve at least some of them.
CSS
corner-shape property — It’s been too hard for too long
to create scalloped, beveled, and other not-ovoid corners.
CSS
polygon() vertex rounding — I’d love to be able to
round the corners of a polygon, rather than have to construct an arc
path or even a shape() value. This is of a piece with
corner-shape, in my view.
CSS
border-shape property — And while we’re at it, how
about we make it easier to shape the whole of the border area?
CSS gap
decorations — Ever since we got Grid layout, I’ve wanted to be able
to draw decorations into the gaps, similar to column-rule
in CSS Multicolumn. Doing it now requires essentially spacer-GIF
hackery, and I’d rather not have to do that.
CSS
grid lanes (masonry) — Masonry (or waterfall) layouts are
surprisingly common, and being able to do it in CSS is finally coming,
so let’s make sure it’s interoperable.
CSS
linked parameters — You know that thing where you can’t have your
page’s CSS change the stroke or fill colors of an external SVG? This
would fix that. Put it in my vein!
CSS
transitioning/animating display and
content-visibility — The desire to transition from and
to display: none has existed for about as long as CSS
transitions have existed, and I’d love to see it interoperable so people
can use it comfortably.
CSS
var() in size container queries — If wanting to say
@container (width<= var(--min-width)) has kept you using
a CSS preprocessor, this would free you.
That’s where I ended. There were a few I didn’t rank because I’m
pretty confident they’re already going to get strong ranking support. There were a few I wanted to rank, but couldn’t in good conscience
because they had no standard, no evidence of browser interest, or
neither of those. And in all honesty, there were some that didn’t get on
my list because I think they’re bad or terribly formed ideas.
How about you — what are your favorites? Go rank them, blog
them, and spread the word however you can.
Update on what happened in WebKit in the week from October 5 to October 12.
A CSS invalidation bugfix, moving steps for optgroup and hr elements,
and a handful of fixes to the Layer-Based SVG Engine compose this week's
bag of updates, changing to a calmer pace compared to the packed weeks
we've had recently!
Cross-Port 🐱
Fixed various CSS selector invalidation when an element is moved.
Fixed buffered-rendering="static" for SVG <image> elements in the Layer-Based SVG Engine (LBSE), where the image used to be drawn at the wrong position inside its offscreen buffer and without its own transform. The image is now painted into the buffer relative to its own position, and the buffer is drawn back with the current transformation, which matches the behaviour of the legacy SVG engine.
Added support for pointer-events: bounding-box on SVG text in the Layer-Based SVG Engine (LBSE), so clicks that miss every glyph now fall back to hitting the text's bounding box (see pointer-events). It also fixed hit testing of transformed children in SVG containers, which were being tested a second time without their transforms.
Fixed text not following its path in the Layer-Based SVG Engine (LBSE) when a <textPath> points to a path that doesn't exist yet. The text is now laid out along the path as soon as that path appears in the document, which also covers removing and re-adding the path or changing href to another path.
Testing in the web platform is done in many different ways, but a very important one is through the Web Platform Tests (WPT) repository, which contains around 130,000 tests (note that almost 54,000 are from test262, testing JavaScript), which make a total of about 2.25 million subtests. This shared test suite covers most of the web specifications, or at least that’s the aim. All this is relevant because the different web engines run these tests constantly to ensure compatibility and avoid regressions.
WPT is great, but until very recently it couldn’t properly test platform accessibility (a11y) APIs, which means it was leaving out a very important part of the web, and not finding interop issues, catching regressions and identifying implementation gaps in that area. Browser engines have usually been testing a11y through internal tests, which is nice, but not enough in many cases. WPT can now test platform a11y APIs, and, as we’ll see later in this blog post, these new tests have already found bugs in web engines, and even in the specs.
Igalia has been exploring ways to solve this problem for quite a while. A first attempt was a project called Acacia, which was sponsored by the Sovereign Tech Fund. Given all platform a11y APIs have Python bindings, we were working on a Python library that would allow us to inspect them directly. After many conversations with different parties, that project was put on hold, and we moved to find a solution directly inside WPT based on all we’ve learnt in that project.
That solution is now a reality, a new type of WPT tests called aamtest, which aim to test the AAM (Accessibility API Mappings) for the different platform a11y APIs. My colleague Valerie Young introduced this new type in March (RFC 204: WPT testing for AAMs) and started to write new tests based on that directly in WPT. As of today, there are 190 aamtest tests in WPT, covering 4 specs: ARIA, Core-AAM, HTML-AAM and MathML-AAM. We’re glad to mention that the recent work on this project has been funded by the NLnet Foundation.
Let’s use a diagram by my other coworker Alice Boxhall to try to clarify a little bit more about what these new tests do. If you want a full description, the diagram is fully explained in the previously linked RFC.
Diagram showing the interaction between a browser and accessibility APIs by Alice Boxhall
In this diagram you can see the different components related to the a11y support in browsers, and how they interact with each other. The green dashed line is the new proposed way to directly test the platform a11y APIs from WPT.
It’s worth mentioning that back in June, Valerie gave a great talk at the Web Engines Hackfest covering all the details related to this work; don’t miss it if you want to dig deeper.
These tests are written in Python and have different sections covering each platform a11y API. They’re all inside an aamtests folder, which is how WPT identifies this kind of test and knows it has to enable a11y in the browser for them.
The first thing in the test is some HTML code that we’ll use to test that the role is properly exposed; in this case it’s quite simple, consisting of a DIV element with role="blockquote":
Next you can see 4 different functions prefixed with test_, one per platform a11y API:
test_atspi(): AT-SPI (Linux).
test_axapi(): AX API (macOS).
test_ia2(): IA2 (Windows).
test_uia(): UIA (Windows).
All of them start with the same line, which inlines the HTML to be able to test it (this uses WebDriver). Then they have a comment with the mapping information from the spec. And after that, they use the Python library to check that the role is properly exposed to the platform a11y APIs.
First it finds the a11y node corresponding to the DOM element with ID test, and then uses the a11y library to get the role of that element. Finally it verifies that it’s the expected one.
Screenshot of results for core-aam/aamtests/role/blockquote.py at wpt.fyi
We have also tweaked wpt.fyi so the tests show as missing for the platforms they don’t belong to. You can see that AT-SPI is only tested on Linux (Chrome and Firefox), while IA2 and UIA are tested on Windows (Edge). These tests cannot run on WPT’s macOS (Safari) CI infrastructure yet, though the WebKit team is working on adding support for them; for now, you can run them locally if you have a Mac.
All this is great, allowing us to directly test the platform a11y APIs, and verify that things are properly exposed to assistive technology users. And being in WPT, it also helps us to check that implementations are compatible with each other, and that there are no regressions that go unnoticed.
In the last few months, I’ve had the chance to help with this project. And I’ve worked on adding one missing piece, the capability of testing a11y events. When something changes on a page (like a form entry that is marked as disabled), platform a11y APIs emit events to notify assistive technologies, and thus the users, about it.
In order to be able to test those events, we have added a new method called expect_event() to the testing infrastructure, which adds an event listener for a given event in a node, executes an action to trigger it, waits for the event and returns it. That way we can make the test suite more comprehensive by also covering events.
Again it has quite simple HTML, and a similar structure to the previous one, though there are a couple of new things.
We define a function toggle_aria_checked() that modifies the value of the aria-checked attribute. That function is passed as an action to expect_event() to which we also pass the event name object:state-changed:checked and the ID of the node in which we’re going to wait for the event. When the event is triggered, we get it and we can check different things on it to verify that it’s working correctly. Then we run it twice to check that the event is also triggered when you do the opposite change to the aria-checked attribute.
One question you might have is why we are doing all this, knowing web engines already have internal tests covering this (as mentioned before). That’s true, but just with the first tests we’ve added, we have discovered interop issues and missing features in different places. Let’s review a few examples.
There are more examples like these; these are just a few. In the early days of these new tests, they have already proven to be very valuable for identifying issues and improve the a11y support in different engines. It’s really nice to see how useful they are while things are coming along.
This doesn’t finish here; this work can be considered the foundation, which is now in place and people can build things on top of it.
Now that WPT has a new type of tests to cover a11y platform APIs, we expect that aamtest tests start to be used more and more to cover a11y support for new and existing web platform features. Our recent work has been focused on the Linux platform, but there is more work to do covering other platforms, completing tests for platforms that aren’t being tested yet. If you want to do that, you can check the documentation.
Not only that, with all these tests, we’re finding interoperability issues here and there, so we hope people start to fix them where convenient. Apart from that, there is some flakiness when running these tests in the WPT CI for both Chromium and Firefox, as they’re the first ones testing against the platform a11y APIs. This needs more investigation to come up with a solution.
All in all, we’re very happy to have reached this point and to see these tests already having a positive impact on the web platform. We’d like to thank everyone who has been helping make this happen, whether through reviews, feedback, participation in discussions, and so on.
Update on what happened in WebKit in the week from September 28 to October 5.
Another week populated with updates! This time we sweep
through a new crypto backend, more layer-based SVG engine
updates, better filters, and some miscellaneous updates.
Cross-Port 🐱
Add moving steps handling to map, img, label and radio input elements to handle their internal book keeping. This also handles custom element registries.
Initial support to build WPE and WebKitGTK with the OpenSSL crypto backend has landed. This is still in development and not yet intended for use, but progress on bringing it to parity with the libgcrypt backend is ongoing.
Graphics 🖼️
Fixed stacked backdrop filters in the Skia compositor, so an element with a backdrop-filter placed over an earlier element with its own backdrop-filter now shows that earlier element with its filter applied, instead of without it.
Removed redundant save/restore pairs when painting transformed SVG shapes in the Layer-Based SVG Engine (LBSE), so each shape now uses a single pair, just like the legacy SVG engine. When DOM rendering happens in the GPU process, every state change is an IPC message, so this cuts LBSE from about 8.5 to about 6.5 messages per shape and closes the gap to the legacy engine.
Fixed transformed <clipPath> elements that use clipPathUnits="objectBoundingBox" in the Layer-Based SVG Engine (LBSE), whose transform was wrongly applied in bounding box units instead of user space. Rendering and hit testing now apply it in user space, matching the legacy SVG engine.
Fixed hit testing and repainting of non-scaling strokes in the Layer-Based SVG Engine (LBSE), which kept using the old stroke width after the transform of the shape or one of its ancestors changed. A vector-effect: non-scaling-stroke stroke depends on every transform up to the outermost <svg> element, so its cached bounds are now cleared whenever one of those transforms changes.
Fixed the source area of filters and backdrop filters: a filter's offscreen surface only covered the visible part of its layer, so when a layer was partly scrolled out of the viewport, its drop shadow was cut off even where the shadow itself fell inside the viewport. The surface now also covers the area the filter reads from outside the visible part, as in Chromium, and a backdrop-filter blur is mirrored at the border box as the spec requires, which fixes several web-platform-tests.
Fixed viewport clipping of nested <svg> elements with overflow: hidden in the Layer-Based SVG Engine (LBSE), which did not clip descendants that have their own layer, such as a transformed <g>. Containers that clip their overflow now get their own layer, like containers using clip-path or mask already do, so layered descendants are clipped correctly.
Fixed misplaced child layers of SVG elements with a filter in the Layer-Based SVG Engine (LBSE), which were drawn in the wrong position whenever an ancestor layer had a transform applied.
WPE WebKit 📟
Restored the Direct Rendering Manager (DRM) vertical blank monitor for the legacy WPE API, so rendering is once again paced by the display's actual refresh cycle instead of a fixed 60 Hz timer. Two regressions had silently disabled it: a missing display ID forced the timer fallback, and a shadowed variable broke the display controller lookup.
In the previous post, Extension Migration Progress Update – Part 2, we demonstrated how a Chrome extension can be installed from the Chrome Web Store using the Extension Shell.
This time, we’d like to take the demo one step further.
Instead of focusing on the installation process, the following two videos show extensions that have already been installed in the Extension Shell and are actually running on real web pages.
These demos are intended to show that the migrated extension APIs are not only sufficient to install extensions, but can also support extensions interacting with real-world web content.
The video shows the extension modifying the behavior of the web page and enabling the previously restricted interactions.
From Installation to Real-World Usage
These demos represent the next step in our Extension Shell work.
In Part 2, we showed that an extension could be installed directly from the Chrome Web Store. With these demos, we are showing what happens after installation: the extension can run on real websites and interact with their web content.
Together, the demos cover the basic flow we want to support:
Chrome Web Store → Extension installation → Extension execution → Interaction with real web content
There is still more work to do as we continue migrating extension APIs from //chrome to //extensions, but these demos provide a concrete example of how the migrated APIs can be used by real-world Chrome extensions outside of the Chrome browser UI.
Following the last blog post, I would now document in more detail how we fixed the visual jank in the Android phones using WPE, it clearly shows testing an embedded engine in multiple devices is really valuable.
Originally, the Pixel 7 looked broken: a horizontal bar of stale content between tile rows, black corners appearing around spinners and rounded elements, and images that sometimes came up as solid rectangles of garbage. We tested multiple options to analyze the problem: it was not a tearing problem, the frames were correctly isolated, it was the frames rendering being wrong, which is much more complex to look into and much harder to profile.
What eventually gave us the answer was testing different rendering configurations. Skia can rasterize on the CPU or on the GPU, we support both in WPE, and in both cases it can use a pool of worker threads, so when we ran some tests we verified:
CPU with workers worked well, no jank.
GPU on the main thread with no workers at all worked well, no jank.
GPU with workers was broken: jank, every time.
So neither GPU rasterization nor parallelism was the problem on its own, it was the combination was causing the visual artifacts. The reason was that each painting worker has its own GrDirectContext, with its own GL context, sharing the underlying EGL display and textures with the context the compositor uses to put the frame together. That kind of sharing depends on the driver getting context synchronization right, and on Mali ((the Android driver for the Pixel 7 phone) it does not. We confirmed it by writting a small standalone reproducer outside WebKit.
The fix for all of that, which is Carlos’WebKit PR #65286, uses a Skia feature that exists precisely for this kind of problem: deferred display lists. The feature comes from the idea of recording raster work in one place and executing it in the GPU process. In WPE we are currently still using a compositor thread with a GPU context, but the idea is the same. The approach is that you describe the destination surface up front, as a GrSurfaceCharacterization holding the surface properties, and you build a GrDeferredDisplayListRecorder from that description. The canvas you get from the recorder accepts and validates all the usual drawing, but does not send any GL commands at all, and at the end detach() gives you a GrDeferredDisplayList. The worker thread does all the expensive CPU side of painting (building the draw operations, resolving paints and geometry) with no GPU context required. Then the compositor thread, in SkiaBackingStore::Tile::update, creates or reuses an SkSurface compatible with the deferred operations object and calls skgpu::ganesh::DrawDDL with it. The compositor’s context is the only thing that ever renders tile content with the GPU context.
It is also very interesting how this is implemented. A thread with no GPU context can not sample a texture, so any image that already lives on the GPU (including the glyph and image atlases) can not be referenced directly while recording. Instead, they are turned into promise images. This is what makes atlas access safe from several recording threads at once. It is also the reason why, the first time we tested, every image was rendered as a black rectangle, which turned out to be an unrelated Android problem with the format used to upload those atlas textures, and cost us a couple of days wondering why the fix did not work.
Once it was activated, the Pixel 7 jank was gone, the bars, the black corners and the garbage in general. Also, parallel painting is still parallel, only the submission is serialized. There was a price, though: moving all the real rasterization to the compositor thread puts it in the same queue as frame presentation, and the first version felt slower. The cause was a fresh render target being allocated for every tile update, so adding a cache to recycle the backing buffer solved the problem.
Nowadays we are using DDL and the skia compositor by default, we plan to remove TextureMapper support, and the Skia compositor is what we provide in main.
The last part of the story is a warning note about benchmarks. When we ran a proper A/B testing with MotionMark, the overall score said deferred display lists were 7% slower, and that number was something we needed to understand: the whole difference came from a single subtest, Suits, which scored 76 against 19. The option without DDL was rendering incorrectly in Mali, so the benchmark in the end was rewarding broken frames in Android. The rendering was just find in Linux drivers where we tested it, so the decision took the whole situation into account. We did not want to add more rendering options (that usually means more complex maintenance), and the regression was measured against an architecture we knew was not completely safe.
Next time I could talk about how we are currently planning to recover that performance that is going to show pretty soon in the benchmarks, and it has taken some time because it requires patching Skia.
Update on what happened in WebKit in the week from September 21 to September 28.
Following the stable releases last week, we have the first security
advisory covering fixes included in them; the flurry of fixes and
polish for the Skia compositor continues; SharedArrayBuffer gets
re-enabled, and more.
Cross-Port 🐱
Fixed a crash on exit in WebKitGTK
and WPE WebKit, caused by the EGL display being torn down in an atexit()
handler while other threads were still using it, by now destroying it on the
main thread once the GPU process has stopped its WebGL thread and the web
process has closed its pages.
Fixed moving steps for source
element to account for the <media> and <model> elements.
JavaScriptCore 🐟
The built-in JavaScript/ECMAScript engine for WebKit, also known as JSC or SquirrelFish.
SharedArrayBuffer is now enabled for the WPE and GTK
ports.
SharedArrayBuffer is exposed when the origin is cross-origin isolated. We have
enabled 35 associated cross-origin isolation tests. Initialization was
designed to work with Android service-launched processes, too.
Graphics 🖼️
Fixed a bug with 3D-transformed
elements that are tilted so far away
from the viewer that part of them ends up behind the camera, where WebKit got
the visible area of the element wrong and computed the hidden part instead. As
a result, the visible part of such elements is no longer left blank in
WebKitGTK and WPE—painting and hit-testing works properly now.
Fixed oversized damage regions for
3D-transformed layers that cross the camera plane, by clipping their projected
polygon against the clip bounds so the damage now matches what the layer
actually paints.
GPU renderer small paths now use Skia distance
fields.
Bitmap atlas entries depended on the transform and subpixel position, causing
animated paths to be re-rasterized and uploaded every frame. With distance
field indexed entries we can reuse them across transforms. We are improving
MotionMark Suits results on Raspberry Pi 4 and desktop.
Fixed the paint order of preserve-3d
layers that cross the camera plane in
the Skia-based compositor. Layer corners behind the camera used to be flipped
to the far side of the screen when projected—layers were sorted against the
wrong geometry and far layers painted over near ones. Now the part of a layer
that lies behind the camera is clipped away before sorting, which makes
complex 3D scenes like the CSS FPS
demo render correctly.
Aligned the filter surface with the device pixel
grid in the Skia-based compositor, so
layers with CSS filters that end up at fractional device positions are no
longer resampled when the filtered result is drawn. This fixes wrong colors in
the outermost rows and columns of pixels of such layers, which now render the
same as they would without a filter.
Fixed SMIL-animated viewBox
changes being ignored on the
outermost <svg> element in the Layer-Based SVG Engine (LBSE), bringing it in
line with the legacy SVG engine.
Fixed edge artifacts on scaled or
transformed non-repeating background images in the Skia-based compositor,
which painted all composited background images as if they repeat, so a thin
line of the opposite edge showed up along the border. Only tiles that actually
repeat are painted that way now, which removes the yellow line that showed up
above the gun in the CSS FPS demo.
This fixes the last known artifact in that demo.
Fixed rendering artifacts in
WebKitGTK and WPE WebKit for 3D-transformed layers that extend behind the
camera under a perspective (for example a large element under
rotateX(90deg)), whose re-composited area came out too small because corners
behind the camera were projected onto the wrong side of the frame, and are now
clipped away before mapping.
WebKitGTK 🖥️
Fixed touch positions in the GTK
port, which were offset by the
surface transform, the room left for the client-side decoration shadows,
because it was not subtracted from the raw GdkEvent position, so every touch
landed away from the finger unless the window was maximized. The same change
cancels the touch sequences that were stranded when the web view is unmapped
or a dialog was shown, which left the page with a finger that was never
released.
WPE WebKit 📟
WPE Platform API 🧩
New, modern platform API that supersedes usage of libwpe and WPE backends.
The ENABLE_WPE_PLATFORM build option has been
removed.
The new WPE Platform API, which was enabled by default since 2.54, is now
always enabled.
Releases 📦️
A new security advisory, WSA-2026-0006, has been published for
WebKitGTK and for
WPE. This covers issues
fixed in the recent 2.54.0 releases, and for the first time includes security
issues fixed in the bundled ANGLE and
Skia libraries. Updating to the latest stable release is
highly recommended.
I thought it would be interesting to talk a little bit about the standards process given a few events that lined up last week in my mind...
Last week my colleague Rakhi wrote a great piece about how standardization at the edges sometimes (maybe even often) works backwards because there are fallable humans all along the way - writing the spec, interpreting the spec, writing tests, and so on. The very next day, another such case was brought to the CSS Working Group. A lot of people found this very interesting.
Around the same time, we published a new episode of Igalia Chats about Global Privacy Control, which, at the end of the day, is mainly a boolean header that a browser can send. As we discussed in the Chat, it probably feels suprising to learn that the efforts to do something like this wind up spanning _many years_ (there are some helpful links there to the history of Do Not Track as well) and what makes people believe that this time it will be different (that the pressure kind of came from outside first is a big one). Anyway, it's kind of fascinating if you don't know any of this stuff.
Then, on Thursday, the SpellCheckCustomDictionary proposal advanced to stage 2 in WHATWG. If you're not familliar with it, I wrote a short post about it not too long ago. The reason I mention this is that it's been stuck for months at stage 1, because we needed to talk a lot about Internationalization concerns.
This is a potentially important discussion, to be sure. However, only "potentially" so because while spell check has existed in browsers for more than 10 years, for the most part, the `lang` attribute remains unconsulted. Where it is, it's not really specified how that should work in terms of general spell checking.
To me, that feels worth talking about, because it sometimes feels like there are impractical gaps that it's not clear how to fill. On the one hand, it feels unreasonable to expect a small improvement to spell checking to be held to a higher standard than the mature specification and existing implementations. On the other hand, I fully agree that these are important questions. The difficulty, at some level, is that all of these uniquely important questions are also somehow dramatically underfunded. Accessibility, Internationalization, Privacy - or even just integrating and normalizing MathML and SVG into One Platform being just a few obvious examples.
It's hard to live up to ideals if we're not funding them well enough, or if they aren't pragmatic enough (for example, demanding the the spec is right).
I don't really know how to fix the funding bit except to continue to lobby vendors to allocate more budget to those things (or, in come cases, maybe just any budget at all) and to suggest that we need more experiments in collectively funding and prioritizing those ideals in implementation work. Lots of features are like fast food or desserts - someone needs to make sure that we eat our vegetables.
GstPipelineStudio 0.6.0 is out! After 0.5.1
taught GPS to open dot files, this release teaches it to suggest: the next element for any
free source pad, or even a complete pipeline from a media file.
Almost since I started using GStreamer, I have wanted this feature. It comes straight from my
days with GraphEdit
and DirectShow: connecting black boxes taught me what each filter did, but I was never quite sure
I had picked the best one for a given pin. So I relied on the right-click menu to show me my options.
GStreamer makes that question even harder. A typical development setup exposes more than 1,500
features, with five or more decoders able to handle H.264 alone. Which one should I use? Can I try
another? Newcomers and seasoned developers alike ask this every day.
Right-click any free source pad and GPS now offers three choices:
Suggest compatible elements: list the elements that can link to this pad
Auto-select next element: let GPS pick the best candidate
Auto-select all elements: let GPS build the whole branch, up to the last compatible element or the sink
The same mechanism works from a media file. Open a URI and, much like
decodebin3, GPS lays
out a working pipeline with every decode branch. Except here you can see it, and change it. Try it, it’s
really fun!
GPS 0.6.0 has a new look. The panels have been reworked, and
libadwaita now drives the UI on every
platform, Windows included, so GPS looks and behaves the same wherever you run it.
Color themes arrive too. Pick the one that suits you: the same pipeline, a different mood.
The interface also comes alive during playback. A heartbeat shows at a glance that your pipeline
is running, so you are no longer watching a static diagram but a live system.
The graph view is also easier to handle. You can now select several elements at once, then move
or delete them in a single batch, which makes large and complex pipelines far easier to reorganize.
The underlying graphmanager library is becoming mature enough to fly on its own soon.
Not sure where to start? The new Pipelines tab lists classic GStreamer pipelines, adapted to
your platform: test sources, timestamp overlays, scaling, framerate limiting, tee, compositor and
more. Pick one, and it opens ready to play and tweak.
Log filtering comes next. It could take GPS to another level, letting you validate a pipeline or
track down a problem from a friendly interface instead of digging through raw logs. Pipeline
statistics and smarter auto-suggestion are also on the way.
We had a great time building this release, and we hope you’ll have as much fun playing with it,
and with the fabulous GStreamer framework. Feel free to propose new features with an RFC
here or send merge
requests here.
As usual, if you would like to learn more about GstPipelineStudio, GStreamer, or any other open
multimedia framework, please contact us!
And here we are three years after I wrote about the Google Pixel Fold being announced, followed now with the announcement of the iPhone Duo...(I have questions about the naming by the way).
Four years ago I was talking about web primitives in the platform for the Surface Duo. My how time flies.
I haven't been able to find any signal yet on whether Safari will support these things in the web platform as the developer docs focus on application development.
If you're interested in trying out the platform features, you can emulate the Surface Duo and Galaxy Z Fold in the developer tools.
And if you're thinking, do I really have to have my website adapt to two screens? The answer is no. Adding a design to an application or dual screen makes sense if you have an experience that has two simulataneous contexts that are useful e.g. a list of email messages/inbox on one screen, an open message, email thread or email composer on the other.
Here's one of my talks from 2022 if you're interested in learning more about what's available in the browser for dual screen/foldable devices.
You can find the slides in the link above but I noticed I never actually embedded my talk in a blog post for posterity, and I didn’t provide a transcription of the 2025 talk for those more inclined to read than to watch a video.
Please excuse me for being so late.
You can find both the video and the transcription below.
See you in Toronto!
XDC 2025 Recording
* {
padding: 0;
margin: 0;
overflow: hidden;
}
html, body {
height: 100%;
}
img, span {
/* All elements take the whole iframe width and are vertically centered. */
position: absolute;
width: 100%;
top: 0;
bottom: 0;
margin: auto;
}
span {
/* This mostly applies to the play button. */
height: 1.5em;
text-align: center;
font-family: sans-serif;
font-size: 500%;
color: white;
}
▶">
* {
padding: 0;
margin: 0;
overflow: hidden;
}
html, body {
height: 100%;
}
img, span {
/* All elements take the whole iframe width and are vertically centered. */
position: absolute;
width: 100%;
top: 0;
bottom: 0;
margin: auto;
}
span {
/* This mostly applies to the play button. */
height: 1.5em;
text-align: center;
font-family: sans-serif;
font-size: 500%;
color: white;
}
▶"
>
Talk slides and transcription
Thanks everyone! Hello, I’m Ricardo from Igalia and I’m going to talk about Vulkan CTS, giving you some general information and some tips and tricks about it.
I’ve been contributing to the Vulkan Conformance Test Suite since 2019. It’s the same project that has OpenGL tests, but I have almost no contributions to the OpenGL part.
I’m not the only one at Igalia working on CTS. Our work on this front is being generously funded by Valve.
As part of my job, I frequently interact with Mesa contributors and people at Khronos. There’s some overlap between both, specially in this room.
So what is my job about?
This.
The project is called VK-GL-CTS and it’s a Vulkan and OpenGL Conformance Test Suite.
Most people writing Vulkan drivers have had to deal with VK-GL-CTS at some point.
It’s open source, available on Github under the Apache 2 license.
You can see it has a lot of commits from many different contributors apart from us, but not much community or activity inside Github, for reasons that I will explain later. This is very common with Khronos projects.
Right now it has around 2.8 million Vulkan tests and ~5 million lines of code specific to Vulkan, but when you run a test you also use a lot of code from a common base that’s shared with OpenGL.
To give you some specific details about the Vulkan tests, if you take a look at the top-level README file, it points you to a second README that’s specific to Vulkan.
If you follow the quick instructions in that second README and you configure and build the project, you end up with a binary called deqp-vk in some subdirectory of the build directory.
That’s the base binary that allows you to run Vulkan tests by passing the -n option and indicating a test name, but you can also use asterisks in the name to form a glob that allows you to run multiple tests that match that pattern.
The program will print a summary of the results in the terminal and put a lot more detail about each test in a file called TestResults.qpa.
The tests are organized in a tree, with the leaves of that tree being the test cases that can be run, and the nodes leading to that leaf being the parent test groups.
One example is this: a Vulkan test that tries to see if copying between images with some given formats works.
dEQP-VK, at the start of the name, is the root node, and there are subgroups to test the core API commands for copying and blitting images, and a subset of those are run for all formats with different image types, like copying from 1D to 2D using the general image layout for both images.
Starting with the first tip: if you dig deeper in the Vulkan CTS README, it mentions a few useful things.
One of them is that, when building the project normally, you build many more things than the deqp-vk binary, like stuff for Vulkan Safety Critical, or some additional extra binaries.
Of course, if you build calling cmake or ninja, you can indicate that you only want to build deqp-vk. You can always create a shell alias, script or whatever to do that, but if you don’t want to forget about it, there’s a cmake configure option that you can use when building the project to specify the targets you want to build by default, called SELECTED_BUILD_TARGETS.
You pass a list of target names separated by spaces. If you specify deqp-vk only, only that binary will be built by default, which it’s much faster than building everything.
Another configuration option that I find particularly useful is DEQP_LOG_NODE_SOURCE. This was added recently to main, so it’s present in the most recent branches, and requires a modern compiler to work.
If you enable it, the log file will mention, for every test case that is run, where the test case is being added to the tree. This makes it easier to locate the source code of a particular test. We’ll talk a bit more about that later.
If you use this, there’s a small performance penalty when creating the test tree in memory, but it’s probably worth it in many cases. I always use this option.
Another thing: the deqp-vk binary is typically around 400MB big in a Debug build, or more depending on some other build options, so it takes a long time to link it. This is specially problematic when you’re making changes to a single file and rebuilding.
Many Linux distributions still use BFD or Gold as the default linkers, which are very slow for deqp-vk, so my advice is to switch to LLD or Mold.
For example, in my previous laptop, the default linker took 30 seconds to link deqp-vk. With mold, it went down to <2 seconds.
Sometimes you can make them the default linker with update-alternatives but you can also set a link option from LDFLAGS and cmake will pick that up when configuring the project.
Moving on from build tips, I wanted to briefly explain how changes are reviewed and merged to the project.
This is related to the community aspect I mentioned before.
Every change that lands in the project needs to pass an internal review process inside Khronos.
Who’s reviewing and approving changes to CTS? Typically people who have a Vulkan implementation, that is, a Vulkan driver running on some hardware, but software-only implementations also count.
Some reviewers work on Mesa. For example, Samuel here reviews a lot of changes to make sure they work on RADV.
However, I think it’s fair to say most reviewers do not really look at the source code for the changes. They only want to check if the tests pass on their driver and, if they don’t pass, they block the change until they fix the driver, if it’s a driver bug.
A change cannot be blocked forever in those cases, so typically the result is that changes are merged more or less quickly and all drivers work and are fixed at the same time.
To help with that process, Khronos has an internal Gitlab instance to track proposals for new tests and issue reports.
If you don’t have Khronos access, you can report issues and submit PRs on Github, and someone will eventually review them and move them to the internal tracker.
So, again, if you have a Khronos account, go to Gitlab. If you don’t, use Github.
If days or weeks pass and nobody replies on Github, feel free to mention us, specially if your issue comes from Mesa. No guarantees, of course, but it may help move your issue forward. You have some of our handles in the slide.
Some basic stuff about reporting issues.
First, please mention hardware and driver, and if possible one specific case that is giving you trouble.
Maybe mention a larger set of tests if you think all of them are affected by the same problem.
Things that can be reported:
Test mistakes, specially if the problem is reported by the validation layers.
Also lack of coverage if you think something needs to be tested.
A couple of tips about coverage: if you’ve implemented something new and all related tests seem to be passing, try to break something on purpose inside the driver and see if the tests still pass. You may be surprised.
Also, if you discover a bug in your driver that is quite simple, obvious and it should be easy to reproduce, maybe it can be converted to a CTS test, so think about that.
Expanding on the topic of reporting issues, sometimes I get the feeling that people assume some minor pain points that they find are simply there and go “well, CTS is like that sometimes”, so I want to mention more things that are fair game and worth reporting.
Configuration step takes too long: at some point a version of the layers was being built by default and the dependencies of the layers were being downloaded during the configuration step, instead of a previous step that fetched external dependencies.
Tests take too long to run: maybe a pathological case of the shader being too slow to compile (this is happening to our Rpi team), or the test hammering the PCI-e bus due to the chosen memory types (this happened to NVK and we introduced a mechanism to more easily select better memory types, and did some fixes to some tests)
And more stuff: tests that take too long to skip, or fail without giving a hint about where, or explaining why (neither in the terminal nor in the logs), not logging enough information, build or link time worsens a lot, etc.
You don’t have to assume “CTS is like that”.
More stuff: dealing with test failures. First, if the test logs an image to TestResults.qpa, you can view them with the cherry tool mentioned in the README, but you can also use a self-contained viewer in the scripts subdirectory. It runs entirely in your browser. I have it as a local bookmark in Firefox.
It has some limitations. Images in the test log are logged as PNGs. Drawbacks: color depth, 3D images, etc. Ideally this tool would be much more sophisticated. Images would be logged in a format that was more flexible and the tool would allow you to examine layers of an image and raw values with precision and easily by hovering the mouse over a failing pixel, but we don’t have that.
You can also run the test in RenderDoc, and you should pass an option for that.
Finally, if the failure message does not mention a line and file in the source code where it’s failing, which is trivial, please report it as an issue. In the mean time, the log-node-source option that I mentioned before can help.
If you want to check what a test is doing, here are some hints about navigating the CTS source code. I don’t want to talk too much about this, but some details are worth mentioning.
If you log the node source and it points you to a line that mentions addFunctionCase, you only need to check the functions that are being run.
Otherwise, the source code contains test cases and instances. Test cases are the leaf nodes of the test tree that we mentioned, and have methods to check the requirements to run the test, to generate the shaders that will be used, and another one to create a test instance.
The test instance is the object that runs the actual test, in a method called iterate, and internally they can manage all the resources they need: images, buffers, command buffers, etc.
Test Cases in the tree are kept alive since the start of the process and until it finishes while a Test Instance is short-lived: they’re created to run the test, they allocate the resources they need, and they’re destroyed after the test finishes, freeing all resources.
The hard part: finding tests.
If I was given a cent every time someone asks me if we have tests that meet certain criteria, I could amass a small fortune.
We can always grep the source code searching for extension names, feature names, etc, but things can get really complicated.
Sometimes it’s not only about Feature X or Format Y, or a given API call.
We want some specific memory types and alignments, or in combination with some other feature, or some other weird and specific requirements that may not be easy to meet.
Sometimes we look at the source code and find that we do have that coverage.
Some other times we have similar coverage but not quite, and it may be easy or hard to add the requested coverage.
Of course, sometimes we’re lacking some general coverage and we need to create new tests.
Unfortunately, in many cases the real answer is that we do need to grep the source code as we mentioned before. However, some of this is being changed nowadays and we’re making progress towards making test requirements more explicit and, in a sense, declarative.
Ideally, at some point that should let us build a system that could be used to search test cases by features, formats, etc.
You can imagine something similar to Sascha Willems’ GPU info database. We could combine it with logging the node source and make it easy to find the source code of those tests.
That’s it. Many thanks! Let me know if you have any questions, or maybe you just want to rant about CTS. If not now, maybe later in the hallway.
Q&A
Q: We sometimes see that a particular test case runs on a queue like the graphics queue. Is it possible to run that test on another queue like the compute queue?
A: That’s being worked on. There’s a very old feature request for CTS to basically be able to run every test that is possible on any other queue that’s available on the device, in general. That’s one thing. It’s a hard problem given the state of the source code but people are working on it right now, and I think we will eventually get there, when we can run the tests on, say, the compute queue. Then that begs more questions like, for conformance purposes, do we have to run all the tests on all the queues supported by the device or not? The answer is not simple. The other possible answer is something that we have been doing for some time, as you know, is that we sometimes create specific variants for some tests that we know are tricky to run on the compute queue or on the transfer queue, and we create variants of those for those specific queues.
Q: Question about lists of packages for the linux distributions to be able to build deqp-vk.
A: I misunderstood part of the question as it was asked but later caught up with the person asking and he was genuinely wondering why deqp-vk was failing to build on some systems following the instructions. As a result of that question, we submitted an update to the documentation to be more precise in the list of required packages to build CTS, so that’s a win!
Q: Request to parametrize the side of the framebuffer in some tests, which is important for tilers like Turnip, to be able to run the test both using system memory and graphics memory.
A: Ack the request and admit that’s a hard one (because it would need changes in a lot of tests).
Update on what happened in WebKit in the week from September 14 to September 21.
Following up to last week, we have a handful of exciting fixes
to WebKitGTK and WPE WebKit covering Sysprof, rendering of CSS
"filter" and "backdrop-filter", and the Layer-Based SVG Engine.
We also have optimizations, stable releases, and new blog posts!
Cross-Port 🐱
Fixed the pairing of begin and end marks in SysprofAnnotator, which kept only one begin per mark and therefore mistimed recursive, concurrent and overlapping marks, so Sysprof traces of WebKitGTK and WPE WebKit now show correct durations for nested work.
Graphics 🖼️
Fixed CSS filter and backdrop-filter rendering on transformed elements in the Skia compositor used by WebKitGTK and WPE WebKit, where drop-shadow always fell in the same direction on screen instead of turning with the element, blur was scaled by neither the transform nor the device scale factor, and perspective was not handled at all. The filtered subtree is now painted with the layer transform on the canvas into a surface in the layer's own plane at a fixed scale, with the filter applied there and the result drawn back through the layer transform, as Chromium does.
Stopped rasterizing the parts of a tile that the clip discards in the Skia backing store used by the GTK and WPE ports. Both the drawn quad and its source rectangle are now cut down to the clip first, so the rasterizer no longer fills pixels that are immediately thrown away when a tile is larger than the clip.
Fixed the transform attribute on the outermost <svg> element, which the legacy SVG engine ignored entirely and the Layer-Based SVG Engine (LBSE) wrongly applied inside viewBox space. The attribute is now turned into the CSS transform property, one CSS function per SVG function, so that it transforms the element's CSS box, matching the behaviour of Chromium and Firefox.
Releases 📦️
After another six-month development cycle, WebKitGTK 2.54.0 and WPE WebKit 2.54.0 have been published. These are the first stable releases of the 2.54 series, that as a highlight include a completely new compositor based on Skia. As it is becoming tradition with each major release, two blog posts go into details of what's new in WPE WebKit 2.54, and in WebKitGTK 2.54.
This release is a milestone for WPE WebKit: after a couple of years in the incubator, the new WPEPlatform embedding API is now considered stable and recommended for new developments. As part of the stabilization, the WPEPlatform manual now includes not one, but two introductory tutorials, and a migration guide to aid migration from the (now) legacy libwpe-based embedding API.
Note that the libwpe-based legacy API is still available and will be kept in light maintenance mode for the foreseeable future.
Community & Events 🤝
Coinciding with the first stable releases, Carlos García has written about the new Skia compositor that is debuting in the 2.54 series. It includes plenty of details on why and how the new compositor has been built to replace the aging TextureMapper, and measurements that demonstrate how it is bringing graphics performance improvements across the board.
At the same time, Nikolas Zimmermann published a companion article about damage handling in the new Skia compositor that explains how the feature it has been rewritten with a focus on correctness while ensuring that it saves doing unnecessary work without incurring on excessive busywork that would cancel the benefits.
In this instalment of the “Why don’t we do a demo?” series I’ll
continue through the software development part of the demo and I’ll end
up with an MVP that will be later shaped into a finished product. Check
out the previous parts (The
plan, Software
development) to have more context on how we got here.
Problem
13: Bringing up the touch-display in the console device
I chose the display
hardware based on what was readily supported in Zephyr so, in
theory, I’m expecting it to work out of the box. However, things are
rarely that simple.
There’s a basic
LVGL sample as a starting point to check the hardware. In principle,
if that works, all I have to do then is to design and implement the user
interface. The sample works but, as the docs explain, I’ll need to do a
small manual tweak in the board:
Touch controller IRQ line is not connected by default. You will need
to solder the 5 INT jumper to use it. You will also need to adjust
driver configuration and its Device Tree entry to make use of it.
Besides, while the basic sample works, there are other problems when
I try to draw more complex layouts.
Solution
Soldering the jumper isn’t really an obstacle:
The pads are accessible and big enough to be easy to solder using a
solder pen or silver paste syringe with a steady hand:
After soldering, I tested the sample application again and I could
check that the touchscreen works by clicking on the test button:
But now, if I continue building upon this, creating a proper
interface with more widgets and a more complex layout, even if it’s just
for testing for now, the display shows a blank screen.
This is a fairly common problem and it was easy to search for info
about it, everything pointed to the small default size of the memory
region for the LVGL heap (CONFIG_LV_Z_MEM_POOL_SIZE). After
some experiments I settled on a value that worked for the application
needs. To err on the safe side, the strategy is to allocate as much
memory as possible to LVGL after the memory needs of all the other
subsystems are met. The network stack and web server are the other parts
that need large-ish memory allocations, but the LVGL memory pool will be
the largest by far, at 32 KB.
Building the application with this configuration shows that I’m now
using almost all the RAM:
Memory region         Used Size  Region Size  %age Used
           FLASH:      780028 B         1 MB     74.39%
             RAM:      251936 B       256 KB     96.11%
        IDT_LIST:          0 GB        32 KB      0.00%
But I can continue adding more widgets and creating more complex GUI
layouts.
Problem 14: Touch-display
problems
The initial LVGL “hello world” test above works as expected when
tested on the display but, once I start adding more components to the
interface, something seems wrong. Buttons aren’t pressed when I click on
them, and touching random areas of the display trigger some widgets in
other parts of the screen.
After a while, I noticed this behavior isn’t random. When I click
something on the right side, the widget receiving the action is on the
left side. When I click on the top area, the action is triggered at the
bottom. The touch coordinates seem to be flipped. This probably went
unnoticed because the layout of the “hello world” sample is just a
single button in the center of the display, that is, it’s symmetrical in
both axes, so any touch on the button will push it, flipped coordinates
or not.
Solution
This one’s really easy, just a matter of removing the pointer axes
inversion properties from the display device tree. Done
and merged.
Problem 15: GUI design
The design and implementation of the graphical interface involves two
different problems:
How to fit all the information and controls in a tiny display and in
a platform like this.
How to implement it effectively.
In terms of design, I’m restricted by the screen real state (3.5
inches), but also by the hardware (memory and display speed). I
certainly can’t make anything as responsive and feature-rich as what
we’re used to in smartphones, so I need to keep it simple but
functional.
With regards to implementation, the main obstacle is the complexity
of the LVGL
api and the amount of trial-and-error needed while tweaking and
testing the layout, which can be very time-consuming, even when testing
on the simulator. While LVGL isn’t more complex than other graphical
libraries, the amount of widget configuration variables, particularly
related to styling, means I’ll still need to do a lot of tests to get
the positioning and behavior just right.
Solution
I started designing the simplest possible layout, a main container
with subcontainers arranged in a single column, where every component is
a widget box containing the controls for a peripheral slot. It’d look
something like this:
When a slot isn’t connected to any peripheral, I can make everything
except for the “Status” label and the “Scan” button invisible, I can
shrink the containers vertically. The scrollbar would let us move
through the available slots if they don’t all fit in the main
container.
Now I need to grow the initial LVGL example code to implement this
layout. Normally, this would involve a lot of iterations of changing
details in the code, building and testing until I get everything looking
and working the way I want. Fortunately, I found a tool (EEZ Studio)
that’ll make part of the process much easier and faster, as it has an
LVGL visual editor and code generator that will let me sketch the layout
visually, do all the style changes and then generate the code. I’m not
taking the generated code as is, as I need to integrate it into the
application and I’ll want to do some things differently, but this is a
huge time saver compared to doing the whole process by hand.
Problem 16: Display refresh
speed
The GUI is looking good now, I can test it on the board and control
the peripherals through the display, but I noticed that when the
peripheral controls don’t fit into one screen and I need to scroll down
to reach the additional controls, the scroll redisplay is really slow.
Normally, re-drawing a label or a button happens fast enough, but
re-drawing the whole screen happens too slowly, you can clearly notice
parts of the screen being updated as you scroll, with the naked eye.
This drags down the responsiveness and makes the display practicaly
unusable in some scenarios.
All in all, this adds yet another restriction: no scrolling.
Solution
The best solution I could find for this is to draw a single
controller widget container in the screen at a time, and switch from one
controller to another using tabs. In each controller container, I also
need to make sure all peripheral widgets fit in a single screen so I can
safely disable and avoid scrolling altogether:
That’ll do, in theory. Implementing it isn’t too much of a hassle
after having done the previous, non-tabbed version. The GUI logic is
simple enough, and keeping a hierarchical and instance-based model for
the data structures, where widgets are nested inside containers (nested
within other containers), and certain parts can be modeled and
duplicated, makes it easy to control each widget group and make them
reactive to events. For instance, remove the peripheral widgets of a
controller when the controller isn’t connected, or disable the “Scan”
button while the scan is already ongoing.
The peripheral devices are battery powered but so far we’re just
trusting the the batteries have enough charge and that everything will
just work. At the very least we should periodically monitor the battery
charge, set some operational safety measures in the firmware and
broadcast the battery level to the connected devices.
Solution
The XIAO nRF54L15 provides
a mechanism to measure the battery level on demand using a load
switch and an ADC.
To get a battery voltage measurement I need to enable the load
switch, wait for it to turn on, sample the ADC connected to its output
and convert the value to millivolts, doing the necessary adjustments to
the reading (considering the voltage divider applied at the output).
Once I have this, there are two things I’ll want to do with it:
Shutdown the firmware when the voltage is below a safe threshold.
The SoC has a brownout reset generator and a glitch detector, but I’d
rather detect and manage this via firmware.
Publish the battery level, in percentage, using the standard BAS
service.
This can be done with very little code:
/* Data of ADC io-channels specified in devicetree. */
static const struct adc_dt_spec adc_channels[] = {
    DT_FOREACH_PROP_ELEM(DT_PATH(zephyr_user), io_channels,
                         DT_SPEC_AND_COMMA)};

/* Battery load switch (for battery level measurement) */
static const struct device *const vbat_reg = DEVICE_DT_GET(DT_NODELABEL(vbat_pwr));

/* ADC data */
uint16_t buf;
struct adc_sequence sequence = {
    .buffer = &buf,
    .buffer_size = sizeof(buf),
};

void shutdown(void)
{
    gpio_remove_callback(button.port, &button_cb_data);
    gpio_remove_callback(button_board.port, &button_board_cb_data);
    led_state = 0;
    gpio_pin_set_dt(&led, led_state);
    gpio_pin_set_dt(&led_board, led_state);
    if (led_indication_enabled && !atomic_get(&indication_ongoing))
        k_work_schedule(&led_indicate_work, K_NO_WAIT);
    k_sleep(K_SECONDS(5));

    sys_poweroff();
    /* Should never reach here */
    while (1) {
        LOG_ERR("Shouldn't reach here");
        k_sleep(K_FOREVER);
    }
}

/* BAS handler */
void battery_voltage_check(struct k_work *work)
{
    int err;
    int32_t val_mv;
    uint8_t val_pct;

    regulator_enable(vbat_reg);
    k_sleep(K_MSEC(100));
    err = adc_read_dt(&adc_channels[ADC_CHANNEL_ID], &sequence);
    if (err < 0) {
        LOG_ERR("Could not read (%d)", err);
        return;
    }

    /*
     * If using differential mode, the 16 bit value
     * in the ADC sample buffer should be a signed 2's
     * complement value.
     */
    if (adc_channels[ADC_CHANNEL_ID].channel_cfg.differential)
        val_mv = (int32_t)((int16_t)buf);
    else
        val_mv = (int32_t)buf;
    err = adc_raw_to_millivolts_dt(&adc_channels[ADC_CHANNEL_ID], &val_mv);
    /* conversion to mV may not be supported, skip if not */
    if (err < 0) {
        LOG_ERR(" value in mV not available");
        return;
    }
    else {
        /* Correct the voltage taking into account the voltage divider */
        val_mv *= 2;
    }
    regulator_disable(vbat_reg);

    if (val_mv >= BATTERY_VOLTAGE_MAX) {
        val_pct = 100;
    } else if (val_mv <= BATTERY_VOLTAGE_MIN) {
        val_pct = 0;
        LOG_ERR("Critical battery voltage: %d mV - Shutting down!", val_mv);
        shutdown();
    } else {
        val_pct = ((val_mv - BATTERY_VOLTAGE_MIN) * 100) /
            (BATTERY_VOLTAGE_MAX - BATTERY_VOLTAGE_MIN);
    }

    bt_bas_set_battery_level(val_pct);
    LOG_DBG("Battery level: %d%%", val_pct);
}
Now I only have to schedule the battery_voltage_check()
function periodically. With this, the controller devices can subscribe
to the peripheral BAS service and get a notification every time the
battery level changes.
Problem 18: web GUI
In the previous blog post I set up a web server on the console board
and ran a basic test. Now that I can control the devices through the
display graphical interface, it’d be interesting to add a secondary
web-based interface so that we can control them remotely as well.
The main requirements are:
It must be lightweight and simple.
It must be responsive and hassle-free.
Both interfaces must be synchronized, i.e. any change in one of the
interfaces must be updated in the other one in real time.
Solution
The first technical decision I need to take is how I’ll implement the
web page in terms of the Zephyr
web server api in a way that’s both lightweight and simple but also
dynamic. A simple way to design a dynamic page would be to define a
dynamic resource handler that will render different contents depending
on the client requests. That means the firmware will be responsible of
the content generation, which can be a resource-intensive task. Besides,
the client won’t be aware of the interface changes unless it does a new
request.
A much better option is to have a live connection between the server
and the client through a websocket. As an additional improvement, I’ll
offload the formatting and processing to the client as much as possible,
so what the firmware will do is to serve a single template-based web
page and the necessary javascript code for the client to do the
formatting and page updating, and communicate the GUI changes from
server to client and vice-versa using json messages through an
established websocket.
This will minimize the amount of data to store in the firmware (only
a small html page and some javascript code) and the GUI updates will be
carried out using small json-formatted payloads.
The html contents (excluding the CSS definitions) can be as small as
this:
And the javascript code that will run in the client will control the
layout:
class Controller {
    constructor(idx, container_id) {
        let templ = document.getElementById('controller_template');
        let clone = templ.content.cloneNode(true);
        this.div = clone.querySelector('#controller');
        this.id = `controller_${idx}`;
        this.div.id = this.id;
        this.div.querySelector("h2").innerHTML = `Controller ${idx + 1}`;

        this.scan = this.div.querySelector('#controller_scan');
        this.scan.id = `${this.id}_scan`;

        this.state = this.div.querySelector('#controller_state');
        this.state.id = `${this.id}_state`;

        this.dots = this.div.querySelector('#controller_scan_animation');
        this.dots.id = `${this.id}_scan_animation`;

        // Insert controller div in the container
        let container = document.getElementById(container_id);
        container.appendChild(this.div);

        // Create and insert slot divs in the controller div
        this.slots = [
            new Slot(idx, 0),
            new Slot(idx, 1),
            new Slot(idx, 2)
        ];
        for (let s of this.slots) {
            this.div.appendChild(s.div);
        }

        // Initial element states
        this.state.innerHTML = 'Disconnected';
        this.dots.style.display = 'none';

        this.scan.addEventListener('click', (event) => {
            console.log(`Request scan on ${this.id}`);
            postAction(`{"target": -1, "action": ${Action.SCAN}, "param": ${idx}}`);
        })
    [...]
}

window.addEventListener('DOMContentLoaded', (ev) => {
    const ws = new WebSocket('/');

    controllers = [
        new Controller(0, "controller_container"),
        new Controller(1, "controller_container")];

    ws.onmessage = (event) => {
    const json = JSON.parse(event.data);
        for (let controller_idx in json) {
            if (controller_idx >= controllers.length)
                continue;
            controllers[controller_idx].update(json[controller_idx]);
        }
    }
})
Now, I need to define a suitable json schema to format the data
passed between the server and the client. I’ll be using a fixed-size
buffer in the firmware for the payload, so I need to make sure that the
format produces compact enough messages. For simplicity, I also want
every message to carry the whole peripheral state for all the devices,
rather than partial updates.
This is the schema I came up with:
{
  "$schema": "https://json-schema.org/draft/2020-12/schema",
  "type": "object",
  "patternProperties": {
    "^[0-9]+$": {
      "type": "object",
      "description": "Controller status",
      "required": ["state", "slots"],
      "properties": {
        "state": {
          "type": "integer",
          "description": "Current state of the controller"
        },
        "slots": {
          "type": "array",
          "items": {
            "oneOf": [
              {
                "type": "null"
              },
              {
                "type": "object",
                "required": ["state", "id", "led", "bat"],
                "properties": {
                  "state": {
                    "type": "integer",
                    "description": "Current state of the slot"
                  },
                  "id": {
                    "type": "string",
                    "description": "String identifier of the connected peripheral"
                  },
                  "led": {
                    "type": "integer",
                    "description": "Peripheral LED state"
                  },
                  "bat": {
                    "type": "integer",
                    "minimum": 0,
                    "maximum": 100,
                    "description": "Peripheral battery level percentage"
                  }
                },
                "additionalProperties": false
              }
            ]
          },
          "minItems": 3,
          "maxItems": 3,
          "description": "Array containing the status of the controller slots"
        }
      },
      "additionalProperties": false
    }
  },
  "additionalProperties": false
}
Once up and running, here’s how the web GUI looks like:
Problem 19: BLE security
At this point, the application is functionally complete in the sense
that it showcases all the features I planned. However, so far we only
cared about functionalities for a minimum viable product. There are many
things we can improve and do properly rather than just for a simple
demo, the most important of them is to enable BLE security and
privacy.
Right now, all the BLE services I enabled are open. Anyone can
connect to them using any client, which is a good first approach for
testing and debugging. However, the demo will be installed in a
conference or a fair with thousands of people, and it’d be totally
vulnerable to any user that (maliciously or not) wants to interact with
it without permission.
What I want to do is to allow the demo devices to establish
connections between each other only, preventing other devices from
joining. I don’t care much about data privacy, although that’d be an
added bonus.
Solution
For these requirements, what I need to do is to enforce BLE
security in all connections, which will give us protection to MITM
attacks if I set up a way to require human interaction during the
pairing process.
The basic security strategy I’ll implement is:
All BLE services provided require authentication.
Connection between any pair of devices requires L4 security
(pairing).
Pairing requires human interaction on the target device.
The pairing process is allowed only during a limited time window.
Additional pairing requests can be started manually.
The amount of paired devices in each device is limited.
Connection requires device proximity.
Since the only interactive user interface I have in the peripherals
is a button (4 buttons in the controller devices), which I’m already
using to toggle the LEDs, I need to multiplex it somehow to allow using
it as a “keypress” for pairing confirmation, and also to start a pairing
advertising process and, optionally, to “forget” all previous pairings,
in case we ever need to do that. I chose to encode the different actions
based on the duration of the button press. That way, a short press is
normally used for toggling the LED, but it’s also used as a pairing
confirmation during the pairing process. A long press is used to restart
the advertising process, and a very long press to forget all previous
pairings.
The LED also needs to encode the current status of the device. Since
the advertising and pairing processes are only temporary, I’m setting
the LED to blink during both of them: slowly during advertising and fast
during the pairing window, where the user needs to press the button to
confirm the pairing.
Implementing these security features means the connection handling is
considerably more complex than before. Fortunately, the
state-machine-based architecture I had in place is easy to extend and
modify to incorporate the changes.
This should be enough to keep the application secure. Maybe even too
paranoid, but I’d rather have no surprises during the deployment. For
convenience, I’ll pre-pair all the devices so that they’ll be ready to
work right after booting. A possible improvement for this setup would be
to use directed advertising to reconnect to previously bond devices, but
I’ll leave that for future iterations.
With this we’re done with the firmware / software part of the
project, thanks for reading this far! The next thing to do is to turn
this into a presentable demo and figure out the materials, assembly
method and the setup logistics. I’ll go through the details in the next
post of this series.
WPE WebKit and WebKitGTK 2.54 have been released with a bunch of improvements and new APIs as usual, but there’s one point that kept the Igalia WebKit graphics team busy for the whole cycle: the new Skia-based compositor. The replacement of Cairo with Skia for content rendering has been a success and it’s already well integrated and optimized. We thought we could try to use Skia for the composition too and replace TextureMapper with Skia. TextureMapper was introduced in 2010 for the Qt port and later adopted by other ports. It uses the OpenGL ES API and maintains a collection of shader programs to paint different content. Nowadays TextureMapper is mostly the same code and shader programs, and it’s unmaintained and missing features. However, the performance was good and it has served us really well all these years. So, this time the goal was not to get better results in benchmarks, but to modernize the implementation, reduce the amount of code to maintain ourselves (like all shader programs) and make it easier to implement the missing features and fix existing bugs. This post is a summary of all the work we have done this cycle to implement the new Skia compositor.
SkiaCompositingLayer
The first step was adding an SkiaCompositingLayer class to replace TextureMapperLayer and adapt all the code to use one or the other depending on an environment variable. The initial implementation was based on the TextureMapper one for the things that are common like iterating the layer tree, computing transformations, etc. The way layers produced their contents didn’t change, so we were receiving textures for tiled content, video buffers, WebGL, accelerated 2D canvas, etc. SkiaCompositingLayer created a Ganesh Skia surface to draw those textures using SkCanvas::drawImageRect(). This initial implementation was enough to run the default MotionMark test suite, since it doesn’t use other composition features. Even though performance was not the goal, we had to make sure we didn’t regress. This initial implementation was neutral in MotionMark. We needed tests to implement those features and measure performance at the same time, so we decided to add a new set of tests to MotionMark, just extending the existing tests to require composition, which makes sure that filters, masks, path clipping, transformations, etc. were done by the compositor.
Filters
We first tried implementing filters using an intermediate surface like TextureMapper does. It worked, but the MotionMark score in the filters test was much worse. We realized that with Skia we could implement most of the filters without using an intermediate surface. All filter types except blur and drop shadow can be simplified to an SkColorFilter with SkImageFilter::asAColorFilter() which can be implemented without an intermediate surface, just by setting the color filter in the SkPaint we pass to SkCanvas::drawImageRect(). This not only fixed the performance regression, but also gave better results than TextureMapper, which always needs an intermediate surface.
Masks
There are two different kinds of masks: image mask, where the source mask is an image already, and clip path, where the mask is represented by a path to be clipped. In TextureMapper both are implemented the same way using intermediate surfaces. The mask is painted into a surface and then the masked layer creates an intermediate surface where its contents are first painted and then the mask contents on top using DstIn blend mode. Skia has APIs that allowed us to implement both cases in a much simpler and more efficient way. In the case of image masks, where we already have an image, we paint the mask contents once and keep it cached, and then the masked layer creates an SkShader for the image mask that is passed to SkCanvas::clipShader() without having to paint into an intermediate surface. Clip path masks are even easier, because we can just take the path we get and build an SkPath we can pass to SkCanvas::clipPath(), without having to paint the mask as an image at all or use any other intermediate surface. Once again, masks were not only easier to implement but they ended up being more performant too.
MotionMark composition suite, WPE with GPU rendering on a Raspberry Pi 4, comparing TextureMapper (312400@main) with the Skia compositor (313600@main). TextureMapper never implemented blend modes, so its high score on bouncing blend circles is the score for not doing the work.
3D contexts
The implementation of 3D layer contexts is fairly independent of TextureMapper and OpenGL, so we could just take it almost as it was, using SkPath to build the clips and a few other adaptations. We could also fix existing bugs like the z-ordering that has always been broken in TextureMapper.
The same page rendered by TextureMapper (left) and by the Skia compositor (right), WPE on the same build. The red box intersects the rotated green plane. TextureMapper draws the box flat against the plane, so the intersection is lost; the Skia compositor splits it, drawing the part in front of the plane and hiding the part behind it.
After implementing all the features we were at a point in which we had the same or better performance in all tests except for three MotionMark compositing tests that were giving much worse results. Those tests use small layers and give a high result which means we end up adding a lot of layers to the scene before we start skipping frames. The root cause was the large number of layers filling the command queue of Ganesh. Skia Ganesh queues the GL drawing operations instead of sending them to the GPU right away. When the surface is flushed for whatever reason, the queued GL drawing operations are then processed and sent to the GPU. This allows Skia to apply nice optimizations like merging several tasks and reducing the amount of draw operations we end up sending to the GPU. In those tests where a lot of layers are created and painted to the compositor Skia surface the internal command queue ends up being huge too. Processing and analyzing such a long queue to optimize what we send to the GPU required more CPU work than what we save by optimizing the GL draw operations. Skia provides an API that allows us to do the batching ourselves. Since the compositor already has information to decide what operations could be merged together, we could reduce the internal queue size in many cases. We can merge SkCanvas::drawImageRect() operations as long as they share the same color filter, blend modes and sampling options. In the best case scenario we could reduce the whole internal queue to just one operation. This time the change improved the results of those tests getting them to about 93% of the TextureMapper score, but still a bit behind.
Promise images
The Skia Ganesh backend requires that an SkImage backed by a texture is created for the current thread GrDirectContext, even if it’s borrowing an existing texture. In WebKit all textures are created with a sharing GL context so that they can be accessed and destroyed from different threads with the same sharing GL context. So, for a layer whose content is an image we had to create a texture in the compositing thread to upload the pixels if the image was not accelerated, or for accelerated images get the texture identifier of the image, and then create another SkImage from the compositing thread borrowing the texture for the current GrDirectContext. The Skia Ganesh backend provides an API to create promise images, which can be created from any thread but targeting a specific thread, providing a fulfill callback that will be called on the target thread when the SkImage is first used to retrieve the wrapped texture. This way we can create the SkImage from the main thread for the compositing thread without using OpenGL at creation time. For non-accelerated images we realized we don’t need to manually create the texture and upload the pixels in the compositor, we can just pass the unaccelerated SkImage to the compositor SkCanvas and Skia will handle it internally much more efficiently than we did. And this change improved those compositing tests much further than we expected. The reason turned out to be the batching from the previous section: Skia merges the entries of an image set by comparing texture proxy pointers, and until now we were wrapping the texture in a new SkImage on every frame for every layer, so hundreds of layers drawing the very same image produced hundreds of different proxies that Skia could not merge. Passing the same SkImage every time collapses all of them into a single draw operation, which is the best case we described above. With batched painting and promise images together we could beat TextureMapper significantly.
MotionMark composition suite, leaves subtests, WPE with GPU rendering. Score per revision; higher is better. The same two steps appear with CPU rendering.
Deferred Display Lists (DDL)
When we switched to Skia for painting, we kept the threaded rendering model, just using a separate smaller queue for GPU rendering workers. The GPU workers created their own GrDirectContext to paint the layer tiles. The resulting textures were re-wrapped in the compositing thread for the compositor GrDirectContext using fences for the proper synchronization. We knew this was not the recommended way to use Skia Ganesh from multiple threads, but with TextureMapper we had no other option. However, with the Skia compositor we can do it the recommended way by using a single GrDirectContext in the compositing thread and use Deferred Display Lists (DDL) and promise images to paint the tiles. With DDL, GPU workers no longer use GL at all and they don’t need a GrDirectContext, they paint tiles into a display list that records the GL drawing operations, but without touching GL. For image drawing operations recorded into the DDL, promise images are used too. Since this is now all CPU work we can remove the smaller GPU worker queue and use a single queue with more workers. The compositor replays the DDL into an SkSurface that is then passed to the compositor SkCanvas.
This change fixed rendering glitches on Android and was performance neutral for the whole composition suite and for most of the MotionMark tests, but in MotionMark 1.3 at 15fps it cost 29% in Suits and 14% in Leaves, while improving Images by 9%. Correctness and the other benefits of DDL made us accept those regressions.
MotionMark 1.3 at 15fps, suits subtest, WPE with GPU rendering on a Raspberry Pi 4. Shaded regions are where deferred display lists were enabled by default. CPU rendering moves less than 1% at all three switches, since it has no GPU worker threads for DDL to change.
Damage
TextureMapper already supported using damage information to optimize the painting while compositing, but it has always been disabled at run time because there were issues we never managed to fix. With the Skia compositor we decided to start from scratch and properly handle the damage information while compositing to render only the parts of the frame that actually changed. I’m not going to go into detail here because Nikolas Zimmermann has written an amazing blog post about it with all the details.
Current situation
The Skia compositor is finished and enabled by default in 2.54. Even though it was not the main goal, it performs better than TextureMapper in most of the benchmarks we run: the composition suite we added is 45% faster, and MotionMark 1.3.1 is 35% faster. The exception is MotionMark 1.3 at 15fps with GPU rendering, which comes out flat, because the Suits and Leaves tests are still about 26% and 10% behind due to the deferred display lists trade-off described above.
We are already working on fixing existing issues in composition that we never fixed in TextureMapper. In the main branch TextureMapper is now disabled by default at build time, and support will be removed soon for the GTK and WPE ports. In 2.54 it’s still a run-time decision so if you find any issue with 2.54, you can check if it’s a Skia compositor regression by trying TextureMapper with WEBKIT_USE_SKIA_FOR_COMPOSITION=0 environment variable.
Overall (geometric mean) score, WPE on a Raspberry Pi 4: 320000@main and later against the TextureMapper baseline at 312400-313296@main. Bars start at the baseline. Part of the gain in the MotionMark suites is Skia rendering work rather than the compositor.WPE on a Raspberry Pi 4, change from the TextureMapper baseline (312400-313296@main) to 320000@main and later. Suits and leaves are the deferred display lists trade-off, not the compositor switch, which was neutral in this suite.
Future plans
We are already working on further improvements like using promise images for all external textures we have to pass to the compositor. We will explore the possibility of using Vulkan with the Ganesh backend instead of GL and eventually try the new Graphite backend. And of course we will continue fixing any existing issues related to the compositor.
It’s been more than 5 years since I started working on Turnip, the open source Mesa 3D driver for Adreno GPUs, with Igalia’s graphics team. Looking back, it’s amazing how much we have achieved together, and how much the driver has improved since then. Here’s my take on the evolution through those years, some of the challenges we faced and how we overcame them. Before I start, I want to thank all those great people from Igalia, Valve, and the Mesa community I’ve had the pleasure to work with.
This post is a bit one-sided as it contains my particular view of the evolution of Turnip through those years and it doesn’t touch on a lot of important features implemented, issues debugged, and improvements made by others.
Challenges
There are several overarching challenges that the Turnip driver has had and still has to this day:
There was no hardware documentation, we had to reverse engineer everything, with the most painful part being hardware bugs that necessitate workarounds. I cannot say I became as good as I would have wanted in all that, but I’m grateful that in Turnip we had people with absolutely amazing HW reverse-engineering skills!
Hardware wasn’t really built to run desktop games, at least at first. It became much better in A7XX generation, but there are still some bumpy parts. Running desktop games is specially important for hardware like the Steam Frame and others.
2021
Way back, when I started to contribute to the Turnip driver, we were fixing CTS tests, running “trivial”, by today’s standards, applications like “Genshin Impact”, “TauCeti Vulkan Technology Benchmark”, “3DMark”. I have a few posts describing some issues debugged back then:
If you’d asked me back then about running AAA PC games, I would have nervously laughed at best =)
DXVK Time!
But soon, we found a way to at least test how PC games render on Adreno GPUs with Turnip; we weren’t able to run games on our development boards, but the driver, after a bit of massaging, had enough features to work with DXVK (Vulkan-based translation layer for Direct3D 8/9/10/11). So the solution at that time was to run the game on the PC, record Vulkan API calls with GFXReconstruct and a Vulkan profile that constrained the desktop GPU’s capabilities to those of the Adreno GPU.
That was a great start; we weren’t able to run games directly on our development boards, but we were now able to test them and begin to implement more features necessary for DXVK.
Measuring Performance
In parallel with trying to support DXVK, fixing issues, and reverse engineering hardware features, we found ourselves needing to better understand performance. We chose to support Mesa’s u_trace framework and integrate with Perfetto. At that time the performance measurement support in Mesa was rough, with only Freedreno (OpenGL driver for Adreno GPUs) supporting u_trace. Spoiler: as of now, most Mesa drivers either support or are in the process of merging support for u_trace/Perfetto integration.
2022
At the end of 2021 Turnip became Vulkan 1.1 conformant. We also started testing lots of single frame D3D11 captures of games we had, which uncovered plenty of new issues.
With more testing came more issues!
At that point I met our three two main adversaries over the years, in full force:
GPU hangs, with the worst of them completely shutting down the SoC.
Low Resolution Z (LRZ)
Low-Resolution-Z is an extremely important optimization to get right in order to get reasonable performance out of our GPU (especially for VR games), but I believe it’s also one of the most complicated (at least from a software POV) depth-related hardware optimizations across various GPUs.
1 / 16
Conceptually it’s relatively simple - create a low resolution depth buffer during primitive binning pre-pass, throw out primitives that completely fail LRZ tests during binning. While during tiling, prevent a lot of overdraw by testing against this already formed low resolution depth buffer. But, in practice, there are lots of implicit restrictions on what can be done without disabling LRZ (to prevent correctness issues), and being too pessimistic when disabling LRZ can lead to unacceptable performance.
GPU Hangs
GPU hangs, on the other hand, are a plague that every graphics driver developer is intimately familiar with. However, at that time there were also unrecoverable hangs, which, due to certain issues in firmware or GPU HW itself, caused the entire SoC to shut down. They were an extreme pain to debug.
Later, I implemented driver-level breadcrumbs that allowed finding the source of hangs at a finer level, and more importantly, synchronously going through breadcrumbs to debug unrecoverable hangs;
Prototyped editing a captured submission to the GPU.
The third Harbinger of the Apocalypse has arrived: VK_EXT_fragment_density_map, the first stepping stone of the extensions essential for VR, was implemented by Connor Abbott. Since then I have been on the hook reviewing increasingly complicated interactions between VK_EXT_fragment_density_map and the growing host of extensions.
The fragment density map (Foveated Rendering) explanation can be found in the following blog posts from Qualcomm and Meta:
Turnip began to support Adreno 7XX GPUs; previously we only supported the single 6XX generation, albeit with several sub-generations. The proprietary driver supported Vulkan since the 4XX generation, but it was only Vulkan 1.0, and 4XX/5XX generations were not powerful enough and didn’t have enough features to support anything with Vulkan.
New generation means more issues to fix!
To help with that I implemented:
rddecompiler which makes it possible to decompile captured raw submissions to the GPU into editable C code, coupled with the ability to replay them, print from shaders, and print from the command stream - resulted in a much faster debug loop;
A debug option that helps find where we use stale register values TU_DEBUG_STALE_REGS_RANGE.
After a lot of command stream and shader reverse-engineering - at the end of the year the Adreno 7XX generation was in decent shape in Turnip.
2024
Work continued with Adreno 750 now being the main target. We had a lot of issues to debug and fix:
A Hat In Time
Farming Simulator
Inspecting Dark Souls 3
And many, many more games.
Android (Waste)Lands
While Turnip, as far as I can remember, was officially only used on some Google Chromebooks, there apparently was a dedicated community of people who tried and actually ran desktop games on Android via Termux. The community has grown since then, but it was great to have a real user already using the driver to play games and having better outcomes than with the proprietary driver, which often doesn’t get updated after a phone’s release.
While fascinating, those Android setups were hard to debug, so we used them only a few times.
Turnip Is Vulkan 1.4 Conformant and Preemption Support
Not my achievements at all, but two major milestones for Turnip were:
Preemption support - this is a crucial feature for VR and needed by the Steam Frame. The VR compositor has to be able to preempt games that are being rendered at that moment, otherwise we can miss a frame or several, which feels extremely bad for a user moving their head in the VR environment. An Adreno GPU can be preempted at two boundaries: at the drawcall/dispatch boundary in direct (sysmem) rendering, and at the tile boundary in tiling (gmem) rendering.
2025
More VR Extensions
Even more extensions came in from Connor: VK_QCOM_multiview_per_view_viewports, VK_QCOM_multiview_per_view_render_areas, VK_VALVE_fragment_density_map_layered, VK_QCOM_fragment_density_map_offset, VK_QCOM_subpass_shader_resolve, VK_EXT_custom_resolve. Those are essential for pushing VR performance to its limit. The biggest issue with FDM related extensions is that they don’t have good CTS tests; the complexity comes from the fact that a conforming driver implementation may simply choose not to reduce quality in regions specified by the density map. Even the size of those regions is not known to a game using those extensions!
As a result I wrote lots of tests that exercise various combinations of those extensions and require visual inspection for them to pass 🫠🫠🫠.
Result of one of FDM tests (Notice lower resolution at the edges of both eyes)
Those tests also measured performance, which helped us fix disparities with the proprietary driver.
Half-Life: Alyx
What is going to use the above extensions to push Steam Frame to its limits? Of course, Half-Life: Alyx.
Even with previously mentioned tests in place, Half-Life: Alyx found plenty of both rendering and performance issues.
That’s how I felt when a new issue was found
Are We Performant Yet?
We already had feedback from Android users running games that Turnip performance is sometimes better than the proprietary driver, but sometimes noticeably worse. But how to compare them? Turnip has Perfetto support, the proprietary driver has Snapdragon Profiler, but it’s hard to use and even then - we’d just see that some particular renderpass is faster or not. There could be hundreds or thousands of draw calls in a renderpass!
Staring at the command stream from the proprietary driver stopped yielding any insights, so the next step was to take a game trace that can run both on Turnip and Qualcomm’s driver and compare them draw by draw, measuring all performance counters along the way. It was done by lots of command stream patching, but the end result was an ability to compare key registers at every draw and every performance counter in existence.
Turnip VS Qualcomm’s driver draw by draw comparison
The resulting table was huge:
This helped us to close several gaps in performance, however the most useful part of the comparison was not the counters, but the register comparison. The counters, aside from execution time and LRZ stats, were surprisingly hard to convert into any useful insight.
Preventing Regressions
With the driver gaining capabilities, but not gaining many more users, we needed a way to prevent regressions while introducing more and more complex features. And while Vulkan Conformance Test Suite is being tirelessly improved upon year after year, it’s still far from enough.
It was time to introduce a CI system that would be able to detect visual regressions in rendering and performance regressions. We already had a number of d3d11 and d3d9 captures to start working with, and so it came to be:
Above, you can see one of the results where the rendering regressed. In most cases we run only a single frame capture instead of longer multi-frame traces. This was an explicit choice due to the observation that it’s better to have a wider selection of captures, than trying to cover any single game better (VR games are an exception here). In many cases only one or two captures out of hundreds regressed due to some issue; the regression was caused by some very specific pattern the game had, which wouldn’t appear in others.
Every night we test several driver configurations:
Fixed DXVK/VKD3D versions + forced direct (sysmem) rendering;
Turnip compiled with ubsan (undefined behaviour sanitizer).
We also run important MRs through that CI to find regressions early on.
Every nightly run generates a performance datapoint, so we can see the line going down day by day. Don’t mind the bump where we had concurrent binning “optimization” enabled 🫠 (that’s a sad tale of an incredibly complicated HW feature which failed to deliver performance gains).
At the moment we are testing more than 600 different game frames per driver configuration; the APIs span D3D8-D3D12, Vulkan, and OpenGL. A single configuration runs in under an hour on just two Adreno 750 devices.
With CI in place we became increasingly confident in making changes to the driver.
See more in my XDC 2025 talk:
2026
Steam Frame was announced at the end of 2025; now we still had plenty of things to polish.
Performance
We were now working much more on performance, and the main culprit in bad performance is often Low-Resolution-Z being fully or partially disabled, especially in VR. We improved Perfetto tracepoints a lot: added new ones, fixed tracepoints with complex renderpass suspend-resume setups, and added performance warnings:
Now it was much nicer to work with, and something external developers could reasonably use.
As a result, while working on the performance of Half-Life: Alyx and some other VR games, we improved LRZ support a lot.
There was also a lot of compiler work, done by great compiler engineers working on Turnip.
D3D12 Woes
As we have been testing more D3D12 games running through VKD3D-Proton, we started to find interesting issues. Those generally are: implicit D3D12 features/requirements, or some behaviour out of the D3D12 spec but which all desktop GPUs do, or in one case Turnip having a higher limit than desktop drivers. We saw at least:
UE5 not working correctly with wave128 (only Adreno has such wide waves) up until a few months ago: vkd3d-proton PR #3265
D3D12 not having a proper query/limit for number of elements in buffers, implicitly supporting more than Turnip advertises: mesa MR !41477
One game relying on “fair” execution of dispatches when implementing its own spin locks in compute shaders: mesa MR !41562
UE5 relying on higher memory allocation alignment than Turnip has: vkd3d-proton PR #3231
Games not checking for D3D12_FEATURE_DATA_D3D12_OPTIONS21::ExecuteIndirectTier before using D3D12_EXECUTE_INDIRECT_TIER_1_1 commands
Alyx ☆ Rare GPU Hangs
It’s “good” when the GPU hangs at a predictable place, it’s bad when the GPU hangs randomly, and it’s even worse when the GPU stops hanging when you try to isolate the issue in any way to debug it.
One of such hangs happened in Half-Life: Alyx, when moving through a specific location the GPU hung, sometimes, and sometimes it didn’t for a long while. I’ve tried:
At first it seemed to happen only on the stable Turnip branch, so I’ve tried to bisect the issue;
After a while I found out that it happened in any branch;
I tried to stare at GPU coredumps - no luck;
Tried to get a gfxreconstruct trace to reproduce the hang; it might hang once or twice out of many replays.
What is almost impossible to do in such cases is test whether disabling a certain driver feature helps; you always have doubts - it didn’t hang this time because of the feature I disabled, or I’m just unlucky. This happened several times during the investigation, the hang would disappear for an hour, and then reproduce several times in a row.
Previously I wrote that we have a mechanism to capture and replay raw submissions that are sent to the GPU. Yes, I tried that too, we can capture the submission that hanged the GPU. Guess what? The captured submission executed absolutely normally and didn’t hang, not on the first execution, nor on thousands….
At that point I still didn’t have a single clue what’s going wrong, aside from some kind of hardware errata being involved. It was time to improve the debug tooling even further. Before, the captured .rd submission could be replayed once with one replay invocation, but the issue at hand demanded lots of iterations, and more ergonomic editing of the command stream than we previously had. So I’ve made improvements (they still are work-in-progress) to:
Loop specific submission any number of times;
Quickly disable specific draw call ranges in the submission;
Automatically bisect which draw/dispatch causes hang/fault.
Only with each bisection step doing 50000 iterations was I able to narrow things down to a few draw calls. Looking at them closely still yielded only more head scratches though. However, with things narrowed down that far, I had something to poke other, more knowledgeable people with.
After some back and forth, it appeared that I hadn’t thoroughly checked all shader debug options we had, or rather, I checked the option, but due to the rarity of the hang I misidentified it as not helpful!
In the end it appeared that there were two hardware errata that needed to be implemented in our shader compiler. And we got “lucky” that they were revealed by one of the most important games to run on the headset.
Present
Driver work never ends, there are still games to debug, features to implement, and VR performance to improve. The fact that Steam Frame runs Linux, is based on open-source software, and isn’t locked down means that Steam Frame would be used in many ways unforeseen by us. I hope that Steam Frame release would bring improvements to the VR ecosystem and spearhead PC gaming on Linux running on ARM platforms.
Update on what happened in WebKit in the week from September 7 to September 14.
In this week's edition, the PNG image decoder received a much
needed cleanup, as well as another swipe of unassorted graphics
improvements, most notably in the Layer-Based SVG Engine. Finally,
we also have an exciting and informative article about how to use
the WPE Platform API on Raspberry Pi.
Cross-Port 🐱
Graphics 🖼️
Cleaned up the PNG image decoder a little bit, by removing conditional code that was used to support libpng versions older than 1.5.0, and requiring that as the minimum version. Given that version 1.5.0 was released back in 2011, it is expected that every system where current WebKit works will have much newer versions of libpng anyway.
Fixed an assertion failure for an outermost <svg> with non-visible overflow in the Layer-Based SVG Engine (LBSE) by refreshing its scroll dimensions at the end of layout, a first step towards reworking <svg> scrolling, which is not yet spec compliant.
Fixed an assertion failure when computing filter outsets for <feGaussianBlur> and <feDropShadow> with a negative stdDeviation, which turns the primitive off but was still passed on to the outset calculation, affecting both SVG filters and CSS reference filters.
Stopped reporting damage every frame for composited layers that use CSS filter in the Skia based compositor, so a blurred or drop-shadowed element is now only repainted when its subtree, or the applied (possibly animated) filter value, actually changed.
Fixed the bug that composited layers with clipping or masking and fully covered by opaque child layers were treated as opaque layers.
The WPE and GTK ports have supported touch events for a long time, but
asynchronous scrolling only worked for wheel events. Scrolling driven by touch
still depended on the web process main thread. This change puts touch events on
the asynchronous scrolling path too.
Let’s start with the background: what asynchronous scrolling is and why it needs
to be built differently here.
A naive implementation of scrolling looks like this:
The UI process receives an input event (wheel or touch).
It sends the event to the web process main thread.
The main thread runs the page’s JavaScript event listeners.
If nothing called preventDefault(), the scroll position is updated.
The page is rendered at the new scroll position.
Step 3 is the problem. The main thread is easily blocked for hundreds of
milliseconds by JavaScript execution or layout, and scrolling is frozen for that
whole time. Your finger moves, the screen does not. That is what synchronous
scrolling feels like.
Asynchronous scrolling moves the work off the main thread: the scrolling
thread updates the scroll position, and the compositor thread composites
and presents the frame. Neither needs the main thread, so scrolling keeps running
at 60fps even when the main thread is busy.
The scrolling tree is a tree of the scrollable areas of a page. The main
frame, overflow: scroll elements, position: fixed/sticky elements and so on
each become a node holding its own scroll position and a reference to its layer.
The scrolling thread updates scroll positions by looking only at this tree, and
the compositor thread then draws the layers at their new positions — the main
thread is not involved in either step.
But there are places where scrolling on its own would be wrong, because the page
might call preventDefault() from an addEventListener("touchstart", ...)
handler. That is what event regions are for.
An event region records, per layer and at rendering time, “this rectangle has a
listener for this kind of event”. EventRegion keeps separate regions for
touchstart, touchmove, pointerdown, mousedown and friends, and for any
given point it yields a TrackingType:
enumclassTrackingType:uint8_t{ NotTracking =0,// No listener. The event does not even need to be delivered. Asynchronous =1,// Passive listeners only. Scroll now, notify the page later. Synchronous =2// A non-passive listener may call preventDefault(). We must wait. };
The passive distinction is what makes Asynchronous possible.
preventDefault() cancels an event only if the listener was registered with
passive: false; from a passive listener it does nothing. And on window,
document and document.body, touchstart/touchmove (and wheel) default to
passive: true — see
MDN: Using passive listeners.
So Asynchronous is the case “there are listeners, but none of them can cancel
the scroll”: start scrolling now, deliver the event to the main thread
afterwards.
Because this information travels to the scrolling thread along with the layer
tree, an incoming input event can be classified without waking the main thread.
That is the heart of asynchronous scrolling.
The iOS port already implements asynchronous scrolling for touch events, but it
could not be reused, because the process layout is different.
iOS:
  UI process:  platform layer tree + scrolling tree + touch event input
  Web process: main thread (DOM, layout)

WPE / GTK (Coordinated Graphics):
  UI process:  touch event input only
  Web process: main thread (DOM, layout)
               + EventDispatcher thread / scrolling thread
               + platform layer tree + scrolling tree
On iOS both the platform layer tree and the scrolling tree live in the UI
process — the very process that receives touch events — so the classification
and the scroll both happen right there. On WPE and GTK we use Coordinated
Graphics, and both trees live in the web process instead. The classification
therefore has to happen after sending the event to the web process, but
before touching the main thread.
Fortunately the same problem was already solved for wheel events. The web
process has an EventDispatcher thread that receives wheel events from the UI
process without going through the main thread and consults the scrolling tree
directly. This change builds the same shape for touch events.
One more piece of background: in WPE a touch does not scroll the page directly.
Touch events are first offered to the page; only if the page does not consume
them does the UI process turn the touch sequence into scrolling.
The decision point is PageClientImpl::doneWithTouchEvent(). If the page handled
the event, gesture detection is cancelled with
wpe_gesture_controller_cancel() so the engine does not also act on it. If it
was not handled, the event is fed to the WPE platform gesture controller via
ViewPlatform::handleGesture(), and a recognized WPE_GESTURE_DRAG is turned
into a synthetic scroll event pushed back into the page as a wheel event:
That TRUE is precise_deltas: touch-driven scrolling in WPE reaches the engine
as precise-delta wheel events, which becomes relevant later.
The important consequence is this: the UI process cannot start scrolling until
it knows whether the page is going to consume the touch. That answer used to
come from the web process main thread — so when the main thread was busy,
scrolling did not start. That is the problem this change fixes.
A new ENABLE(COORDINATED_TOUCH_EVENTS) is introduced in PlatformEnableGlib.h,
and it turns on ENABLE(TOUCH_EVENT_REGIONS) whenever touch events are enabled
on WPE/GTK. The AlwaysUseTouchEventRegions preference now defaults to true
under that flag, so Document::shouldUseTouchEventRegions() returns true and
touch regions are actually recorded on the layers during rendering.
UI process: send to the EventDispatcher instead of the main thread #
The old WebPageProxy::handleTouchEvent() consulted a touchEventTracking state
kept in the UI process and sent Messages::WebPage::TouchEvent, i.e. straight to
the web process main thread.
The new version delegates all classification to the web process and only queues
events and delivers answers. One event is in flight at a time; the next is sent
when the reply arrives. The flood of touchmove events produced while a finger
moves is coalesced into the newest queued event when that is also a touchmove,
and the coalesced events are flushed to doneWithTouchEvent() together with the
reply.
The destination is now Messages::EventDispatcher::TouchEvent.
Web process: classification on the EventDispatcher thread #
EventDispatcher::touchEvent() runs on the EventDispatcher thread, where it
looks up the page’s scrolling tree, asks it for a TrackingType, and splits
three ways:
NotTracking — no listeners. Reply handled = false immediately, without
bothering the main thread at all. The UI process can start scrolling right
away.
Asynchronous — passive listeners only, so nothing can cancel the event.
Reply handled = false first so scrolling starts, then deliver the event to the main thread.
Synchronous — a non-passive listener may call preventDefault(), so wait
for the main thread result as before.
Replying without a main thread round trip is possible because the new
TouchEvent message is declared AnyThread in EventDispatcher.messages.in.
The iOS equivalent is MainThreadCallback, which always replies from the main
thread.
If there is no scrolling tree for the page yet, the event goes to the main
thread as before.
The classification itself is
ScrollingTreeCoordinated::eventTrackingTypeForTouchEvent(). It works in two
stages.
First, for each newly pressed touch point: convert the point from view to contents coordinates,
hit test the layer tree down from the root contents layer, take the frontmost
layer whose event region contains the point, and query that region. It is queried
for many event types, because a touch fires more than the DOM touch* events —
pointer*, compatibility mouse events and gesture* too, and a non-passive
listener for any of them forces synchronous handling. The results are folded into
a small TouchEventTracking struct with four fields: start, move, end and
force-change.
Second, the tracking type of the event as a whole is derived from the touch point
states, merging the per-field values. Merging picks the stronger of two types
(NotTracking < Asynchronous < Synchronous), so if any single point needs
synchronous handling, the whole event is synchronous.
TouchEventTracking persists for the lifetime of a touch sequence and is reset
once all points are released, so the hit test done at touchstart is reused for
the following touchmove/touchend. That guarantees a sequence never flips from
synchronous to asynchronous halfway through just because a finger moved off a
listener’s area.
A slider handles touches internally even with no JavaScript listener, so looking
at the event region alone would classify it as NotTracking.
HTMLInputElement::updateTouchEventHandler() now sets the
HasInternalTouchEventHandling flag on EventTarget for range inputs, and
StyleAdjuster turns that flag into the full set of touch region types for the
element.
Keeping the animation running on the scrolling thread #
The last piece is in ScrollingEffectsController::handleWheelEvent(). As shown
above, WPE synthesizes wheel events from touch gestures with precise deltas.
Precise-delta events only need immediateScrollBy() to move the scroll
position — but then nothing drives screen updates while the main thread is busy.
The fix is that, while a scroll gesture is in progress, a scroll animation is
also started — from one ULP short of the destination (std::nextafter()) to the
destination. Visually it finishes instantly — the
real scroll is still done by immediateScrollBy() — but a scroll animation is
now running, which starts display link monitoring and keeps compositing driven
regardless of the main thread.
Where a non-passive listener exists, we still wait for the main thread as before.
The spec requires preventDefault() to be honoured, so that is unavoidable.
As a side effect, the tests under fast/events/touch/ had to be updated.
Event regions are computed during a rendering update and propagated to the
scrolling tree via the platform layer tree. Which means a test like this:
target.addEventListener("touchstart", handler); tapSoon(20,20);// ← the region has not been updated yet!
taps immediately after registering the listener, while the scrolling tree still
believes there is no listener and returns NotTracking. The event never reaches
the main thread and the test fails.
A new UIHelper.renderingComplete() was added for this:
staticasyncrenderingComplete() { // Wait for the platform layer tree to be updated await UIHelper.animationFrame(); await UIHelper.animationFrame(); }
Two animation frames are needed because the first one runs the rendering update
that computes the regions, and a second is needed for the result to reach the
layer tree.
On WPE and GTK both the layer tree and the scrolling tree live in the web
process (Coordinated Graphics), so the iOS touch asynchronous scrolling
implementation could not be reused directly.
Instead, touch events were given the same shape that already works for wheel
events: ask the scrolling tree from the EventDispatcher thread.
The keys were enabling touch event regions, and making the IPC reply
AnyThread so it can be sent without waiting for the main thread.
Anywhere the page has no non-passive listener, scrolling
now starts regardless of what the main thread is doing.
It has been a while since I wrote a post here. The last one was from December 2012, almost fourteen years, which is a bit embarrassing for someone who is still hacking on WebKit. I need to try to fix it, and this post is the first attempt.
I would like to write a summary of the work we have been doing in wpe-android in the last year, where this port of WPE comes from and where it is now. The details deserve their own posts and I plan to write more about specifics. Now that WPEPlatform is going to be released as stable in the next few days seems a good example of how to use it, we have been actively using to test the API in the last months.
wpe-android started in 2017 as an experiment of running WPE WebKit on Android. The engine communicated with the system through libwpe, the abstraction library WPE used before WPEPlatform. It used an Android backend living in its own separate library, libWPEBackend-android, and the Java side exposed the API with the WPEView, WPEContext and the other proxy classes. It was a useful experiment. It was enough to show the engine running in a phone. The problem is a good part of the Android specific code, in particular the rendering path sending buffers to a SurfaceControl, was placed in the application side instead of in the platform layer of the engine. Also Android developers had to learn an API that did not look like anything they already had in the platform, it was close to the Linux WPE API.
Since then we have been implementing WPEPlatform, a new platform abstraction that has been added inside WebKit. It gave us the chance to fix both problems at the same time. During this spring we implemented a proper Android backend on top of it, so now the display system of Android looks like a regular WPE platform to the engine. WPEDisplayAndroid registers as a display extension point and sets up an AHardwareBuffer configuration, WPEToplevelAndroid follows the ANativeWindow lifecycle from the SurfaceHolder callbacks, WPEViewAndroid submits the frames with SurfaceTransaction and explicit sync fences, and WPEScreenSyncObserverAndroid uses AChoreographer so the engine renders aligned with vsync. On top of that we added a thin JNI bridge that mirrors the WebKit and WPEPlatform objects in Java, and a new convenience API that looks like android.webkit.WebView, with WebView, WebContext, WebSettings, CookieManager, WebViewClient and WebChromeClient. This way people can reuse the Android documentation and the knowledge they already have instead of learning something new.
We ported the tools used to the new API, the MiniBrowser, the media player sample, the instrumented tests and WebDriver. We were able to delete the legacy stack.
After that, the only thing keeping libwpe in the build was process management: Android cannot simply fork() and exec(), since auxiliary processes are Android services that need to be launched explicitly. To solve this, we implemented a WPEProcessManager API for WPEPlatform inside WebKit, which landed upstream and is now used by the port.
With that in place, we were able to remove libwpe entirely, and WPE WebKit now talks to Android the same way it talks to any other platform. In parallel, we kept improving other parts of the platform, implementing new API features and fixing bugs along the way. One notable example is a scroll jank issue on the Mali driver, which was resolved largely thanks to the Skia DDL architecture upstream (a story that deserves its own write-up).
There is still plenty work to do, for our small team this project is still a very valuable experiment and we would like to keep exploring the options.
The code is here if you want to give it a try or help:
I will try to write about our work around WebKit and wpe-android in more detail in the next weeks, hopefully the next post will not take another fourteen years …
WPE Platform API (also known as “new API”) is a redesigned, GObject-based platform-integration layer for WPE WebKit that replaces the older libwpe backend model. A few months ago, Kate and
Simon published two closely related blog posts about it. The first one focuses more on the API and browser
implementation details, while the second one focuses more on writing and integrating the browser within Linux distribution.
This article builds on top of the above ones, and showcases how to build and try a minimal WPE browser using WPE Platform API on Raspberry Pi. Moreover, as the WPE Platform API still evolves to some degree, this article
also explains how to use and stick to the latest WPE WebKit from main branch. This way one can play with all the latest features straight on embedded hardware.
Before going further, one should be aware that in case of a simple release build (instead of one using latest main branch) it’s better to follow official instructions instead of this article.
This article focuses on a certain setup using Raspberry Pi 3B but it should be fairly easy to adapt the config to any other Raspberry Pi model.
As for the work environment: the Linux-based host with ability to run containers was used along with WebKit Container SDK. The SDK version was precisely 2.53-v6-d535e88 as it uses
Ubuntu 24.04.4 LTS that works well with Yocto scarthgap.
The Yocto scarthgap has been used to increase the chances that the config and commands demonstrated in this article will remain buildable for many years to follow.
The preparation of the image starts with a series of commands that create a main directory and clone important Yocto repositories along with some meta layer repositories. At this point already, it’s important to have the working directory shared
between host and SDK.
With that, wpewebkit latest will be preferred and installed in the image along with a dummy browser called wpe-browser.
To make the wpewebkit latest work, one needs to create meta-webkit/recipes-browser/wpewebkit/wpewebkit_latest.bb:
SUMMARY ="Lightweight WebKit port for embedded devices with OpenGL-ES acceleration" DESCRIPTION ="WPE WebKit port pairs the WebKit engine with OpenGL-ES (OpenGL for Embedded Systems), \ allowing embedders to create simple and performant systems based on Web platform technologies. \ It is designed with hardware acceleration in mind, relying on EGL, and OpenGL ES." HOMEPAGE ="https://wpewebkit.org/" BUGTRACKER ="https://bugs.webkit.org/" LICENSE ="BSD-2-Clause & LGPL-2.0-or-later" LIC_FILES_CHKSUM ="file://Source/WebCore/LICENSE-LGPL-2.1;md5=a778a33ef338abbaf8b8a7c36b6eec80 "
# Build option for WPE API 1.1 PACKAGECONFIG[wpe-1-1-api]="-DENABLE_WPE_1_1_API:BOOL=ON,-DENABLE_WPE_1_1_API:BOOL=OFF,"
# Build option for WPE platform API PACKAGECONFIG[wpe-platform]="-DENABLE_WPE_PLATFORM=ON,-DENABLE_WPE_PLATFORM=OFF,libinput libxkbcommon wayland-native"
EXTRA_OECMAKE =" -DPORT=WPE -G Ninja"
# TODO: documentation and introspection are disabled by default because the are # causing cross-compiling build errors # PACKAGECONFIG:append = " ${@bb.utils.contains('DISTRO_FEATURES', 'api-documentation', 'documentation', '' ,d)} introspection"
# If SSE code compiles, assume it runs successfully (it can't actually run # because of cross compiling) EXTRA_OECMAKE:append:x86 =" -DHAVE_SSE2_EXTENSIONS_EXITCODE=0" # Javascript JIT is not supported on ppc/arm/RISCV32/mips64 PACKAGECONFIG:remove:powerpc ="jit" PACKAGECONFIG:remove:powerpc64 ="jit" PACKAGECONFIG:remove:powerpc64le ="jit" PACKAGECONFIG:remove:armv4 ="jit" PACKAGECONFIG:remove:armv5 ="jit" PACKAGECONFIG:remove:armv6 ="jit" PACKAGECONFIG:remove:armv7a ="jit" PACKAGECONFIG:remove:armv7ve ="jit" PACKAGECONFIG:remove:riscv32 ="jit" PACKAGECONFIG:remove:riscv64 ="jit" PACKAGECONFIG:remove:mipsarchn64 ="jit" PACKAGECONFIG:remove:mipsarchn32 ="jit" PACKAGECONFIG:remove:loongarch64 ="jit"
# Javascript JIT is not supported on x86 PACKAGECONFIG:remove:x86 ="jit"
LDFLAGS:append:riscv64 =" -pthread"
FULL_OPTIMIZATION:remove ="-g"
LEAD_SONAME ="libWPEWebKit.so" PACKAGES =+ "${PN}-web-inspector-plugin ${PN}-qtwpe-qml-plugin" FILES:${PN}+="${libdir}/wpe-webkit*/injected-bundle/libWPEInjectedBundle.so" FILES:${PN}-web-inspector-plugin +="${datadir}/wpe-webkit-*/inspector.gresource" # nooelint: oelint.vars.insaneskip - ignored for convenience. We need to recheck if problem persist INSANE_SKIP:${PN}-web-inspector-plugin ="dev-so"
# nooelint: oelint.vars.insaneskip - ignored for convenience. We need to recheck if problem persist INSANE_SKIP:${PN}-qtwpe-qml-plugin ="dev-so"
# JSC JIT on ARMv7 is better supported with Thumb2 instruction set. ARM_INSTRUCTION_SET:armv7a ="thumb" ARM_INSTRUCTION_SET:armv7r ="thumb" ARM_INSTRUCTION_SET:armv7m ="thumb" ARM_INSTRUCTION_SET:armv7ve ="thumb"
This file is self-contained on purpose; the idea is not to rely on any includes so that unpredictable behavior doesn’t happen in the future.
While the above file contains a lot of interesting details, the most interesting practical part is the last few lines. The SRCREV is set to point to the latest commit from the WebKitmain branch (at the time
of writing). Along with that comes SRC_URI that specifies two patches required to make WPE WebKit compile.
The problem with the patches is that advancing SRCREV will likely make them unusable due to merge conflicts. Therefore, when advancing the revision, it’s recommended to remove patches from SRC_URI and face the compilation problems from scratch as
it’s very likely there will be new compilation problems anyway. Fortunately, nowadays LLMs can be used to fix any compilation problems by preparing custom patches just like the below ones (created by LLM as well). For example, most of the modern
models should manage to prepare proper patches just by pointing them to the above recipe and the temp directory with the latest logs from build commands.
Assuming one uses the wpewebkit_latest.bb above, the first patch needs to be created in: meta-webkit/recipes-browser/wpewebkit/wpewebkit/0001-libpas-Only-include-stdatomic.h-when-compiling-with.patch with the following content:
From 0000000000000000000000000000000000000000 Mon Sep 17 00:00:00 2001
From: Pawel Lampe <plampe@igalia.com>
Date: Mon, 17 Aug 2026 00:00:00 +0000
Subject: [PATCH] [libpas] Only include stdatomic.h when compiling with Clang

Some libpas .c files (e.g. jit_heap.c) are compiled as C++ via
set_source_files_properties(... PROPERTIES LANGUAGE CXX) in
Source/bmalloc/CMakeLists.txt, for TZone heap support. pas_utils.h
unconditionally does `#include <stdatomic.h>`, but GCC's own
<stdatomic.h> relies on the C11-only `_Atomic` keyword and has no
support for being included from C++ translation units (this was only
addressed in much newer GCC releases). Compiling any of the
CXX-tagged libpas .c files with GCC 13 therefore fails with:

    error: '_Atomic' does not name a type

The header is only actually needed here for the Clang-specific
__c11_atomic_* intrinsics guarded by `#elif PAS_COMPILER(CLANG)`
further down in this file; the non-Clang (GCC) path uses the
__atomic_* builtins instead and does not need any of the types or
macros from <stdatomic.h>. Guard the include accordingly so GCC
builds (both plain C and the CXX-tagged libpas sources) are
unaffected by GCC's non-C++-aware <stdatomic.h>.

Upstream-Status: Pending
Signed-off-by: Pawel Lampe <plampe@igalia.com>
---
 Source/bmalloc/libpas/src/libpas/pas_utils.h | 8 ++++++++
 1 file changed, 8 insertions(+)

diff --git a/Source/bmalloc/libpas/src/libpas/pas_utils.h b/Source/bmalloc/libpas/src/libpas/pas_utils.h
index 962634080930..9b98fda54f43 100644
--- a/Source/bmalloc/libpas/src/libpas/pas_utils.h
+++ b/Source/bmalloc/libpas/src/libpas/pas_utils.h
@@ -42,7 +42,15 @@
 #endif

 #include <limits.h>
+#if PAS_COMPILER(CLANG)
+/* GCC's <stdatomic.h> relies on the C-only _Atomic keyword and is not
+ * usable when this header is included from a translation unit compiled
+ * as C++ (some libpas .c files are compiled as C++, see bmalloc's
+ * CMakeLists.txt). It is only needed here for the Clang-specific
+ * __c11_atomic_* intrinsics below; the GCC path uses __atomic_* builtins
+ * instead. */
 #include <stdatomic.h>
+#endif
 #include <stdbool.h>
 #include <stdint.h>
 #include <string.h>
--
2.43.0
The second patch should be: meta-webkit/recipes-browser/wpewebkit/wpewebkit/0002-WebDriver-Guard-LOG_CHANNEL-check-with-LOG_DISABLED.patch with:
From 0000000000000000000000000000000000000000 Mon Sep 17 00:00:00 2001
From: Pawel Lampe <plampe@igalia.com>
Date: Mon, 17 Aug 2026 00:00:00 +0000
Subject: [PATCH] [WebDriver] Guard LOG_CHANNEL check with
 LOG_DISABLED/RELEASE_LOG_DISABLED

WebDriverService::handleRequest() unconditionally checks
LOG_CHANNEL(WebDriverClassic).state to decide whether it is worth
building the request/response log strings. However,
Source/WebDriver/Logging.h only declares the WebDriverClassic (and
other WebDriver) log channels inside:

    #if !LOG_DISABLED || !RELEASE_LOG_DISABLED

On a release build (NDEBUG, so LOG_DISABLED is true) without journald
support and without OS_LOG/Android (so RELEASE_LOG_DISABLED is also
true) - the common configuration for an embedded Linux build without
the "journald" PACKAGECONFIG - that guard is false, so the channel is
never declared, and this direct, unguarded use of LOG_CHANNEL() fails
to compile:

    error: 'LOG_CHANNEL_PREFIXWebDriverClassic' was not declared in this scope

RELEASE_LOG_INFO() itself already collapses to a no-op in that
configuration (see wtf/Assertions.h), so guard this manual
LOG_CHANNEL() state check with the same condition used to declare the
channel in Logging.h.

Upstream-Status: Pending
Signed-off-by: Pawel Lampe <plampe@igalia.com>
---
 Source/WebDriver/WebDriverService.cpp | 2 ++
 1 file changed, 2 insertions(+)

diff --git a/Source/WebDriver/WebDriverService.cpp b/Source/WebDriver/WebDriverService.cpp
index 07ae385f33f4..2612d239a611 100644
--- a/Source/WebDriver/WebDriverService.cpp
+++ b/Source/WebDriver/WebDriverService.cpp
@@ -381,6 +381,7 @@ bool WebDriverService::findCommand(HTTPMethod method, const String& path, Comman
 void WebDriverService::handleRequest(HTTPRequestHandler::Request&& request, Function<void (HTTPRequestHandler::Response&&)>&& replyHandler)
 {
     Function<void (HTTPRequestHandler::Response&&)> actualReplyHandler = WTF::move(replyHandler);
+#if !LOG_DISABLED || !RELEASE_LOG_DISABLED
     if (LOG_CHANNEL(WebDriverClassic).state != WTFLogChannelState::Off) {
         RELEASE_LOG_INFO(WebDriverClassic, "HTTP request %s %s (body=%zu bytes)", request.method.utf8().data(), request.path.utf8().data(), request.dataLength);
         actualReplyHandler = [startTime = MonotonicTime::now(), replyHandler = WTF::move(actualReplyHandler)](HTTPRequestHandler::Response&& response) mutable {
@@ -388,6 +389,7 @@ void WebDriverService::handleRequest(HTTPRequestHandler::Request&& request, Func
             replyHandler(WTF::move(response));
         };
     }
+#endif

     auto method = toCommandHTTPMethod(request.method);
     if (!method) {
--
2.43.0
Once the patches are added, wpewebkit latest should build correctly. However, to make use of it one needs a browser.
To demonstrate how easy the browser for WPE WebKit with Platform API can be, a very minimalistic one will be prepared below.
The first step is to create a directory:
mkdir meta-webkit/recipes-browser/wpe-browser/
Then a file: meta-webkit/recipes-browser/wpe-browser/main.cpp that implements the whole browser:
and finally a recipe file: meta-webkit/recipes-browser/wpe-browser/wpe-browser_1.0.bb that allows bitbake to build the browser and install it in the image:
SUMMARY ="Minimal WPE WebKit browser launcher" DESCRIPTION ="A minimal launcher built on the WPE Platform API, displaying \ a URL given as its only argument (defaults to https://wpewebkit.org). \ Based on https://simonpena.com/blog/2026/03/20/getting-started-with-wpe-webkit/" HOMEPAGE ="https://simonpena.com/blog/2026/03/20/getting-started-with-wpe-webkit/" LICENSE ="MIT" LIC_FILES_CHKSUM ="file://${COMMON_LICENSE_DIR}/MIT;md5=0835ade698e0bcf8506ecda2f7b4f302"
Since the Platform API is the future of WPE, it’s worth using it already. As the above sections demonstrate, it hasn’t ever been easier to create a WPE-powered browser for embedded hardware. Moreover, nowadays as LLMs are at play,
using latest sources from main branch and quickly patching on demand is a possibility worth utilizing. With that, a broad sea of experimenting possibilities becomes wide open. However, it must not be forgotten that while main branch
is great for testing new web platform features implemented in WebKit, it’s not necessarily ideal for testing performance. In such case, it’s better to rely on releases and proper browser engine fine tuning for particular hardware one
plays with.
Update on what happened in WebKit in the week from August 31 to September 7.
This was another week focused on ironing out graphics issues in preparation
for the upcoming 2.54.x release series. Did we say release? Here we have
another set of packaged release candidates as well!
Cross-Port 🐱
The “paint flushing” feature of the Web Inspector that shows the areas of the
layers that were painted is now
available. On the other hand, setting
WEBKIT_SHOW_DAMAGE=1 in the environment will show the areas of the window
that were rendered. For example, if the page is scrolled a little, the whole
window is rendered, but no layer has to be repainted.
Graphics 🖼️
Fixed visible pixel snapping in the
GTK and WPE ports' Skia compositor by choosing linear instead of
nearest-neighbor sampling for backing store tiles whenever a layer's transform
no longer maps tile pixels onto screen pixels 1:1, matching what the Texture
Mapper backend already got from its always-linear OpenGL code path.
Fixed a clipping bug in the
Skia-based compositor that caused layers with overflow: hidden set to
not clip blur and box-shadow filter outsets.
Fixed a repaint bug where content
changing behind an element with a software-rendered filter such as blur()
could leave stale pixels on screen, as with the glow effect that YouTube draws
around videos in dark/ambient mode. The fix restores proper tracking of which
layers act as the repaint container for a pixel-moving filter, so the repaint
area is expanded correctly again on WPE, GTK and macOS.
A fewproblems with Offscreen Canvas have
been fixed.
Releases 📦️
Release candidates WebKitGTK
2.53.92 and
WPE WebKit 2.53.92 have
been published, and they include polishing and a number of fixes that ensure
that there will not be noticeable regressions brought in by the new Skia-based
compositor and the damage tracking support—two of the main features of the
upcoming stable release series. As the stable release dates approaches, we
encourage people who try these preview versions to report issues in
Bugzilla.
This post walks through the process of bringing back an extension-focused //extensions/shell in Chromium and enabling the “Add to Chrome” button on the Chrome Web Store.
If you haven’t read it yet, I recommend starting with Extension Migration Progress Update – Part 1, where I described the initial stage of migrating extension installation formats and APIs out of the //chrome layer.
After migrating the extension installation formats — CRX, ZIP, and Unpacked — into the //extensions layer, the next natural step was to enable embedders to install extensions directly from the Chrome Web Store.
To achieve this, the Web Store Private APIs were an essential piece of the puzzle.
Migrating Web Store Private APIs
The Web Store Private APIs had a relatively large dependency on //chrome. We started by migrating the relevant files and gradually replacing Chrome-specific dependencies with alternative implementations where necessary.
In some cases, this meant introducing new interfaces, while in others it meant moving code to a more appropriate layer.
However, after this migration was completed, we encountered an unexpected obstacle.
Where did extensions/shell go?
Chromium originally had a lightweight embedder called //extensions/shell, previously built as the app_shell target.
The idea was simple: provide an environment where extensions could be installed and run without bringing up the entire Chrome browser.
However, the shell had originally been created about a decade ago for a different purpose. It was intended to provide an independent environment for ChromeOS platform applications without requiring the full Chrome browser.
Platform apps were eventually deprecated, and the shell was later repurposed primarily as a lightweight environment for extension browser tests.
Over time, the extension browser tests were moved into the //chrome layer. The shell was no longer used by any real product, and maintaining it became technical debt. As a result, app_shell was eventually removed upstream.
Why were the browser tests moved from //extensions to //chrome?
I asked an Extension owner about the reasoning behind this change.
The key point was that the old shell-based browser tests did not provide a sufficiently realistic environment for testing extensions.
There were two major problems.
First, many extension APIs delegate part of their implementation to the embedder through interfaces such as ExtensionsApiClient. Testing only the //extensions implementation with the shell meant that the actual embedding logic was not exercised. Bugs in the delegated implementation could therefore go unnoticed.
Second, extensions depend on much more than the //extensions layer itself. UI, networking, rendering, process management, and other browser functionality all affect how extensions behave. The //chrome layer provides an important part of that environment.
Therefore, the upstream direction was to move extension browser tests into the real Chrome browser environment rather than maintaining a separate shell.
That reasoning makes sense for testing.
In fact, we agreed that bringing the old shell back simply as a test environment would not be the right approach.
But I had a different question:
What if we use a lightweight shell not as a test environment, but as a reference implementation and a demo environment for embedders?
The answer was that Chromium currently does not plan to maintain such an embedder. The concern is that a simplified shell could itself become an inaccurate reference implementation. If its behavior diverged from the real Chrome integration, it could create more confusion rather than provide useful guidance.
The suggested direction was instead to use extension-based Web Platform Tests (WPT) to provide consistency, while considering actual browsers as the reference implementations.
That approach makes sense from the upstream perspective.
However, for our migration work, we still needed something slightly different.
We needed a small, working environment where we could demonstrate that extensions can actually be supported outside of the //chrome layer.
So we decided to bring back an extension-focused shell — not as an upstream testing framework, but as a practical environment for integration and demonstration.
Although this shell is not part of upstream Chromium, we are currently maintaining the implementation internally in the Igalia repository, with plans to open-source it in the future. It serves as a lightweight environment for demonstrating and validating Extension support outside of the //chrome layer, rather than as a replacement for Chromium’s browser tests or an upstream reference implementation.
Rebuilding the Extension Shell
The first step was to establish the basic structure of the shell.
1. Building the skeleton
We created a custom ShellBrowserContext directly derived from content::BrowserContext, bootstrapped the Views environment, and added a simple placeholder window.
On top of that, we connected the extension system through:
ShellExtensionsBrowserClient — the entry point for implementing embedder-specific Extensions behavior for the shell.
ShellExtensionSystem — the service responsible for core extension management, including loading and unloading extensions and parsing manifests.
This gave us the basic environment needed to initialize Chromium’s extension infrastructure without depending on the full Chrome browser.
2. Building the installation pipeline
Next, the shell needed to actually install extensions.
We connected ExtensionExternalInstaller, which orchestrates the overall installation flow — including downloading, unpacking, and manifest validation — to support CRX and ZIP installation.
We also implemented ShellContentUtilityClient, which registers the sandboxed utility-process service needed to safely handle untrusted data, such as ZIP decompression, out of process.
We then completed the renderer-side wiring so that an installed Manifest V3 extension could actually execute its service worker and access chrome-extension:// resources.
Several pieces of the extension installation infrastructure also needed to be connected, including:
Blocklist — a KeyedService that tracks which extensions are blocklisted, backed by Safe Browsing.
InstallStageTracker — tracks installation stages and failure events specifically for policy force-installed extensions.
InstallTracker — broadcasts installation start, completion, and failure events to observers.
InstallVerifier — confirms that an installed extension is either verified through a Web Store signature or allowlisted by enterprise policy.
SharedModuleService — supports the import/export mechanism that extensions use to pull in shared modules from other extensions.
At this point, we had a shell that could actually install and initialize extensions.
3. Making it look like a browser
The next step was to make the shell usable as an actual browser rather than just an extension test environment.
We used the existing content/shell implementation and ShellPlatformDelegateViews as references, without directly depending on them.
The shell now has a basic browser UI with:
Back
Forward
Reload
Stop
Address bar
A views::WebView containing a real content::WebContents
This allowed us to browse normal web pages as well as run installed extensions.
4. Enforcing network-level policies
With the browser environment in place, we also started validating extension APIs that operate at the network level.
In particular, we tested declarativeNetRequest and webRequest, which uncovered a few issues that needed to be fixed in the shell integration.
After these steps, the basic foundation of an embedder that can install and run extensions was finally becoming stable.
And that naturally led to the next question:
Can we install an extension directly from the Chrome Web Store?
The answer was initially no.
Enabling the “Add to Chrome” Button
When opening an extension page on the Chrome Web Store, the “Add to Chrome” button was disabled.
The reason was another missing piece of Chrome-specific functionality.
The Web Store uses the chrome.webstorePrivate extension API to perform the installation flow.
Behind this API is WebstorePrivateAPIDelegate, which delegates browser-specific operations to the embedder. These operations include things such as installation approval, login state, Safe Browsing checks, and the installation confirmation UI.
Since our shell was not Chrome, these pieces were not implemented.
Implementing the missing pieces
To make the Web Store installation flow work, we implemented the required delegate functionality with safe defaults and added the necessary extension infrastructure to the shell.
This included:
WebstorePrivateAPIDelegate — provides the embedder-specific implementation required by the chrome.webstorePrivate API to handle Web Store extension installation.
ShellExtensionsAPIClient — provides shell-specific implementations of browser-level services required by extension APIs.
ShellExtensionInstallPromptClient — provides the shell-specific UI handling for extension installation prompts.
WebstorePrivateAPI factory — creates and provides the WebstorePrivateAPI service for extensions running in the shell.
ManagementAPI factory — creates and provides the ManagementAPI service, which exposes extension management functionality to extensions.
The shell also needed to provide appropriate User-Agent metadata, which was delegated through:
embedder_support::GetUserAgentMetadata().
After wiring these pieces together, the Chrome Web Store was finally able to recognize our shell as an environment capable of handling extension installation.
Demo
And this is where things became much more interesting.
The “Add to Chrome” button is now enabled, and clicking it can trigger the extension installation flow in our extension shell.
This is an important milestone for the migration.
We now have a lightweight browser environment that can:
Launch independently of Chrome.
Browse normal web pages.
Install extensions.
Run Manifest V3 extensions.
Exercise extension APIs.
Install an extension directly from the Chrome Web Store.
What’s next?
Getting an extension installed is only part of the story.
The next step is making the installed extensions behave like they do in a real browser.
There are still several APIs that have traditionally depended on the //chrome layer. Permissions, cookies, and other browser integration points are among the areas that need to be migrated or provided by the embedder.
Once these pieces are migrated, we should be able to go beyond simply installing an extension from the Web Store and demonstrate a more complete end-to-end experience:
Chrome Web Store → Extension installation → Extension startup → Extension API usage
This is the next stage of the migration work.
I’ll continue documenting the progress as more of these APIs move into the //extensions layer and the extension shell becomes a more complete demonstration environment for embedders.
FOSForums (Free and Open Source Forums) is a free conference focused on free and open source software, hardware, and the communities around them.
Now in its 4th edition, since 2023 it has been held at the Institute of Computing at Unicamp – one of Brazil’s top public research universities – and has featured speakers from Igalia, Red Hat, Linaro, RISC-V International, Toradex, Unicamp (State University of Campinas), USP (University of São Paulo), Eldorado Research Institute, and others.
It’s still a relatively new and small conference – around 30 attendees this year – but a notably high share of them are students, both undergraduate and graduate. That makes it an especially relevant place to share knowledge, identify talent, and support people early in their tech careers – contributing back to the community.
This year’s schedule covered the FinOps Foundation, open science, continuous integration with RISC-V/Linux/KernelCI, Linux filesystem performance on flash devices, and Linux page_owner (my talk), plus a hands-on session with BitDogLab (an open-source educational hardware platform). A talk on turning bug reports into kernel patches was also planned but unfortunately couldn’t be delivered – keep an eye on Heitor’s blog!
I opened with an introduction about Igalia – who we are, what we work with, and what we do – and how to join us through our open positions and our Coding Experience program.
The technical part covered the problem at hand, “Where is memory going?”, and then walked through page_owner from definition to application: what it is, what it is for, how it works, how to use it, then basic and advanced examples.
The session recording is available on YouTube (currently within the live stream; later in the FOSForums 2026 playlist), and the slides are available here.
Update on what happened in WebKit in the week from August 24 to August 31.
After such a packed edition last week, we can relax with an even more
packed installment this week! The team has been moving full steam ahead
with the Layer-Based SVG Engine, and graphics improvements in general,
but we also had a handful of other updates, such as SDK updates, a new
WebsitePolicies API, and more.
Cross-Port 🐱
Add new ChildChange types for moveBefore(). This addresses issues with the in-progress moveBefore() implementation where scripts would sometimes execute erroneously.
Added a WebsitePolicies:upgrade-to-https-policy property. When enabled this policy will automatically try using HTTPS even for HTTP websites (excluding localhost or IPs). The policy can be configured either to allow automatically falling back to HTTP if that fails, or to consider all HTTPS failures fatal for the best security.
Graphics 🖼️
Fixed SVG text being rasterized for the wrong resolution in zoomed standalone SVG documents in the Layer-Based SVG Engine (LBSE). vector-effect: non-scaling-stroke on <text> no longer comes out too thick, and the resulting metrics match the legacy SVG engine.
Fixed viewport clipping in the Layer-Based SVG Engine (LBSE), where a nested <svg> or a <marker> applied its viewport clip even when its content already fitted inside, and since that clip is not pixel-snapped its edge could fall between two device pixels and cut into whatever was drawn right at the viewport border. Painting now skips a clip that removes nothing, which eliminates a class of subtle pixel differences against the legacy SVG engine.
Fixed opacity animations not damaging descendant layers in the GTK and WPE ports, where a descendant that paints outside its parent's bounds kept its stale pixels on screen. The mask-specific damage handling was generalized into a single group-property path shared by opacity, filters, mask blend modes and replicas, which now damages the layer plus the overlap region of its whole subtree.
Added a cycle-analysis subcommand to webkit-sysprof, which draws every frame cycle of a capture as a bar of cells colored by the mark covering that moment on the main thread, showing whether a slow frame stalled on layout, a long timer or rasterization instead of only reporting that it was slow.
Removed redundant text updates for the text children of elements using display: contents, which previously got one on every style resolution regardless of whether their style actually changed. This removes dozens of useless updates per style recalculation in Web Component applications, where every <slot> uses display: contents.
Fixed tile image caching in the Skia compositor by regenerating the cached SkImage whenever a a tile's contents are updated and by adding a texture release callback that keeps the texture valid for as long as the image references it.
Switched video DMA-BUF buffers to Skia promise images in the Skia compositor, so the texture backing a video frame is only created at the point Skia actually draws it, which works for these buffers because the underlying DMABufBuffer can be kept alive until the promise image is released.
Fixed a hang in the Layer-Based SVG Engine (LBSE) when two SVG <pattern> elements reference each other through href, or one references itself: collecting the inherited pattern attributes now remembers which patterns it has already visited, the same cycle detection that gradients have always had. The walk also resolves every reference in the tree scope of the pattern it started from, so a pattern referenced from inside a shadow tree now inherits the right attributes.
Skipped anchor-positioning bookkeeping during style resolution when a document uses no anchor positioning at all, avoiding two hash lookups per styled element.
Cached the SVG viewport size used to resolve lengths in the Layer-Based SVG Engine (LBSE), instead of recomputing the nearest <svg> element's view box rectangle once per shape per frame. The viewport is invariant across a flush and identical for every shape under the same <svg>, so caching removes redundant work.
Fixed red and blue appearing swapped in non-accelerated video with the Skia compositor, by allocating the video frame's BitmapTexture with the BGRA layout flag and applying that flag when the buffer is turned into a Skia image.
Infrastructure 🏗️
Bumped the GTK and WPE developer SDK from v9 to v11, bringing GStreamer 1.28.5, sparkle-cdm 2026.2 and libsoup 3.7.2. Be sure to update your local wkdev-sdk container using wkdev-update to make sure your development environment matches what the CI is testing.
In Part 2 I explained how ARM32 has two ISAs available (ARM and Thumb), how their feature sets differ in important ways and how software can and often does make use of both even in the same program.
Today we’re going one level higher and look at the ABIs (Application Binary Interface). Whereas an ISA defines what bit sequences make the CPU do what operations, an ABI is a set of conventions software is meant to follow so that it is interoperable with other software targetting the same ABI.
An ABI is adopted by compilers and operating systems. The designers of the instruction set often define some base ABI that compilers only need to extend to define a few missing bits.
One of the biggest underlying reasons getting perf to work in ARM32 is hard is that ARM has deprecated and gone over multiple base ABIs in its lifetime. Furthermore: the details on how frame pointers should work used to be completely non-standard and that has created fragmentation.
As of writing, these are the standard base ABIs defined for ARM:
~1987: APCS (Arm Procedure Call Standard (obsolete)). Only applies to ARM.
~1997: TPCS (Thumb Procedure Call Standard (obsolete)). Thumb-only counterpart of APCS.
1998: ATPCS (ARM-THUMB Procedure Call Standard). Unified ABI for both ARM and Thumb.
2003: AAPCS (Procedure Call Standard for the Arm® Architecture). The current base ABI. It applies to both ARM and Thumb.
In this post we’ll learn some typical examples of features an ABI would standardize, ultimately landing in frame pointers as one of such features.
But of course, a stack is a very useful abstraction that any non-trivial program will need as it allows to free up registers by saving their data for later use. Different pieces of code (e.g. functions) need to agree on a definition for the stack and rules to use it so they don’t accidentally overwrite each other’s data.
As such, ABIs define the stack; namely: what register points to the current top of the stack, whether it grows towards greater adresses (ascending stack) or toward lower adresses (descending stack), whether the “top of the stack” should be understood as “the last element pushed” (full stack) or “the position a newly pushed element would use” (empty stack), any alignment requirements, and rules for writing to the stack—for example: writes outside of the stack may be considered undefined behavior even in the absence of function calls so that interrupt handlers can make use of the same stack.
On ARM32, virtually all the ABIs1 agree on using a full-descending stack, whose top position is tracked by the r13 register, which for this reason is also give the alias sp (stack pointer). The stack is 4 byte (32 bit) aligned. The AAPCS ABI further requires 8 byte alignment at the public interface (e.g. when calling a library function). Storing data outside of the valid region of the stack (i.e. in addresses lower than sp) is undefined behavior.
Function calls
An ABI defines what a function call is under the hood; namely: how arguments are passed and how are values returned. This part of ABIs is important enough to have its own name: calling convention.
Function arguments
A simple calling convention could require all function arguments be to pushed into the stack. The callee could then access them by addressing the stack pointer. Notably, the cdecl and stdcall calling conventions used in MS Windows 32-bit x86 work in this manner.
Modern calling conventions—including ARM32 AAPCS and all x86-64 calling conventions—use registers in addition to the stack for passing arguments, trading complexity in the ABI for better performance. This is especially a win for functions with few arguments. In many cases, programmers and compilers can strategically do computations directly in the same registers that will be later used as arguments, further reducing the overhead of function calls.
In AAPCS, r0-r3 are filled with the first few arguments. Arguments with types smaller than 32 bit (e.g. char, int16_t) are extended to 32 bits before the call. When an argument has a 64-bit type, it takes two consecutive registers. For more details, see section 6.5, Parameter Passing in the AAPCS specification. Remaining arguments are pushed into the stack.
Callee-saved and caller-saved registers
ABIs often separate user registers in two groups:
Callee-saved registers
Caller-saved registers, also known as scratch registers
A function is allowed to write to callee-saved registers at any point, but it must ensure they have their original value on return. This is normally accomplished by pushing (saving) the previous value to the stack before writing and popping it before return, hence the name «callee-saved».
On the other hand, a function is allowed to freely write (scratch) any and all caller-saved registerswithout preserving their old value anywhere. This also means that, before doing any function call, you must be careful to save any important data in these registers, hence the name «caller-saved».
Having a healthy mix of callee-saved and caller-saved is good for performance, as it reduces the number of stack manipulation operations necessary in typical functions.
In AAPCS, r0-r3 and r12 are caller-saved (i.e. scratch registers). All other general purpose registers are callee-saved.
Returning from a function: return pointers
The calling convention also needs to specify how returning from a function works. The caller must store a return pointer (an address to executable code immediately following the function call) in a well-defined place.
In many calling conventions, including the common ones for x86 and x86-64, the return pointer is passed in the stack. ARM calling conventions are a bit smarter: instead they place the return pointer in a so-called link register (lr). This means that simple leaf functions (functions that do not call other functions) can operate on their arguments and return a value without ever touching the stack.
All ARM calling conventions use r14 as the link register.
Of course, many functions will need to call to other functions before returning, so how does a link register handle this? Quite simply: lr is a callee-saved register! A function that will perform function calls will typically store lr in the stack somewhere in its preamble, do as many function calls as it wants, then restore the old value of lr from the stack.
The l in the bl and blx branch instructions in ARM stands for “link”. It means that the current value of pc will be loaded in lr before the branch. This is the most common way to do function calls in ARM and Thumb.
Special purpose registers
An ABI may reserve certain CPU registers for specific purposes, even if those registers would otherwise be general purpose registers according to the ISA. Compilers do to take this into account when generating code.
AAPCS leaves r9 free to use for any ABI extending AAPCS (e.g. for a specific operating system).
AAPCS defines r12 as the Intra-Procedure-call scratch register (ip). Functions are allowed to use it as a regular scratch register, but its real purpose is to enable writing simple veneers without needing stack manipulation.
Side-tangent: Veneers…? What is a veneer?
(You can safely skip this section If you just want to understand the minimum concepts necessary for frame pointers. Keep reading if you have a more general interest in ARM assembly.)
Instructions in ARM have a fixed size of 32 bits which is as wide as pointer. A consequence of this is that calling functions in arbitrary locations of the program requires a variable number of instructions. Most branches in ARM are done with signed offsets with a range of ±32 MiB (26 bits, of which only the most significant 24 bits are actually encoded in the instruction because ARM instructions are 4-byte-aligned). Thumb is even scrappier: the typical Thumb bl (branch with link) instruction only supports offsets of ±4MiB encoded in 22 bits, which is already more than the 16 bits per instruction of Thumb-1 and it is only possible because the bl ASM instruction gets turned into two machine Thumb-1 instructions designed for this purpose, each containing half of the offset).
Compilers and linkers cope with this limitation by assuming calls will be near enough for the offset to fit. When the offset does not fit, they synthesize some code (the veneer, also sometimes called a trampoline or range extension thunk) in a location close enough for the offset to fit. The veneer will then load the entire address in some register—likely ip— and then use a «branch to address in register» instruction (e.g. bx ip).
From this example the utility of having a scratch register not used for argument passing (ip) becomes apparent: if a scratch register like ip did not exist, the veneer would need to spill some callee-saved register to the stack just to build an address for the bx instruction. Furthermore, the callee couldn’t return directly into the original caller, but it would have to return back into the veneer so that the values from the stack could be restored.
Also of note is that is the fact that the blx instruction (branch with link and exchange ISA, provided an offset or register) did not exist until ARMv5. Before, there was only bx (branch and exchange ISA), which operated on a register. This resulted in a different number of instructions required for the branch depending on the ISA of the target (which may not be known until run-time in the case of shared libraries), and by extension made veneers necessary for interworking between ARM and Thumb.
Frame pointers
A stack frame is the chunk of the stack used by a specific function call, not including nested calls.
A frame pointer points to a fixed location (e.g. the start or end) of the stack frame. When we say that a program uses frame pointers, we refer to that program dedicating a register—the frame pointer register (usually shortened as fp)—to store the frame pointer at all times.
Having a frame pointer allows assembly code to refer to locations in the stack with simple offset from the frame pointer. So, for example, a certain variable saved in the stack will be at fp-4 and will remain at fp-4 even if code later pushes to the stack. This is more useful for humans than compilers, since it’s possible to access the same data from sp as long as you keep track of the required offset changing every time something is pushed or popped.
Something much more useful occurs if code always pushes the old value of the frame pointer register and the return pointer to the stack at call boundaries: it becomes possible to inspect the stack at runtime: the frame pointer register points to the current frame record, from which the previous frame pointer and return pointer are accessible in a fixed offset. This process can be repeated, traversing the stack like a linked list, one stack frame at a time. Before main(), a sentinel value (typically a null pointer) should be pushed instead of a frame pointer so that the end of the linked list can be detected.
Note that the usage of frame pointers is an ABI matter: The above breaks if you call a function in a library that doesn’t use the same exact convention for frame pointers. If that function skips updating the frame pointer register, its stack frames will become invisible. Or worse: if it writes some random value to it, the entire chain of callers will no longer be recoverable.
In x86 ABIs, the Base Pointer register (bp in 16-bit, ebp in 32-bit, rbp in 64-bits) is commonly used to store the frame pointer.
Frame pointers were important for obtaining backtraces in early debuggers, but this is less necessary in modern toolchains. Nowadays compilers can generate debug information (debuginfo) in a format like DWARF that debuggers can use to map any value of the pc register to what function it is part of and how deep in the stack the return pointer is at that particular instruction. This is the same process they use to map local variables to positions in the stack. The process can be repeated until the entire stack trace is obtained.
Since frame pointers became less necessary for debuggers, compiler optimizations that skip updating the frame pointer register or even use it as a general-purpose register have become very common. Omitting frame pointers as an optimization has been the default in gcc for all platforms since 2017, after it had been enabled in most target platforms individually. ARM32 already had this enabled in 2010 and earlier.
While debuginfo is a good alternative to frame pointers to get backtraces in a debugger, other development tools are not so lucky. Recovering call chains from frame pointers is a very lightweight affair: it’s a singly linked list traversal where all the nodes are within consecutive memory. On the other hand, getting a call chain through debuginfo requires having separate debuginfo sections for each object file (e.g. .so library) mapped in memory, search the wanted pc value in their tables and decode the debug tags info to find the address of the return pointer; then repeat this for every other stack frame.
Some tools have tried to adapt to this new normal of not having frame-pointers by adding support for DWARF unwinding. perf is one of them. This is however still unsatisfactory on low-end hardware: perf record -g --call-graph=dwarf cog about:blank will bring a Raspberry Pi 3 to its knees, freezing the entire system until it dies on the hands of the OOM killer. High-end hardware, like desktop PCs, can usually handle using DWARF, but it still results in much higher overhead.
With this modern understanding of what frame pointers are, we will also try to build all packages with frame pointers enabled in an ARM32 environment, so that we can also use a profiler there.
Problem: what are the ARM32 frame pointer ABIs, really?
APCS frames
The (old and deprecated) APCS spec specified an optional frame pointer ABI. When you pass the (now deprecated) -mapcs-frame flag to gcc, you tell it to use the frame pointer structures defined in APCS. Here is a descriptive diagram from page 629 of the Acorn Archimedes‘ Programmer Reference Manual (1987), whose Appendix C is “ARM Procedure Call Standard”:
Note: “save mask pointer” is meant point to the instruction that pushed this structure (ostensibly at the beginning of the function). Because in ARM you can push many registers in the stack in a single instruction, that instruction effectively contains a mask of all the registers that have been saved in the stack, hence the name “save mask”.
Here is a simple function that we will use to compare the frame pointer ABIs:
extern void show_sum(int a);
extern void show_diff(int b);

int do_operations(int a, int b) {
    int sum = a + b;
    show_sum(sum);
    int diff = a - b;
    show_diff(diff);
    int xor = a ^ b;
    return xor;
}
This is the assembly generated by gcc:
$ arm-linux-gcc -mcpu=cortex-a53 -marm -mapcs-frame -gdwarf-4 -fno-omit-frame-pointer -O2 -g -c add.c && arm-linux-gnu-objdump -S example.o
int do_operations(int a, int b) {
   0:	e1a0c00d 	mov	ip, sp
   4:	e92dd830 	push	{r4, r5, fp, ip, lr, pc}
   8:	e1a04001 	mov	r4, r1
   c:	e1a05000 	mov	r5, r0
  10:	e24cb004 	sub	fp, ip, #4
    int sum = a + b;
    show_sum(sum);
  14:	e0800001 	add	r0, r0, r1
  18:	ebfffffe 	bl	0 <show_sum>
    int diff = a - b;
    show_diff(diff);
  1c:	e0450004 	sub	r0, r5, r4
  20:	ebfffffe 	bl	0 <show_diff>
    int xor = a ^ b;
    return xor;
}
  24:	e0250004 	eor	r0, r5, r4
  28:	e89da830 	ldm	sp, {r4, r5, fp, sp, pc}
Here ip is used as a temporary to hold the value of sp before the push. The resulting stack matches the one in the old APCS document as we could expect:
fp points here: | pc at time of push (i.e. savemask pointer) |
                | saved lr                                   |
                | ip (i.e. the saved sp before the push)     |
                | saved fp                                   |
We can obtain the call chain by looking at the fp register and traversing the linked list of frame records: the saved lr contains the return function for that stack frame, and by extension, who called that function. We continue traversing the stack upwards until we find a NULL pointer indicating the end of the linked list.
Stack diagram of APCS frame records. The fp register points to the saved pc. «saved fp» is the previous value of fp, and hence points to a previous saved pc in the stack. Since the saved registers are specified to appear always in the same number and order, the call chain can be traversed like a linked list. The linked list ends when we encounter a null fp.
AAPCS frames, clang
It may seem weird that I just spend that much time above showing a very old ABI (APCS). Especially because if you look at the modern AAPCS spec today you’ll see frame pointers also defined.
However, if you scroll to the change history, you’ll also notice it was only added in January 2020, whereas AAPCS had been around for 17 years before. This is the real source of problems: as far as I can tell, during these 17 years compilers had no official guidance on any frame pointer ABI for AAPCS.
Making things worse, GCC and clang ended up with similar but mutually incompatible frame pointer ABIs. The official AAPCS frame pointer ABI sided with clang’s. It looks like this:
$ clang -target arm-linux-gnueabihf -g -gdwarf-4 -mcpu=cortex-a53 -c -O2 -fno-omit-frame-pointer -c example.c && arm-linux-gnu-objdump -S example.o
int do_operations(int a, int b) {
   0:	e92d4830 	push	{r4, r5, fp, lr}
   4:	e28db008 	add	fp, sp, #8
   8:	e1a05000 	mov	r5, r0
    int sum = a + b;
   c:	e0810000 	add	r0, r1, r0
  10:	e1a04001 	mov	r4, r1
    show_sum(sum);
  14:	ebfffffe 	bl	0 <show_sum>
    int diff = a - b;
  18:	e0450004 	sub	r0, r5, r4
    show_diff(diff);
  1c:	ebfffffe 	bl	0 <show_diff>
    int xor = a ^ b;
  20:	e0240005 	eor	r0, r4, r5
    return xor;
  24:	e8bd8830 	pop	{r4, r5, fp, pc}
Only two words are pushed in the stack: fp and lr. The fp register is updated to point to the the most recently saved fp in the stack.
Stack diagram of AAPCS frame records. The fp register points directly to the previous saved fp in the stack. Adjacent to it is the saved lr containing the return address of the calling function.
GCC frames
If you pass -marm -fno-omit-frame-pointer to gcc (as of 15.2), this is what the resulting frame pointer ABI looks like:
$ arm-linux-gcc -mcpu=cortex-a53 -marm -gdwarf-4 -fno-omit-frame-pointer -O2 -g -c example.c && arm-linux-gnu-objdump -S example.o
int do_operations(int a, int b) {
   0:	e92d4830 	push	{r4, r5, fp, lr}
   4:	e1a04001 	mov	r4, r1
   8:	e1a05000 	mov	r5, r0
   c:	e28db00c 	add	fp, sp, #12
    int sum = a + b;
    show_sum(sum);
  10:	e0800001 	add	r0, r0, r1
  14:	ebfffffe 	bl	0 <show_sum>
    int diff = a - b;
    show_diff(diff);
  18:	e0450004 	sub	r0, r5, r4
  1c:	ebfffffe 	bl	0 <show_diff>
    int xor = a ^ b;
    return xor;
}
  20:	e0250004 	eor	r0, r5, r4
  24:	e8bd8830 	pop	{r4, r5, fp, pc}
This is very similar to what ended up becoming the official AAPCS frame pointer ABI and to what clang does except that fp points to the saved lr, rather than to the saved fp directly. This is what it ends up looking like:
Stack diagram of GCC frame records when building for ARM32 with -fno-omit-frame-pointer. The fp register points to the saved lr in the stack.
What about Thumb?
While I’ve learned a lot about Thumb while working on this, I would be very cautious trying to make use of frame pointers in Thumb. They’re even messier and currently broken in GCC. For more details, you can keep reading this section.
r7 as frame pointer register
Thumb in stack traces complicates things significantly. Note that r11 is a “high register” in Thumb, which limits in how many different instructions it can be used efficiently. This is especially a problem in the original Thumb-1, which doesn’t have an instruction to push/pop low registers directly and you would typically need 3 additional instructions in the prologue and 3 additional instructions in the epilogue.
The above is much less of a concern with the now ubiquitous Thumb-2, which has 32-bit instructions for push/pop and arithmetic on high registers. However, as a consequence of this historical problem, you will see that in a default Linux setup both gcc and clang use r7 as frame pointer register in Thumb code.
$ clang -target arm-linux-gnueabihf -mcpu=cortex-a53 -mthumb -gdwarf-4 -fno-omit-frame-pointer -O2 -g -c example.c && arm-linux-gnu-objdump -S example.o
int do_operations(int a, int b) {
   0:	b5b0      	push	{r4, r5, r7, lr}
   2:	af02      	add	r7, sp, #8
   4:	4605      	mov	r5, r0
    int sum = a + b;
   6:	4408      	add	r0, r1
   8:	460c      	mov	r4, r1
    show_sum(sum);
   a:	f7ff fffe 	bl	0 <show_sum>
    int diff = a - b;
   e:	1b28      	subs	r0, r5, r4
    show_diff(diff);
  10:	f7ff fffe 	bl	0 <show_diff>
    int xor = a ^ b;
  14:	ea84 0005 	eor.w	r0, r4, r5
    return xor;
  18:	bdb0      	pop	{r4, r5, r7, pc}
The layout clang uses is the same as the official AAPCS ABI, but using r7 instead of the r11. Assuming there is no mixing of ARM and Thumb — the call chain can be recovered with the same traversal algorithm.
On GCC, however, Thumb frame pointers are unviable for call chain recovery, as the GCC sets r7 to the most recent position in the stack, which makes it impossible to know the position of the saved lr and the previous node pointer within the stack without additional information.
Using r11 for both ARM and Thumb
Using different frame pointer registers for different modes is problematic, as code in one mode (typically ARM) will frequently clobber the register used by the other mode (typically Thumb). Both r7 and r11 are caller-saved registers, so the information is there in the stack, but the stack and register values is not enough to locate them.
A simpler approach is to use r11 for both modes, which is much less awkward in Thumb-2. This is what the official AAPCS spec specifies. Recent versions of clang can be told to do this with -mframe-chain=aapcs (or alternatively, -mframe-chain=aapcs+leaf if frame pointers on leaf functions are also desired).
$ clang -target arm-linux-gnueabihf -mcpu=cortex-a53 -mthumb -gdwarf-4 -fno-omit-frame-pointer -mframe-chain=aapcs -O2 -g -c example.c && arm-linux-gnu-objdump -S example.o
int do_operations(int a, int b) {
   0:	e92d 4830 	stmdb	sp!, {r4, r5, fp, lr}
   4:	f10d 0b08 	add.w	fp, sp, #8
   8:	4605      	mov	r5, r0
    int sum = a + b;
   a:	4408      	add	r0, r1
   c:	460c      	mov	r4, r1
    show_sum(sum);
   e:	f7ff fffe 	bl	0 <show_sum>
    int diff = a - b;
  12:	1b28      	subs	r0, r5, r4
    show_diff(diff);
  14:	f7ff fffe 	bl	0 <show_diff>
    int xor = a ^ b;
  18:	ea84 0005 	eor.w	r0, r4, r5
    return xor;
  1c:	e8bd 8830 	ldmia.w	sp!, {r4, r5, fp, pc}
Frame pointer sadness
There are problems with frame pointers in ARM other than the incompatible ABIs. In fact, I kept finding more and more sadness the more I worked on this post.
GCC frames can’t be unwinded in leaf functions
While -fno-omit-frame-pointer will make GCC push fp to the stack, it doesn’t disable the “link register save elimination” optimization. This messes up with leaf functions. Consider the following trivial function:
Notice that, unlike in the previously shown GCC frames, here the fp register is made to point to the saved fp in the stack, rather than the saved lr. This means that an unwinder will (1)wrongly read a next node pointer instead of the function return address that it would expect, (2) will interpret whatever random variable was pushed in the stack immediately before as the next node in the call chain.
I’m surprised I only caught this long after having written an unwinder for GCC frames and having seen it produce sensible flamecharts, but I’m pretty sure this is not just a synthetic problem, since I can see the same problematic assembly by objdump’ing GStreamer libraries.
The deprecated APCS frames (-mapcs-frame) are not affected by this bug.
Getting the top frame is racy during the prologue
At the top of a stack trace you expect to see the currently running function, at the currently running instruction. This is normally obtained by reading the value of the pc register. Then, by looking at the fp register and inspecting the topmost frame record we can see who called this function and traverse the chain.
However, this also means there is a small window of time from the moment a call is done with bl and until the fp register is updated to point to the newly created frame record in which the pc register points to the callee and the caller is recorded in the lr register, but hasn’t been put in a frame record yet.
This results on the caller function seemingly disappearing from the stack trace for a brief moment, as seen here in a instruction-per-instruction simulation:
I can’t think of an alternative call chain traversal algorithm that solves this problem using only the stack and registers. While it seems tempting to also make use of the lr register directly to reconstruct the missing frame, that causes other problems later when the callee returns. I’m also not the first person to point out this problem.
Conclusions
Frame pointers in ARM32 are messy — especially compared to ARM64 or x86_64. A standard ABI for them has only been specified few years ago, with support for it is pretty spotty and divided into incompatible alternatives.
The status of frame pointers for ARM32 in GCC is much worse than I thought when I started working on this: my impression now is that the ostensibly deprecated -mapcs-frame is the only frame pointer ABI GCC handles in a reliable way, and I wouldn’t be too surprised if it turned out that any usefulness of the non-APCS frame pointers in ARM32 with GCC is coincidental rather than intentional. This is certainly not helped by the long lasting specification void in this area.
The default frame pointer ABI of GCC is only reliable during non-leaf functions and as long as Thumb is not used. With that big caveat, they’re still potentially useful. Furthermore, the GCC-specific deficiencies I’ve explained here could be fixed, especially now that there is some official ABI guidance.
Clang has positively surprised me during my investigation. I started looking at it only for comparison, but was happy to see support for the new AAPCS frame pointer ABI in Thumb as well, as well as a general good handling of edge cases.
On top of that, seeing the limitations of frame pointers has also made me a bit curious about the alternative approaches for improved accuracy. Most of those require lookup tables and therefore are generally going to be slower, but how much they can be optimized is still an area of ongoing research.
Additional resources
Analyzing code that uses the stack by hand is error prone, so eventually I wrote a simulator for testing frame pointer ABIs and the algorithms to traverse them.
If you want to look at the compiler sources, you’ll be mostly intersted in:
clang: llvm/lib/Target/ARM/ARMFrameLowering.cpp. Contains the code for generating prologues and epilogues. Search FramePtr to find the relevant code.
gcc: gcc/config/arm/arm.c. Look for HARD_FRAME_POINTER_REGNUM. The prologue contents are emitted in arm_expand_prologue().
The earliest variant of APCS—referred to as APCS-A—mapped sp to r12 instead of r13. fp was also mapped to r10 instead of r11. This is explained in page 1762 of the RISC OS Programmer Reference Manual (1989), which describes what would later be called APCS-2. I’m also leaving aside many complexities of APCS variants, most notably chunked stacks, where the program stack wouldn’t be in contiguous memory, but instead in a linked list of chunks, useful for multi-threading in processors without a Memory Management Unit. ︎
Update on what happened in WebKit in the week from August 17 to August 24.
Another periodical packed with updates on the graphics, multimedia, and
tooling fronts. Which sure has to do with preparing for the upcoming 2.54.x
release series, that now has release candidates published. Also, do not miss
a new stable release being published with fixes for security issues, and
make sure to update.
Cross-Port 🐱
Fixedflakiness in the Web
Inspector heap snapshot tests.
Extended the webkit-sysprof analyze
tool cover the remaining marks emitted along the rendering pipeline, from
RenderTreeBuild and CompositingUpdate through FinalizeRenderingUpdate,
RenderLayerTree and WaitForCompositionCompletion down to the individual
tile marks, pulling the tile count and the dirty region out of the mark
messages as statistics next to the durations. The statistics tables also gained
mean and median columns, so a captured trace now shows where the time in a
frame actually goes.
Fixed test
fast/canvas/canvas-composite-text-alpha.html, and improved the state of
several other tests which relied on setTimeout().
Touch events are now dispatched to the EventDispatcher thread in the Web
Process, enabling smooth scrolling even when the main thread is busy.
Additionally, this change fixed a bug where precise scrolling delta wheel
events, dispatched by touchpads, failed to trigger asynchronous scrolling.
Fixed several accessibility related tests and added support for missing
keywords in the GLib-based ports (GTK & WPE):
Video frame processing now relies on the driver's implicit YUV to RGB
conversion, steered by the colour space and sample range hints taken from the
frame colorimetry, with a hint-free import as fallback.
Graphics 🖼️
Fixed how <feImage> paints its referenced
element in the Layer-Based SVG Engine
(LBSE), which still used a helper written for the legacy SVG engine, where SVG
content never had layers, so it used to paint renderers directly and skipped
any child that owns a RenderLayer under LBSE, silently dropping its
opacity, mask, filter or 3D transform. The referenced content is now painted
through the layer tree, the way <mask>,<clipPath>, <pattern> and
<marker> content already is.
Made SVG maskno longer force a
RenderLayer in the Layer-Based SVG
Engine (LBSE), mirroring the earlier change for
clip-path. A mask is now applied
during painting by SVGNonLayerClippingAndMaskingScope, which opens one
transparency layer capturing the renderer's foreground and composites the mask
over it afterwards, and which also absorbed the clips that cannot be expressed
as a path. A container with a mask keeps its layer, since the mask covers its
whole subtree, while a leaf stays layer-free. This further reduces the layer
overhead that has been holding LBSE back against the legacy SVG engine.
Skipped scroll coordination for
composited layers that have no scrolling role, where the per-layer update
previously walked every branch to detach roles the layer had never registered
for, only to hand back the parent node ID unchanged. Cutting that work out
shortens every compositing update, which matters for composition-heavy
workloads.
WebKitGTK
2.52.6 and
WPE WebKit 2.52.6 have
been released, including a number of fixes for security issues covered in the
accompanying security advisory WSA-2026-0005
(GTK,
WPE). It is recommended
for everybody to update to these stable releases.
Stabilization for the upcoming 2.54.x release series for both the GTK and WPE
ports is ongoing, with the first stable release, 2.54.0, expected around
mid-September 2026. In the meantime release candidates WebKitGTK
2.53.91 and
WPE WebKit 2.53.91 have
been released.
Those interested in previewing the work done by the team in the last half year,
including the new Skia-based compositor that is expected to eventually replace
the aging TextureMapper, may want to give them a try and report any issues
found in Bugzilla.
Here's some interesting stuff about browsers you might not know, and a new API proposal that might interest you...
You probably already know that if you have an editable area in a page with the spellcheck=true attribute set on it, then when a user clicks inside that area, it marks words as spelling errors, and you can style spelling errors with CSS. What you might not know is that feature is carefully designed and implemnted to avoid the huge fingerprinting risk of letting people know what's in your dictionary. A lot of the actual details are left to implementations and this means that not only will each OS/language highlight different spelling errors, but so will different browsers on the same machine, or even different profiles in the same browser!
But, if you think about websites and apps, they are highly likely to be accepting input related to something fairly specific, and highly unlikely to be in a common dictionary. Right? Online education is a great example where you'll find students writing words in different domains that are very common in that domain, but aren't in the common dictionary. Mathematics has its own words, so does chemistry, astronomy, and law. But schools are just one example. There are sites related to the stock market - lots of things there might look like gibberish otherwise. Or your hospital and doctor reports. The sites and apps for wine afficianados, or coffee lovers. There are sites where you submit fan fiction. There are forums where you discuss web development or cloud infrastructure. All of these will have common words that aren't in a general purpose dictionary.
That's a problem because it means we're marking lots of words as misspelled, but they aren't. Too many false positives and we easily overlook the ones that really are missspelled. In fact, in some cases it can even feel like more of an annoyance than a help.
So, there is a proposal currently in HTML for a new API called SpellCheck Custom Dictionary. For v1 the proposal is dead simple. It introduces a new document.spellCheckCustomDictionary with exactly two methods: .addWords(listOfWords) and .removeWords(listOfWords) - where listOfWords is an array of Strings. Those words are simply added to (or removed from) a Set internally which is consulted before consulting any other dictionaries (remember, there can be several) for the lifetime of that document. It doesn't affect other pages or the profile dictionary, or the browser dictionary or the OS dictionary, or any other things.
This is currently implemented by Igalia, with funding from Bloomberg Tech. It is currently available in Chrome Canary behind the experimental web platform features flag, and is scheduled to be shipping in on September 8, 2026 behind the same flag.
Because of its simplicity, it also works with JSON pretty nicely, you can just fetch a JSON array and call .addWords with the result. Of course, in practice you'll probably want to do this as a kind of progressive enhancement, not load the JSON immediately, and maybe handle and report various errors. For a whole lot of developers and use cases, it seems to me that a declarative API would be ideal. But we're not there yet. We have more to figure out with regard to how to express more than exact matches and so on. So, we'll get there... I hope.
The script will wait until the initial parse is complete and then check for support. If the browser supports the custom dictionary API, it will load and add the words.
There is a /src and /dist version of this and it's very tiny (441 bytes over the wire with Brotli) and I expect it works for most common stuff.
It's "rough" though and not exactly how we'd probably expect a real implementation to work. For example, if you remove the link, it doesn't remove the words. If you change the href, it doesn't do anything, and so on. A real implementation would probably do those things. So, if you're interested in playing with something more complete, I've also included a -complete version of each: src/spellcheck-dictionary-loader-complete.js and dist/spellcheck-dictionary-loader-complete.min.js. The latter is still only 770 bytes over the wire with Brotli, but it's up to you how important that use is to you.
You can get all of the versions from this repo where there is also a start on several domain dictionaries to play with. What I think would be really great is to have some shared dictionaries that we work on together, so feel free to send PRs for additional words, this is really only a mostly generated starting list for demonstration purposes.
Please, let us know what you think - and thanks again to Bloomberg Tech for the funding!
Update on what happened in WebKit in the week from August 10 to August 17.
Following an extra packed periodical, this week we get back to a more
regular pace with two nice bugfixes, and a new tool to analyze WebKit
performance on Linux!
Cross-Port 🐱
The webkit-sysprof toolkit landed in main thus introducing a set of tools for processing Sysprof.syscap capture files recorded from WebKit (GTK/WPE ports). It extracts marks (timeline events) and counters (time-series metrics) from a capture and lets one dump, summarize, analyze, or plot delta-time histograms for them.
Graphics 🖼️
Fixed filters specified on the outermost <svg> element in the Layer-Based SVG Engine (LBSE), where a filter: url(...) reference on an SVG root was silently dropped because the layer code skipped it, as the legacy engine used to apply it by itself. The filter region is now resolved against the SVG root's border box in its container's coordinate system, since the outermost <svg> is a replaced element in the CSS box tree, not part of the SVG user space its children live in.
Avoided serializing gradient and pattern transforms just to answer a presence check in the Layer-Based SVG Engine (LBSE). Asking hasAttribute() whether gradientTransform or patternTransform was specified forced the transform list to be serialized into the attribute map whenever the base value was changed through the SVG DOM, even though that string is never read back, so the check is now answered directly from the typed accessor.
Update on what happened in WebKit in the week from July 28 to August 10.
Quite a packed pair of weeks this time! The range of updates is big, but some
highlights are the handful of Layer-Based SVG Engine updates, performance
improvements, and the new WPE APIs. Finally, the Web Engines Hackfest
recordings are now published!
Cross-Port 🐱
Fixedwebkit_website_data_get_size() looking up sizes for localStorage, indexedDB, and the DOM Cache.
Recovered a MotionMark compositing regression in the Skia backend, where respecting damage information during compositing cost about 20% on the composition suite and more than 50% on two of its tests. Restricting a draw to the damaged area means splitting it into source-rect-to-destination-rect pieces or drawing it under a device-space clip, and neither is needed when the damage already covers the whole draw, which is the common case in those tests because a composited layer is much smaller than a damage grid cell. Those draws are now issued exactly as they would be with damage turned off, avoiding a clip path that flushed the image set batch and left it an order of magnitude smaller, and with the regressions gone, using damage information for compositing was enabled again along with unifying damaged regions that are sent to the system compositor.
Skipped a per-frame visual overflow recomputation in the container paint cull of the Layer-Based SVG Engine (LBSE). The cull used a cached overflow rect that was recomputed by unioning all descendant bounds on a miss, which happened every frame for containers with an animated transform. It now only runs when the rect is already cached.
Skipped the outline paint pass for SVG renderers without an outline in the Layer-Based SVG Engine (LBSE). Every shape used to be painted twice per frame, the second pass being a no-op in the common outline-free case, so guarding it behind hasOutline() removes a redundant traversal from every frame.
Fixed masked SVG content being cut off at the edges in the Layer-Based SVG Engine (LBSE), where the mask image was sized over the enclosing integer rect of the mask content bounds in device space while the transparency layer clip was computed differently, losing the outermost pixels. An SVG renderer that is a box (<text>, <foreignObject>) also used the CSS mask clip rect derived from the border box, which leaves out SVG content spilling outside it, and now uses the visual overflow rect instead
Fixed most of the remaining <mask> issues in the Layer-Based SVG Engine (LBSE): masks were displaced on targets whose children carry transforms, the mask region given by x, y, width and height was ignored so content reaching past it was not cut off, and the cached mask image was never dropped on layout, leaving a resized viewport masking with an image rasterized for the old size.
Stopped rebuilding objectBoundingBox gradients on every layout size change in the Layer-Based SVG Engine (LBSE), which used to discard the cached gradient and re-collect its attributes (serializing every animated property back to a string, including gradientTransform) on the next paint. That work is wasted for objectBoundingBox units, whose coordinates resolve against the object bounding box with the userspace transform recomputed on every paint anyway, so only the clients are repainted now, while userSpaceOnUse gradients resolve against the viewport and are still invalidated as before.
Cached the SVG fill and stroke paint server directly on the renderer in the Layer-Based SVG Engine (LBSE), instead of in the shared referenced-resources table living in a renderer's rar data, where every fill and every stroke paid the cost of a hash map lookup just to reach the cache, which gives a small win on the MotionMark/Suits performance test. It also fixed a shape referencing a paint server that does not exist yet, which kept painting unfilled once an element finally took that id, because the shape registered itself as a pending resource under the full resolved URL while the lookups used the bare fragment identifier.
Sped up mapping the paint dirty rect through transforms in the Layer-Based SVG Engine (LBSE). Transformed SVG paints inverted the full 4x4 matrix on every paint, and now use the cheaper inverse of the 2x3 affine transform whenever the transform is affine, falling back to the 4x4 inverse only for 3D transforms.
Made SVG clip-path no longer force a RenderLayer in the Layer-Based SVG Engine (LBSE). A bare clip is now applied during painting through a shared ClipPathPaintScope, a scope object that sets up the clip in its constructor and tears it down afterwards, handling CSS basic-shape and box clips as well as SVG clipper resources so both regular CSS boxes and SVG content share one path. This is a further step in removing the intrinsic need for layers on SVG renderers, continuing the effort to close the performance gap between LBSE and the legacy SVG engine.
Fixed dynamic x and y updates on SVG <foreignObject> elements, which stopped taking effect after the viewport geometry started being derived from the resolved style. The x, y, width and height attributes are presentation attributes mapped to the CSS x, y, width and height properties, but only width and height marked the presentational hint style as dirty when they changed, so a style recalc never ran for x and y and layout kept reading stale values. All four geometry attributes now invalidate the presentational hint style, matching how <rect> handles its geometry, so setting x.baseVal.value from script repositions the <foreignObject> as expected.
Added support for external and data: URL references to clip-path, markers and paint servers (gradients and patterns) in the Layer-Based SVG Engine (LBSE). Until now the LBSE resource resolvers only looked for the referenced fragment inside the local document, so markup like url(file.svg#id) silently resolved to nothing, while filters already worked and the legacy SVG engine handled all of these since a few weeks.
Fixed SVG filters vanishing on elements with a very large bounding box in the Layer-Based SVG Engine (LBSE). The filter region was seeded with the element's object bounding box and then united with each referenced <filter> region, but a referenced <filter> brings its own region, and that region alone decides where the filter paints, so the union could grow far past the image buffer limits and get clamped down to scale that made the output disappear. When every function in the chain is a <filter> reference the bounding box is now dropped and only the referenced regions are kept, matching what the legacy SVG engine does, while objectBoundingBox filter units still resolve exactly as before and HTML/CSS filters are untouched.
WPE WebKit 📟
Add the WebView::run-color-chooser API to WPE to allow applications to show color choosers, similar to WebKitGTK's API.
The WPE port can now use libsecret for persistent credential storage, reusing the implementation from the WebKitGTK port. This is disabled by default and can be toggled passing -DUSE_LIBSECRET=ON to CMake when configuring the build.
Add the WebKitClipboardPermissionRequest API to WPE, allowing support for the clipboard permission similar to WebKItGTK.
Community & Events 🤝
The videos of the Web Engines Hackfest 2026 talks have been published, including the sessions from the new WPE WebKit track. This year the following WebKit-related talks have been recorded:
Refactoring composition in WPE with Skia, by Carlos García Campos, about the new Skia-based compositor currently in development that has been recently featured in our weekly dispatches.
No QA, No WPE: Catch Regressions Before You Do, by Claudio Saavedra and Nikolas Zimmermann, about how continuous integration and quality assurance has been improved (and continues to) to improve stability and performance in the GTK and WPE WebKit ports.
WPEPlatform API for Android, by Alejandro G. Castro, which is not only this year's update on WPE Android but also covers how the platform-dependent components have been partially rewritten and migrated to the WPEPlatform API.
The XHCI specification has a optional debugging capabilities that is available
via the extended capabilities set. This set could be enabled by vendor to pass
along additional information around the hardware - especially information that
would help in debugging. In this post, we are going to identify a USB controller
(on a target) that supports this debug capability and try to enable/verify it
on the host side. At last, we are going to also look at the debug capabilites
associated with early boot phase of the kernel
Requirements
USB 3.1 Superspeed cable A-A or A-C cable
Target with supported xHCI debug capability
Host machine
Checking if xHCI debug capability is supported
We need to verify if the target machine has xHCI debug capability supported.
We can simply find out by peeking into our sysfs device information:
($) find "/sys/devices" -type f -name "dbc"
If this command returns a device, we can be sure that the xHCI controller
is present with debug capability.
On the host machine which is connected via the USB 3.1 SuperSpeed cable,
we can verify that the USB host controller recognises the debug device.
Running dmesg on host:
[110351.933236] usb 4-2: new SuperSpeed USB device number 6 using xhci_hcd
[110351.944701] usb 4-2: New USB device found, idVendor=1d6b, idProduct=0010, bcdDevice= 0.10
[110351.944732] usb 4-2: New USB device strings: Mfr=1, Product=2, SerialNumber=3
[110351.944742] usb 4-2: Product: Linux USB Debug Target
[110351.944750] usb 4-2: Manufacturer: Linux Foundation
[110351.944756] usb 4-2: SerialNumber: 0001
[110351.990401] usbcore: registered new interface driver usb_debug
[110351.990438] usbserial: USB Serial support registered for debug
[110351.990452] usbserial: USB Serial support registered for xhci_dbc
[110351.990502] usb_debug 4-2:1.0: xhci_dbc converter detected
[110351.990786] usb 4-2: xhci_dbc converter now attached to ttyUSB0
You can attach any serial console utility to interact with target device
using xHCI debug capabilities.
Linux kernel early boot setup
xHCI is also helpful to output early kernel boot stage logs. This phase is the
intialization process just after the bootloaders hands over control. To enable
early kernel debug, we need to configure the kernel with proper kconfig and
pass debug parameters in the kernel commandline.
Build the kernel with following kconfig enabled:
CONFIG_EARLY_PRINTK_USB_XDBC
And for the kernel commandline, append:
earlyprintk=xdbc
Early boot IO remap
Now that you have had gentle introduction to this debugging capability, we
are going briefly mention about fixed boot-time mappings known as fixmaps.
The early boot has a special set of operations that are carried out before
the standard virtual memory and device drivers are active. In this phase, hardware
registers are allowed to be accessed via fixed boot time mapping and page tables.
Generally the xHCI debug capability reside under the extended capabilities given
by vendor and can be mapped in fixed boot time mappings. However, we have such
devices coming up, that have extended capabilites size much bigger than the fixmaps.
In this case, the PCIe memory range would fail to get IO remapped using
early_ioremap() call.
And this is the exact place that is triggered at in mm/early_ioremap.c
	/*
	 * Mappings have to fit in the FIX_BTMAP area.
	 */
	nrpages = size >> PAGE_SHIFT;
	if (WARN_ON(nrpages > NR_FIX_BTMAPS))
		return NULL;
We shall call this issue as extra extended capabilities issue for lack of
a better work!
Solution to extra extended capbilities for xHCI
Now that we are seeing such hardware in the market where the fixmaps can be
a limiting factor, we have to find a solution for it. This has been a focus
of my work and after a few iterations, we have
this patch
for review! Feel
free for review comments or follow it for curiousity. There might be few more
followups on this particular approach – so stay tuned for that.
Update on what happened in WebKit in the week from July 14 to July 27.
This two-week update includes plenty of changes to the Skia compositor,
changes to multimedia support, three blog posts, and assorted improvements.
Cross-Port 🐱
The Web Inspector “Layout & Rendering” timeline now shows a Layout Invalidated event for every element
that needs relayout, not just the layout root (with the old root-only event
renamed to Layout Scheduled). This unveils why some layouts take much longer
than others. No more guessing which of dozens of nodes is actually to blame!
The webkit://gpu page has gained a dark
style, which will be used when the
system settings indicate that dark mode is preferred by the user.
Multimedia 🎥
GStreamer-based multimedia support for WebKit, including (but not limited to) playback, capture, WebAudio, WebCodecs, and WebRTC.
The experimental GstWebRTC backend was
removed and libwebrtc usage was
enabled in the main branch. We hope
to enable WebRTC support by default in the 2.56 series, scheduled around March
2027.
MP4 edit lists support was enabled in
the MSE backend, improving timestamp accuracy, specially when handling of
B-frames.
Graphics 🖼️
Split the compositing walk in the
Skia compositor into a damage pass and a paint pass, so the frame damage is
known before the first draw. The damage pass walks the layer tree with a
SkNoDrawCanvas in place of the real canvas, so every draw is discarded and
only the damage is collected. Both passes run from a single paint() that
applies animations and computes the transforms once, so the two see the same
tree. Knowing the damage up front is what lets the compositor eventually paint
only the parts of a frame that actually changed.
Wired up damage-driven compositing on
the Skia compositor, so a frame re-composites only the region that actually
changed instead of the whole surface, when the
UseDamagingInformationForCompositing feature is enabled (not yet on by
default). Each frame's damage is combined with what each swap-chain target
still needs to redraw since it was last drawn into, and the clear and every
draw are clipped to that region, which is a milestone towards no longer
repainting untouched pixels every frame.
Made the root layer collect the frame damage
itself in the Skia compositor, instead
of having each layer report its own changes. Reporting leaves a gap whenever a
layer is in no position to report, e.g. a destroyed one took its painted rectangle
with it, so what it had drawn stayed on screen. The root now holds one rectangle per
layer and compares it against what each frame's walk finds, so a layer that
moved is repainted in both places, and a layer the walk never reaches is
repainted where it used to be and dropped. Nothing has to notice anything for
the pixels it left behind to be repainted, which is what makes it safe to
restrict composition to the damaged region by default in future commits.
Limited every content draw to the target's repaint
region in the Skia compositor, so a
composited frame can redraw only the pixels that actually changed. Each content
type restricts itself to the region's rectangles rather than clipping the
canvas, since a multi-rectangle clip cannot be a hardware scissor and would make
Skia build a mask and break batching. This is the groundwork for damage-driven
compositing, which stays off by default behind the damage-tracking feature
flag, as the compositor still passes no region and nothing is restricted yet.
Made each swap-chain target track its own
damage since it was last current.
Repainting only what changed is correct only when drawing into the target that
holds the previous frame, but the swap chain hands back whichever target is
free, and that one is a frame or more behind. Each frame's damage is now added
to every target as it is recorded and cleared from a target when that target is
presented, instead of being built as a side effect of reading it.
Taught the tile and image draws in the Skia compositor to split themselves by
damage rectangle, so a frame only repaints
the parts of a layer that actually changed. A new SkiaDamageRegion holds the
frame's damage in device space and is built once per frame, and each draw is
restricted to it: skipped when it touches no damage, split into one sub-draw
per damage rectangle it overlaps, or drawn under a device-space clip when a rotated
or skewed transform rules out working with rectangles. Nothing feeds a damage region
in yet, so every draw still paints in full—this prepares for future patches
enabling using damage information in the composition
Fixed missing repaints when
compositor-applied layer state changes dynamically in the Coordinated Graphics
backend. A layer recorded damage when its backing store re-rendered or a new
contents buffer arrived, but the compositor also handles filters, masks, clip
path changes, the contents rectangle, the contents tiling, the blend mode and
contents visibility, and changing any of those alters the pixels it produces
without dirtying a tile. Those setters now damage the whole layer, so a
compositor that repaints only the damaged rectangles no longer leaves the previous
frame's pixels on screen.
Community & Events 🤝
Nikolas Zimmermann has written a two-part blog series about the current the new
Layer-Based SVG Engine (LBSE), with the first post covering the effort to
reduce layer
overhead
using layers conditionally, and the second about how compositing is being
implemented
and the complications introduced due to paint ordering rules.
Loïc Le Page has published a blog
post explaining how to
use the new WPEPlatform
API to implement a
custom WPE integration. While presented example uses
GLFW and EGL to show Web content on an X11 window, the
concepts are useful for anyone looking into embedding WPE.
In the past, when you needed to adapt WPE WebKit to a new platform, or integrate it with your own system/application
not based on Wayland, you had to develop a specific backend. I wrote two blog posts in the past about this topic
(One about the process of creating a new WPE backend and another about
using EGLStreams in a WPE backend) and, to be honest, it was not really
straightforward.
Since WPE WebKit 2.50, a new system has been designed to replace all this by a more modern and intuitive approach,
making a lot easier to integrate WPE WebKit into your application. The new API is called WPE Platform and
allows you to define the equivalent of the old backend system into your own executable. At the moment of this post
(version 2.52), the WPE Platform is still in development and the official release is foreseen for the next stable
version 2.54. Nevertheless, it is already stable enough to start playing with it.
This post is going to explain step by step how you can use WPE WebKit as a web view inside a simple X11 window using
EGL with full hardware acceleration and zero-copy of the graphical hardware buffers while avoiding the complexity of
writing an external backend. The X11/EGL window itself will be managed by the GLFW library.
N.B. GLFW is only used here as a convenient, cross-platform way of creating a window and an EGL context with a
minimal amount of code. It is not the topic of this post. What matters here is the generic contract to follow
to implement a custom WPE Platform. It consists basically in three GObject classes and a small set of virtual
methods that would look exactly the same if we had chosen SDL, Qt, or directly a raw X11 Window instead of GLFW.
The reference project for this post is
blog-the-wpe-platform-api. It implements a complete and
minimal WPE Platform taking into account the basic user’s interactions (keyboard, scrolling, mouse, etc…).
The version 0.0 of this code implements
the bases to initialize a web view using WPE (it will need a Wayland compositor to run). While the version
1.0 also integrates all the components
needed to implement the WPE Platform. From the implementation point of view, the only difference is the usage of
a custom WPEDisplay instead of the default one:
If your operating system has a development package for libWPEWebKit-2.0 version 2.52 or above, the easiest way is to
install this package from your distribution. Else, you can build WPE WebKit by yourself:
or by using the webkit-container-sdk reading the instructions
provided on the project,
The following instructions are for building the library locally out of any container. You first need to clone the
WPE WebKit project, version 2.52 or above:
mkdir wpe-webkit
cd wpe-webkit
git clone --depth1-b wpewebkit-2.52.5 https://github.com/WebKit/WebKit.git
Then install clang and all the needed development dependencies by calling: ./WebKit/Tools/wpe/install-dependencies.
Download the build-wpe.sh and set_dev_env.sh
scripts and copy them to your working folder containing the WebKit source code. Then execute:
It will build and install WPE WebKit into ./dist-wpe. The set_dev_env.sh script will set the environment
variables to use the files in ./dist-wpe for pkg-config and for the runtime.
Install the GLFW development dependency (package libglfw3-dev on Ubuntu/Debian).
Configure and build it:
cd wpe-glfw-platform
meson setup build
ninja -C build
You can now run it by calling ./build/wpe-glfw [url].
N.B. In the version 2.52.5 of WPE WebKit, the Skia multithreaded hardware-accelerated compositor is not fully
stable with some specific GPUs. In particular, with NVidia graphic cards, it may crash when the allocated surfaces
are resized to resolutions bigger than HD. If this is your case, you can disable the Skia hardware-accelerated
compositor by setting the environment variable WEBKIT_SKIA_ENABLE_CPU_RENDERING=1. In some cases, you don’t need to
disable the whole hardware-acceleration for the compositor. Sometimes just configuring the hardware compositor to use
only one thread is enough. You can do that by setting the environment variable WEBKIT_SKIA_PAINTING_THREADS=1.
A WPE Backend sits at the crossroads between the WPEWebProcess, in charge of running the ThreadedCompositor,
and the application process, which presents the resulting frames. Both processes must load the same backend shared
library, and that library has to implement an IPC layer to move each handle from one process to the other.
graph LR;
    subgraph SA[<b>WPEWebProcess</b>]
        A(ThreadedCompositor)
    end
    subgraph SB[<b>Application Process</b>]
        C(User Application)
    end
    A -->|draw| B([WPE Backend shared library<br/>Loaded by both processes]) --> C
The WPE Platform API removes this shared library and all the IPC burden. WPE WebKit still spawns a
WPEWebProcess to run the ThreadedCompositor but the transfer of the rendered frames from the WPEWebProcess to the
application process is now handled internally by WPE WebKit itself. As an application developer, you no longer need
to implement any IPC: you only receive a ready-to-use WPEBuffer object, backed by a DMA buffer or by shared memory,
directly into your application process.
graph LR;
    subgraph SA[<b>WPEWebProcess</b>]
        A(ThreadedCompositor)
    end
    subgraph SB[<b>Application Process</b>]
        B[WPEDisplay<br/>WPEToplevel<br/>WPEView]
        C(User Application)
    end
    A -->|"WPEBuffer (handled internally)"| B --> C
What used to be a shared library exposing five libwpe interfaces is now just three plain
GObject classes (WPEDisplay, WPEToplevel and WPEView) that you need to subclass
and link directly into your application binary.
WPEDisplay is the entry
point. It owns the connection to the native graphical system (here, an EGL display bootstrapped through GLFW) and
acts as a factory for the toplevel window and the web views.
WPEToplevel is roughly
the equivalent of a native window. It owns the actual GLFW window, translates native window events (keyboard, mouse,
scroll, focus and resize) into WPEEvent instances, and exposes the usual window operations to the
WPE Platform API (resizing, setting the window title and switching to fullscreen).
WPEView is where the web
page is actually drawn. It receives a new WPEBuffer each time the ThreadedCompositor has produced a frame and is
responsible for presenting it on screen.
graph TB;
    subgraph SA[<b>WPEGLFWDisplay</b>]
        A["connect(): create the EGL display through GLFW"]
    end
    A -->|create_toplevel| B[<b>WPEGLFWToplevel</b><br/>owns the GLFW window]
    A -->|create_view| C[<b>WPEGLFWView</b><br/>renders one WPEBuffer per frame]
    B -.attach view and broadcast window events.-> C
A single WPEDisplay can create several toplevel windows, and a toplevel window can have several views attached to it
(think of tabs sharing one native window). In our example application we only create a single toplevel window with a
single view.
Implementing WPEGLFWDisplay: bootstrapping EGL through GLFW #
The
WPEGLFWDisplay::connect(…)
override is called only once, when wpe_display_connect(...) is invoked from main(). It initializes GLFW, requests
an EGL/GLES2 context for every window that will be created afterwards, and creates a tiny hidden bootstrap window used
only to force GLFW to set up its EGL connection:
// Request EGL + GLES 2 context for all subsequent window creationsglfwWindowHint(GLFW_CONTEXT_CREATION_API, GLFW_EGL_CONTEXT_API);glfwWindowHint(GLFW_CLIENT_API, GLFW_OPENGL_ES_API);glfwWindowHint(GLFW_CONTEXT_VERSION_MAJOR,2);glfwWindowHint(GLFW_CONTEXT_VERSION_MINOR,0);glfwWindowHint(GLFW_VISIBLE, GLFW_FALSE);// Create a tiny hidden window so GLFW can initialize its EGL connection
self->init_window =glfwCreateWindow(1,1,"",NULL,NULL);...
self->egl_display =glfwGetEGLDisplay();
If we want to be able to transfer the frames with zero-copy, keeping them in the GPU memory, we will need a valid
WPEDRMDevice. It is also initialized during the display connection, using the EGL_EXT_device_query extension to
fetch the device associated with the current EGL display:
If WPEGLFWDisplay::get_drm_device(…)
returns NULL, the produced frames will be transferred to the application using shared memory, which implies copying
the frames content back and forth between the GPU and the CPU.
Implementing WPEGLFWToplevel: the window and its events #
WPEGLFWToplevel is where the actual GLFW window is created. It is important to manage this creation in the
WPEGLFWToplevel::constructed(…)
override rather than in the init() function because WPEToplevel::constructed(...) is resetting the toplevel
registered dimensions.
staticvoidwpe_glfw_toplevel_constructed(GObject* object){// It is important to initialize the window in the `constructed` virtual// method and not in the `init` method because the parent class// (WPETopLevel) resets the toplevel window size in this call.G_OBJECT_CLASS(wpe_glfw_toplevel_parent_class)->constructed(object);
WPEGLFWToplevel* self =WPE_GLFW_TOPLEVEL(object);// All window hints have already been configured by the display
self->window =glfwCreateWindow(DEFAULT_WIDTH, DEFAULT_HEIGHT,"",NULL,NULL);...// Communicate the initial window size to the WPETopLevel, so when// the WPEView is attached, it can be resized immediately to the correct// dimensions.wpe_toplevel_resized(WPE_TOPLEVEL(self), DEFAULT_WIDTH, DEFAULT_HEIGHT);}
Once the window exists, each GLFW events callback (for the keyboard, mouse, window resizing, etc…) is translating the
window events into the corresponding WPEEvent and broadcasts those events to every view currently attached to this
toplevel window.
The collection and dispatch of the GLFW events themselves are ensured by calling glfwPollEvents(). As this function
is managing the events for all the GLFW windows, it is configured in the
WPEGLFWDisplay as
a Glib source. This way all GLFW window events are collected, dispatched, translated into WPEEvent and broadcasted to
each view from the main application thread running the Glib main loop.
The rest of the class is a set of straightforward virtual method overrides mapping WPE window operations onto GLFW
calls to allow the WPE Platform API to set the window title, change the toplevel window size or switch to
fullscreen.
Implementing WPEGLFWView: turning a WPEBuffer into pixels #
WPEGLFWView is the class doing the actual OpenGL ES drawing. The main interesting override is
render_buffer(…),
called by WPE WebKit every time a new frame is ready to be presented. The rest of the code is basically some
boilerplate used to render a texture on a plane.
The WPEBuffer provided by WPE WebKit can be a wrapper for a DMA buffer allowing to draw the frame without copying
it to the main memory, or it can be the wrapper of a classical block of shared memory if the DRM device was not
available in
WPEGLFWDisplay::get_drm_device(…).
So, when drawing, we first try to get the EGLImage wrapped by the WPEBuffer and, if not available, we fall back to
the shared memory:
// Try to import the WPEView content through an EGLImage to allow a// zero-copy transfer. This is only going to work if the EGLDisplay is// associated with a valid DRM device returned by// WPEDisplay::get_drm_device().
gpointer egl_image =wpe_buffer_import_to_egl_image(buffer,NULL);if(egl_image){
self->glEGLImageTargetTexture2DOES(GL_TEXTURE_2D,(GLeglImageOES)egl_image);glUniform1f(self->uniform_swap_rb,0.f);}else{// Else, fall back to the SHM buffer. In this case the WPEView content// is copied through the CPU into shared memory.
GBytes* pixels =wpe_buffer_import_to_pixels(buffer,&shm_err);...
gconstpointer data =g_bytes_get_data(pixels,NULL);...glTexImage2D(GL_TEXTURE_2D,0, GL_RGBA,(GLsizei)buf_w,(GLsizei)buf_h,0, GL_RGBA, GL_UNSIGNED_BYTE, data);glUniform1f(self->uniform_swap_rb,1.f);}
All the resources (the EGLImage or the GBytes pixels array) are held by the WPE WebKitThreadedCompositor and
so, once the drawing is finished, we must signal that the buffer has been rendered and can be recycled:
The first call (wpe_view_buffer_rendered(...)) triggers the rendering of the next frame, while the second call
(wpe_view_buffer_released(...)) informs that the internal EGLImage or GBytes pixels array can be re-used for a
future frame content, avoiding the allocation of new buffers for each new frame.
N.B. The drawing loop in the example is very simplified for the purpose of this post because we are not
repainting the window content when it is damaged for example. We are only doing the drawing sequentially at one place
when receiving a new frame from the web view. In a real application, we may want to keep the current WPEBuffer for
intermediate repainting, until receiving the next frame. In this case, we would call wpe_view_buffer_rendered(...)
for buffer A once it has been drawn but we would call wpe_view_buffer_released(...) only after receiving buffer
B with the next frame content. So, buffer A may be used more than once to repaint the window content like
shown in the following sequence diagram.
sequenceDiagram
    participant A as WPEWebProcess
    participant B as Application Process
    activate A
    A ->> A: Render frame 1 in buffer A
    A ->> B: WPEBuffer A
    deactivate A
    activate B
    B ->> B: Draw frame 1 from buffer A
    B ->> A: wpe_view_buffer_rendered(A)
    deactivate B
    activate A
    A ->> A: Render frame 2 in buffer B
    activate B
    B ->> B: Repaint buffer A
    deactivate B
    A ->> B: WPEBuffer B
    deactivate A
    activate B
    B ->> A: wpe_view_buffer_released(A)
    B ->> B: Draw frame 2 from buffer B
    B ->> A: wpe_view_buffer_rendered(B)
    deactivate B
    activate A
    A ->> A: Render frame 3 in buffer A
    A ->> B: WPEBuffer A
    deactivate A
    activate B
    B ->> A: wpe_view_buffer_released(B)
    B ->> B: Draw frame 3 from buffer A
    deactivate B
The rendering in the current example is not optimized either because the ThreadedCompositor must wait for the
complete presentation of the current frame with glfwSwapBuffers(...) blocking until the drawing is finished. We can
perfectly imagine a multithreaded view where the render_buffer(...) override just posts the current WPEBuffer to a
separate drawing thread. This way the WPE WebKit drawing of the next frame and the presentation of the current
frame on screen would run in parallel instead of waiting for each other.
Glad to see the Web Engines Hackfest covered in the local tech magazine Código Cero. Of course I’m biased, but I’m very happy with the growth of the event and the really interesting discussions that happen there every year.
Update on what happened in WebKit in the week from June 30 to July 13.
The summer continues with many updates to the new SVG engine (LBSE),
improvements to the new Skia-based compositor, some small API additions,
and ever-important stable releases with security fixes.
Roughly halved the cost of the Skia based
compositor on WPE running on Vivante
GPUs with the Etnaviv driver, by turning off Skia's mipmap sharpening option.
That option is enabled by default and makes the Skia shader generator append a
small negative level-of-detail (LOD) bias to every mipmap-capable texture
sample. WPE does not use mipmapping at all, so the bias sharpened nothing,
but it still turned each texture fetch into a LOD lookup, which is a slow path
on the tiled GPUs found in the i.MX series. Disabling it restores usage of
faster, plain fetch operations.
Fixed broken rendering with the Skia
compositor on WPE when super-tiled
textures are enabled on Vivante GPUs. Those tile buffers are allocated padded
up to a multiple of 64 pixels, so the physical texture is larger than the
logical tile, but the Skia backing failed to take this difference into
account, leading to distorted tile images being rendered.
Stopped the Skia compositor from blending opaque
layers on WPE. Every layer was drawn
with the default source-over blend mode, which leaves GPU blending switched on
even for fully opaque layers that do not need it, so the cost was paid on
every composited frame.
Layers that are opaque, drawn at full opacity and using the default blend mode
are now composited with a plain source blend mode instead, which lets Skia
turn blending off and lowers GPU bandwidth usage, benefiting tiled GPUs the
most.
Reading the transform attribute walked the whole transform list and
multiplied every item together again, and that happened around three times per
animation frame for each element, even though the result only changes when the
transform list itself is mutated.
The concatenated matrix is now stored on the element and invalidated whenever
a transform-related attribute changes, so the multiplication runs once per
mutation instead of once per read. This cuts repeated matrix work out of the
per-frame path for animated SVG content.
Painting a container used to set up a clip rectangle for every child shape in
turn, so each shape did its own graphics-context save, clip and restore even
though the clip rectangle was identical for all of them. When there is a
single region to clip to and no child paints into its own layer, that clip is
now established once and shared by every child, transformed or not.
This removes a per-shape save and clip from the hot painting path of SVG
documents with many children.
Every transform flush recomputed the origin for each non-layered SVG shape,
even though it only depends on the transform-origin style and the transform
reference box, and sampling MotionMark's Suits test at fixed complexity showed
that computation taking around 1% of the WebProcess main thread.
The origin is now cached and keyed on the reference box, with a style change
to transform-origin or transform-box dropping the cache, and the fast path
is limited to plain SVG transforms so viewport containers and CSS-transformed
renderers keep computing it directly. This removes a repeated per-shape cost
from animated SVG content, and the caching scope can be widened later.
The default transform-box for SVG is view-box, so every transformed shape
resolved the viewport from the SVG root's content box again on each query,
both when updating its local transform and again during paint. The viewport is
constant after layout, so it is now cached on the <svg> element and only
recomputed when layout actually changes it, on resize, zoom or a viewBox
update. This removes another repeated per-frame computation from the transform
path for animated SVG content.
Once per rendering update WebKit processes every SVG renderer whose transform
changed, whether from script or an animation, and that repaint pass was the
dominant per-frame cost on MotionMark's Suits subtest. Instead of walking each
moved renderer up to its repaint container, the flush now computes each
child's rectangle in its parent's coordinate space, unions the children per
parent, maps that single union up the chain once, and issues one
repaintUsingContainer() call per repaint container rather than one per
shape.
This also stops requesting outline bounds, which for SVG merely duplicated the
visual overflow rectangle, and refreshes the bounding-box and visual-overflow
caches that a layout would normally update, so getBBox() and paint or
hit-test culling never read a stale rectangle. This collapses many
backing-store invalidations into one while keeping the repainted region
minimal, closing the performance gap to the legacy SVG engine.
Non-layer SVG renderers already cache their transform in m_localTransform,
but the painting code path used to recompute it from scratch each time,
concatenating the transform list, applying transform-origin and
multiplying matrices, only because the cached value uses a different transform
origin. The paint transform is now derived directly from the cached one by
translating around the nominal origin, which removes that per-paint
recomputation and cuts the cost of painting transformed SVG content.
Fixed a repaint bug in the
Layer-Based SVG Engine (LBSE) where dynamically changing a marker's
markerUnits or orient attribute left stale pixels behind. Such a change
resizes every shape that references the marker, but a referencing shape
without a layer gets no post-layout position update, so only its new bounds
were repainted—a shrinking marker left its former area on screen.
The visual overflow rectangle, markers included, is now cached at the end of
shape layout while the geometry is still current, so a marker change can
repaint the old bounds before recomputing the new ones. The extra repaint is
limited to markers, since gradients and patterns do not affect a client's
bounds, and the resulting repaint rects are more accurate than the legacy SVG
engine's.
WPE WebKit 📟
Added a new feature flag,
BackForwardCacheWithMedia, which may be used to disable storing pages with
media content in the back-forward cache. This should solve the problem with
hardware decoders kept occupied on low-end devices in case of caching pages
with media after navigation.
Releases 📦️
WebKitGTK 2.52.5 and WPE WebKit 2.52.5 have been released, including a number of fixes for security issues, and therefore it is recommended to update. An accompanying security advisory will be published in the coming days. Additionally, these releases include small improvements and Web compatibility improvements.
In which I share some thoughts about the state of things, and how maybe we could hope to change them.
Back in 2020, after Microsoft gave up on their own engine, I began writing about a topic I called "Web Ecosystem Health". What ultimately makes a healthy system that will last? Over time I became convinced that it is all much more fragile than we realize. In 2021 I wrote Web Rise beginning to detail some of this.
There have been several more articles and a whole series of at least 20 podcast episodes with guests of all types talking about many, many different aspects of this. But, at the heart of it is really how it is all funded.
The other day I asked on social media "Imagine that one of the big 3 web engine stewards, for some reason, decided they would stop. What do you think would happen? Would someone step in and save the project? Who? Or would it just die?" My colleague Eric Meyer (who is on holiday and had no idea I was posting this, or why) replied
My prediction is that people would step in to save it, but the effort would falter and wane over the next several years as contributors lost momentum and interest until finally shuddering to a halt.
And that's kind of why I asked - because I was landing in a sort of similar situation. I mean, I've said it before, but I think maybe even more radically now, we need to diversify investment. Maybe even diverisfy ownership, somehow in a bigger way.
The Supporters of Chromium-Based Browsers (https://socbb.org/ - which I've recently heard pronounced "Sock Baby" and have now latched onto) is an interesting collaborative initiative under the Linux Foundation that some of our discussions helped inspire. Basically, it's a common pool of money that is paid into by Google, Microsoft, Meta and Opera which then tries to fund work and grow contributions from outside those organizations. Together, they decide how the money is spent.
I think it's still "small" though and I wonder how much you could scale it up. I was thinking about this with regard to Servo. Servo is a really interesting project. It gets people excited. It is written in Rust, it's the first one to come without a long history of baggage that it has to deal with. There is so much promise there.
But, it's also not really remotely ready to compete with Blink or WebKit or Gecko, and none of those are standing still. In fact, while Servo can close ground quickly in some cases, there are just far, far fewer people paddling it forward. It takes a leap of faith to believe that we could make it really competitive, and to provide the resources to do it. Again, very few orgs even could carry the load on their own - and it's still kind of fragile if it's just one org too. But what if we could collectively own it. Something more like the Mozilla Foundation, but... better? What if we could get a lot of companies to invest in that dream with the promise that a kind of collective ownership could really change things and that while no one could do it alone, probably we could all bear to take a chance on something with a lot of interesting upside. What makes Servo interesting here is that doens't already have a powerful and weathy steward. Diverisity of ownership it could ensure that the web would remain despite changes to buisness models and so on. It would help give them some kind of a louder voice - but also present really practical compelling reasons for building concensus and compromise -- because no one org is king.
It would be an interesting new challenge in governance and so on, but... It could be really interesting.
While working on Vulkan Video encode support in Mesa, I needed to capture H.265
encoding traces. gfxreconstruct already handled H.264 video and several other
extensions, but VK_KHR_video_encode_h265 was explicitly blocked. Here’s how I
unblocked it and what I learned about gfxreconstruct’s code generation
machinery along the way.
gfxreconstruct is LunarG’s suite
of tools for capturing and replaying graphics API calls. It intercepts Vulkan
(and D3D12) calls at the layer level, serializes them into a compressed binary
trace file, and can later replay that trace verbatim. This is useful for driver
regression testing, GPU bring up, architecture simulation, and bug reporting.
gfxreconstruct has two independent mechanisms that prevent an extension from
being captured.
The first is a runtime blocklist in
framework/encode/vulkan_entry_base.cpp.
A static array called kVulkanUnsupportedDeviceExtensions lists extension name
strings that the layer strips from vkEnumerateDeviceExtensionProperties
results. If your extension is on that list, applications cannot even see it when
the capture layer is loaded, so they never attempt to use it and nothing gets
recorded.
The second is a generation-time exclusion list in the Python code generator.
gfxreconstruct does not hand-write capture and replay handlers for each Vulkan
function. Instead, it parses the Khronos XML registry (vk.xml, video.xml)
and auto-generates thousands of lines of C++ for encoding, decoding, and
consuming API calls. The generator has exclusion lists that tell it which
extensions and struct families to skip entirely.
This part is trivial: open framework/encode/vulkan_entry_base.cpp and delete
the line
VK_KHR_VIDEO_ENCODE_H265_EXTENSION_NAME,
from kVulkanUnsupportedDeviceExtensions. One line. After rebuilding, the layer
reports the extension to applications. But that is not enough: without generated
capture/replay code, intercepted calls would have no handlers.
After removing the exclusions, I ran the generator and hit an error. The
generator could not resolve a len attribute in video.xml for
StdVideoH265HrdParameters.
The problematic members are pSubLayerHrdParametersNal and
pSubLayerHrdParametersVcl. Both are pointers, and video.xml specifies
len="*_max_sub_layers_minus1 + 1" for them. The expression references
*_max_sub_layers_minus1, a field that lives in an outer struct (VPS or SPS),
not in StdVideoH265HrdParameters itself.
gfxreconstruct’s code generator resolves len expressions by walking the
current struct’s members, but it cannot follow cross-struct references. This is
a reasonable limitation: the generator would need to understand the full
semantics of the Vulkan Video specification to know which outer struct provides
the length field.
The fix is a small XML tree patch in
gencode.py.
Before the generator runs, I strip the len attribute from both members:
hrd_type = video_tree.find('types/type[@name="StdVideoH265HrdParameters"]') if hrd_type isnotNone: for member_name in('pSubLayerHrdParametersNal','pSubLayerHrdParametersVcl'): for member in hrd_type.findall('member'): name_elem = member.find('name') if name_elem isnotNoneand name_elem.text == member_name: member.attrib.pop('len',None)
Without a len attribute, the generator falls back to treating each pointer as
pointing to a single element. This is safe for practical capture scenarios where
only one sub-layer is in use.
With the generator changes in place, regenerating is a single command:
uv run --with pyparsing python3 framework/generated/generate_vulkan.py
uv run --with pyparsing ensures the pyparsing dependency is available
without a manual pip install.
The generator overwrites all files under
framework/generated/generated_vulkan_*.cpp and
framework/generated/generated_vulkan_*.h. The diff was substantial: hundreds
of new functions for encoding and decoding StdVideoH265* structs, plus all the
video session parameter handling infrastructure.
The interesting part of this exercise was understanding gfxreconstruct’s
architecture. The capture layer is not a monolithic block of hand-written
interceptors. It is a generator pipeline: Python scripts consume the Khronos XML
registry and emit C++ that handles serialization, deserialization, and replay
for every struct and function in the Vulkan API surface.
This means enabling a new extension is mostly a matter of telling the generator
to stop ignoring it, then fixing any edge cases where the XML description
does not match the generator’s assumptions. The actual capture and replay logic
comes for free once the generator produces code for the extension’s types and
entry points.
If you are considering enabling other video extensions (H.264 encode is still
blocked), the same recipe applies: remove from the runtime blocklist, remove
from _remove_extensions and _remove_video_extensions, regenerate, and fix
any XML len expression issues that surface.
Update on what happened in WebKit in the week from June 22 to June 29.
After a small break after the Web Engines Hackgest, we're back with another
round of updates, this time with a couple of exciting improvements to the
SVG engine, a WebRTC fix, and support for WebP images with the toDataURL()
API.
Cross-Port 🐱
Made RenderLayer creation conditional for SVG renderers in the new Layer-Based SVG Engine (LBSE), so a layer is now only created when one is actually needed for intrinsic reasons (3D transforms, opacity, etc.) instead of unconditionally for every renderer. Plain 2D transforms no longer force a layer and are applied directly during painting. This is the groundwork for follow-up patches that remove the intrinsic need for layers when applying clipping, masking and filters to SVG subtrees. It is an important milestone towards reducing the overhead that has been holding back LBSE performance compared to the legacy SVG engine.
Fixed the paint order of non-composited children around composited SVG siblings in the Layer-Based SVG Engine (LBSE). A layered container paints its children from a single flat list in DOM (and SVG paint) order, but some children are composited into their own GraphicsLayer for reasons like will-change, a 3D transform or certain opacity cases. The flat child list is now split into contiguous paint-order segments at those boundaries, with each run of plain children painted by its own overlay layer placed at the correct depth in the compositor's child list. This keeps every child in its DOM order without giving trailing siblings a RenderLayer or backing store of their own, and a container with no composited children produces no segments at all, so the common case costs nothing. This allows us to support composition within LBSE subtrees in a performant way, after dropping the requirement that every renderer creates a layer.
Multimedia 🎥
GStreamer-based multimedia support for WebKit, including (but not limited to) playback, capture, WebAudio, WebCodecs, and WebRTC.
Fixed initial decoding issues on LibWebRTC on platforms that do video decoding on the final playback stage (for efficiency and performance), instead of on the LibWebRTC decoder component.

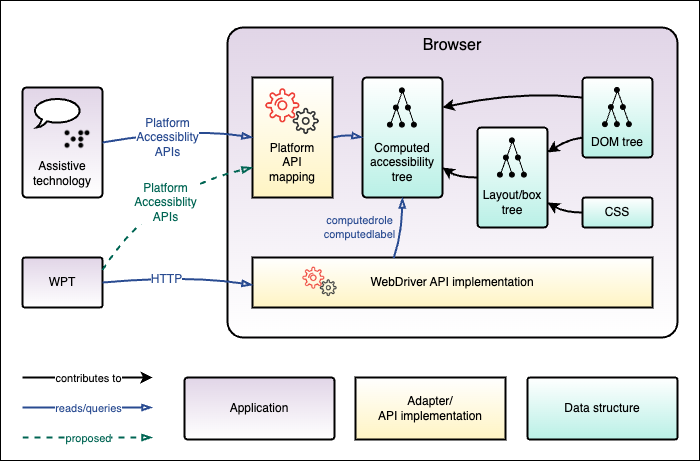
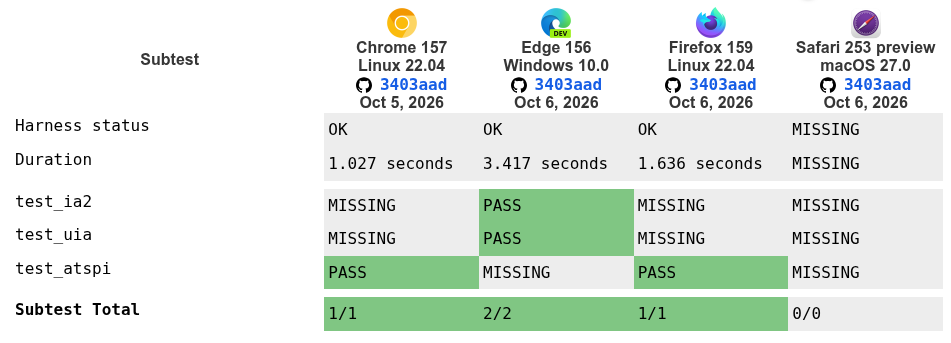


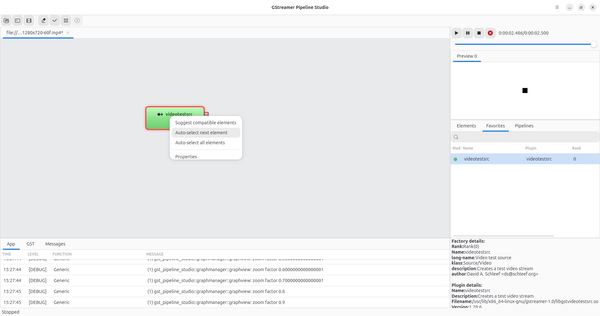
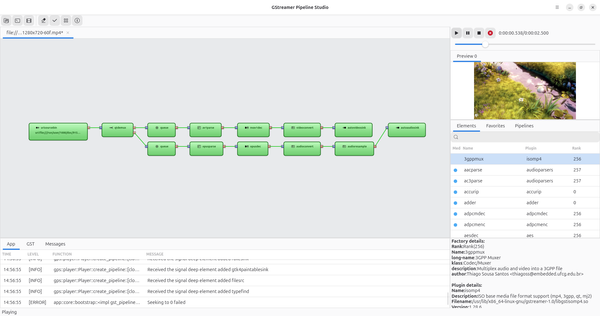
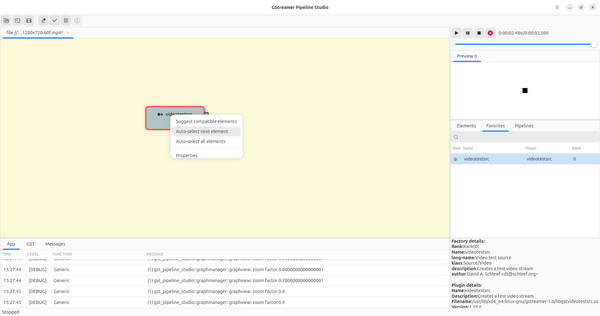
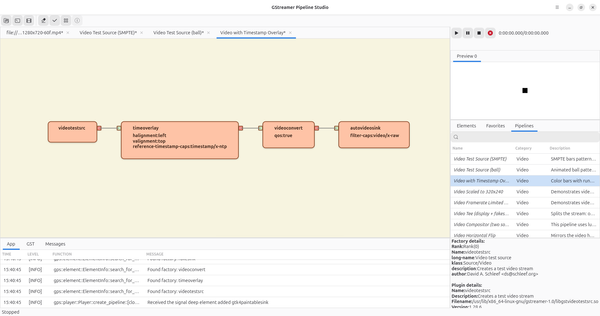
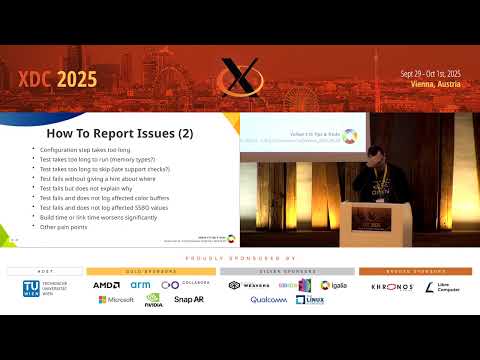




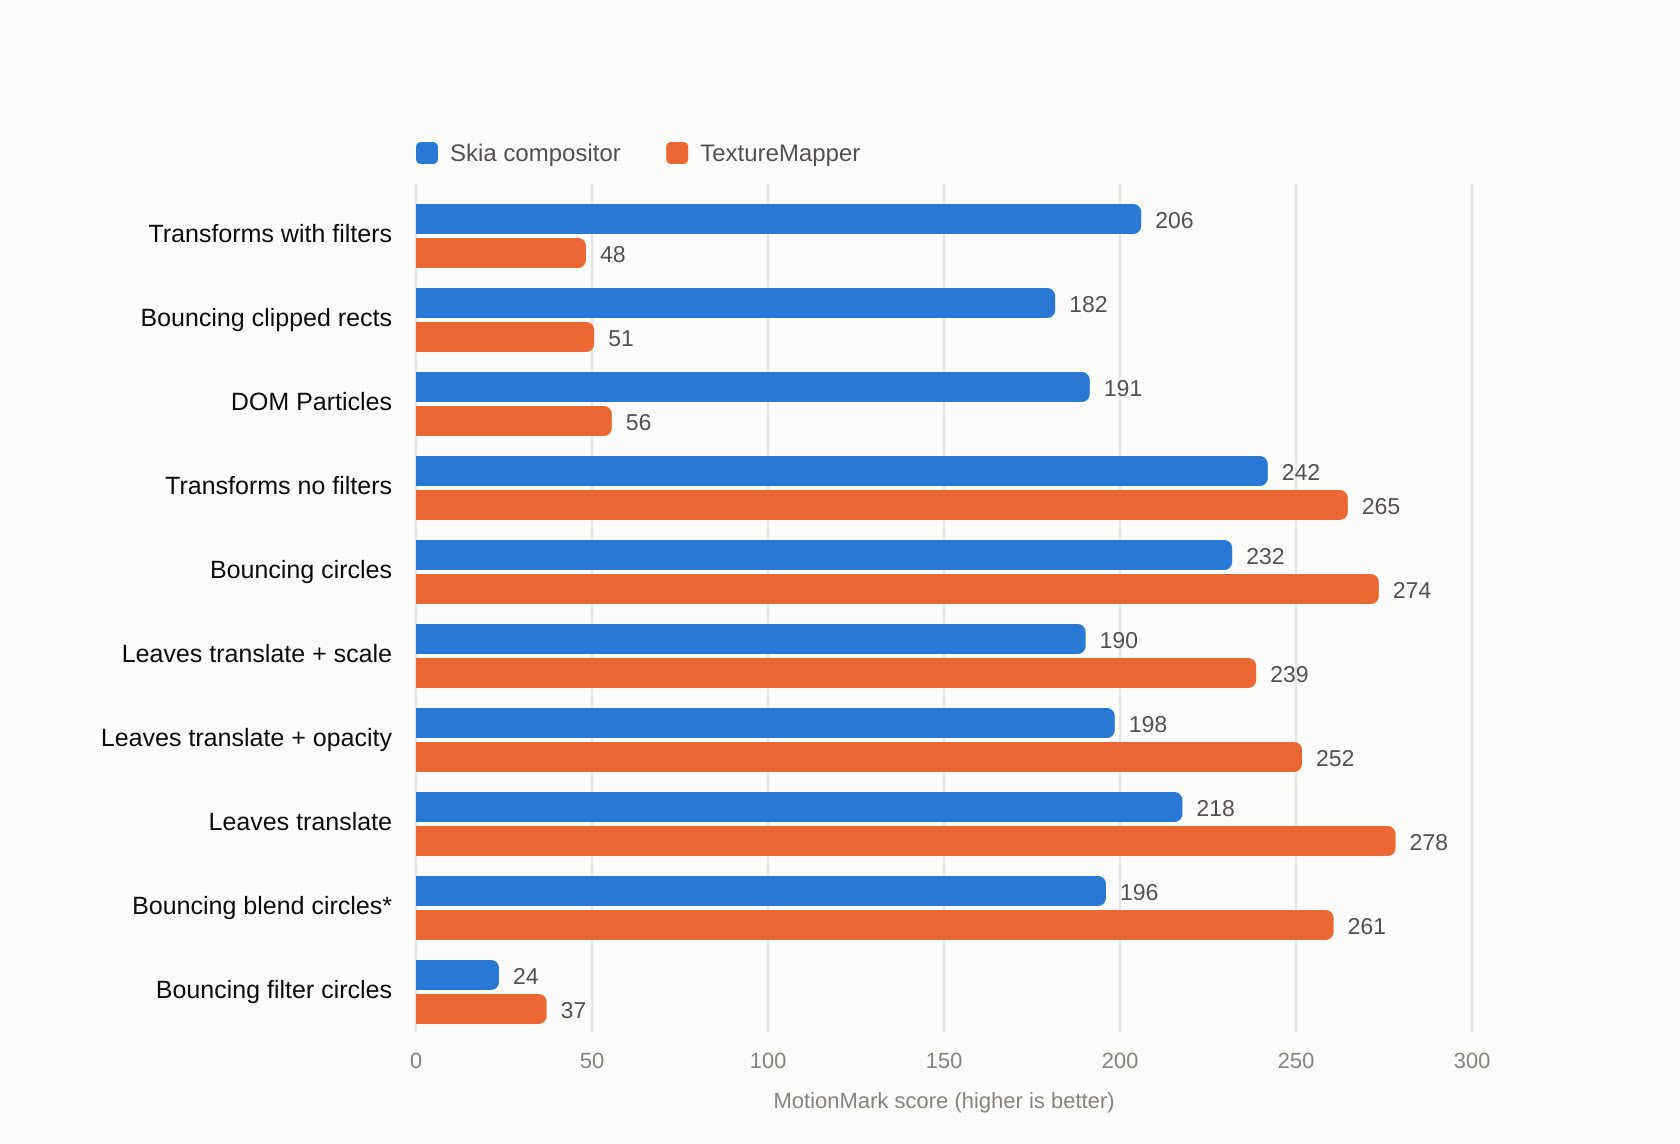
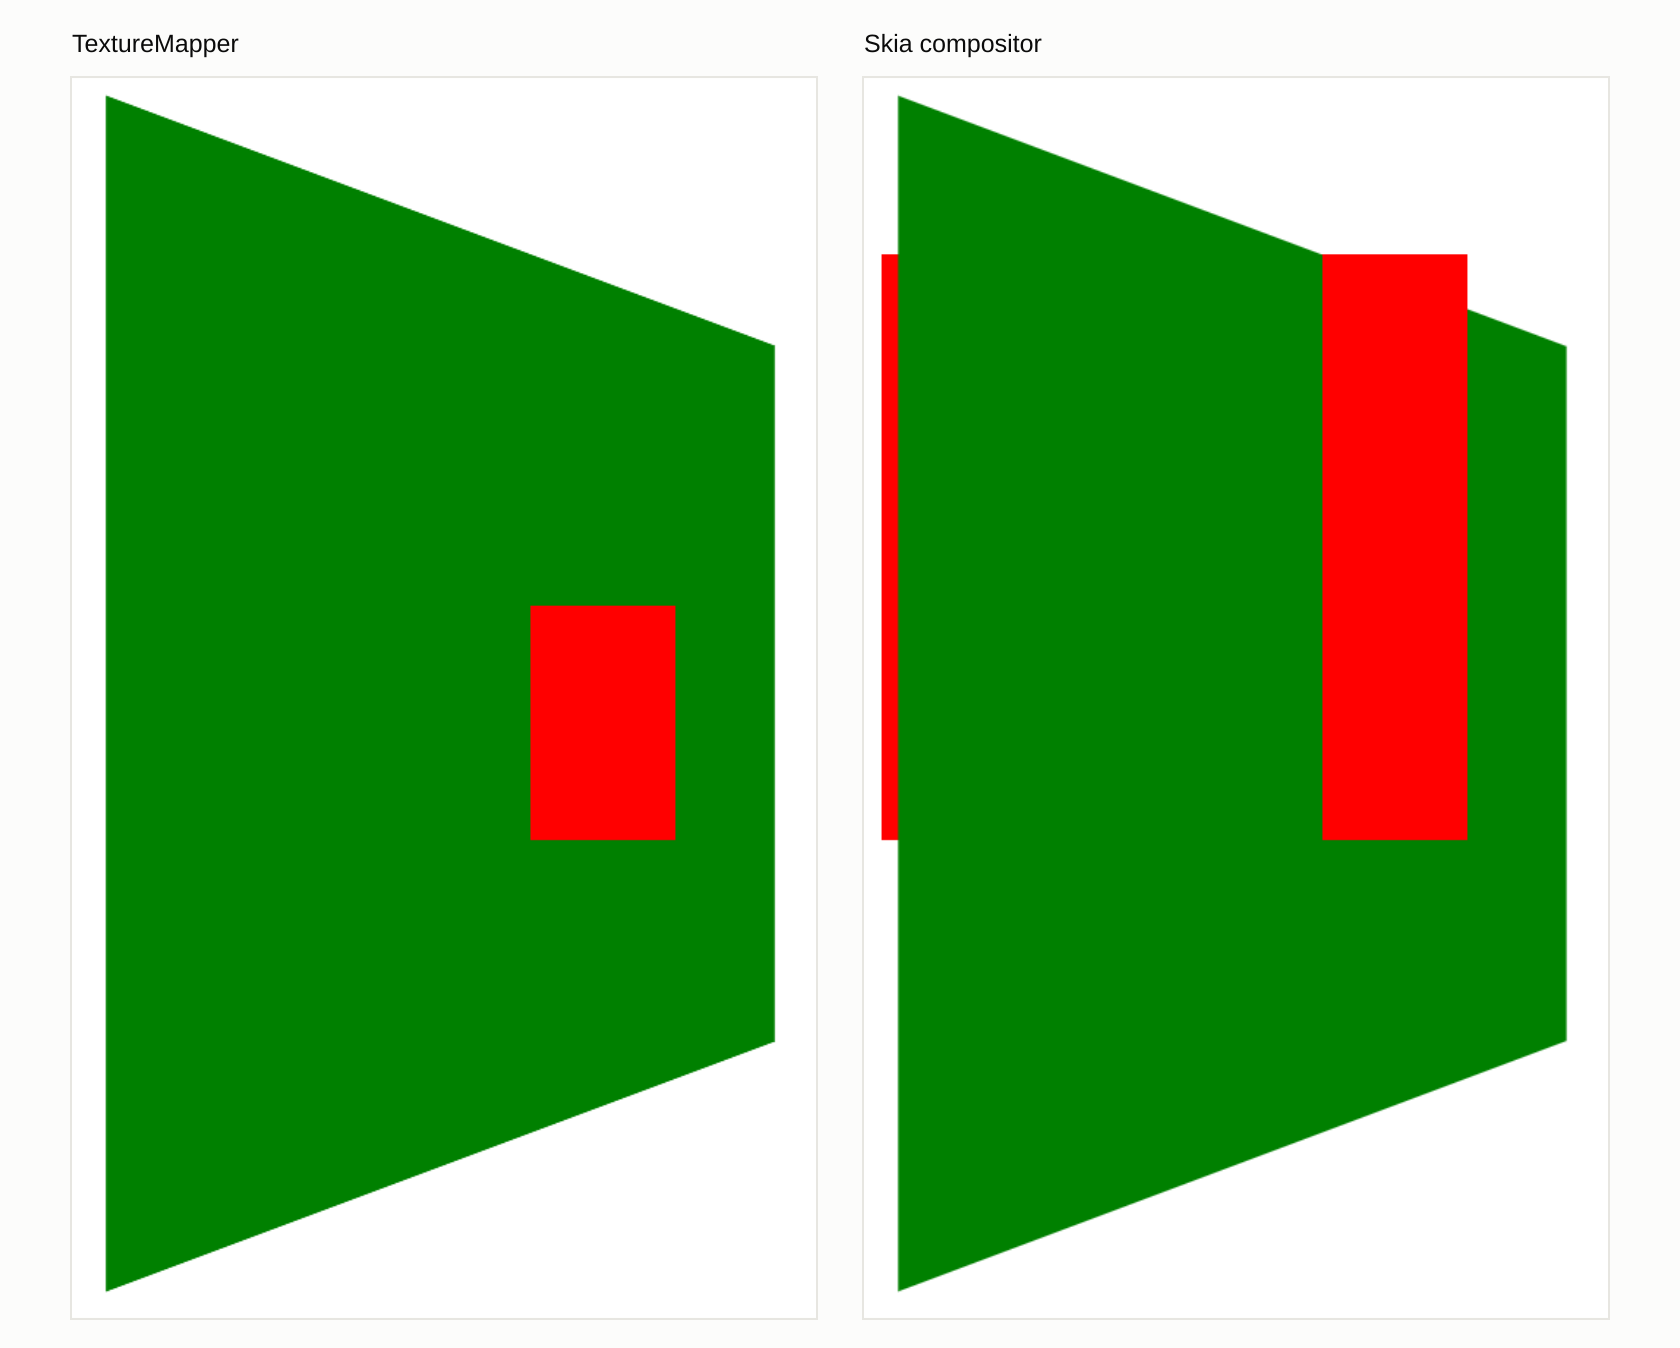
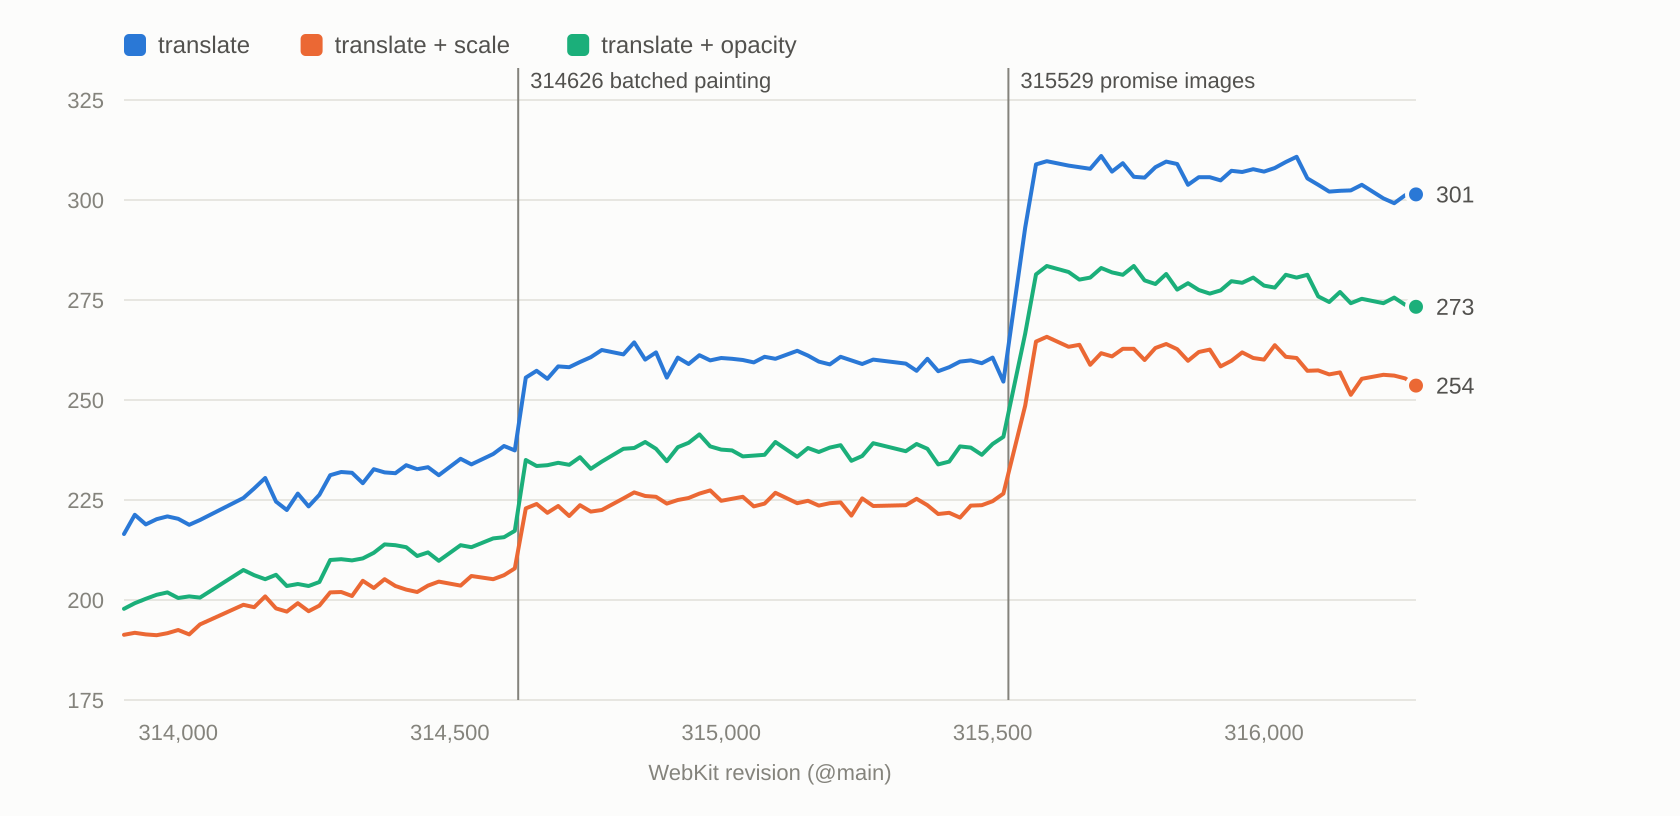
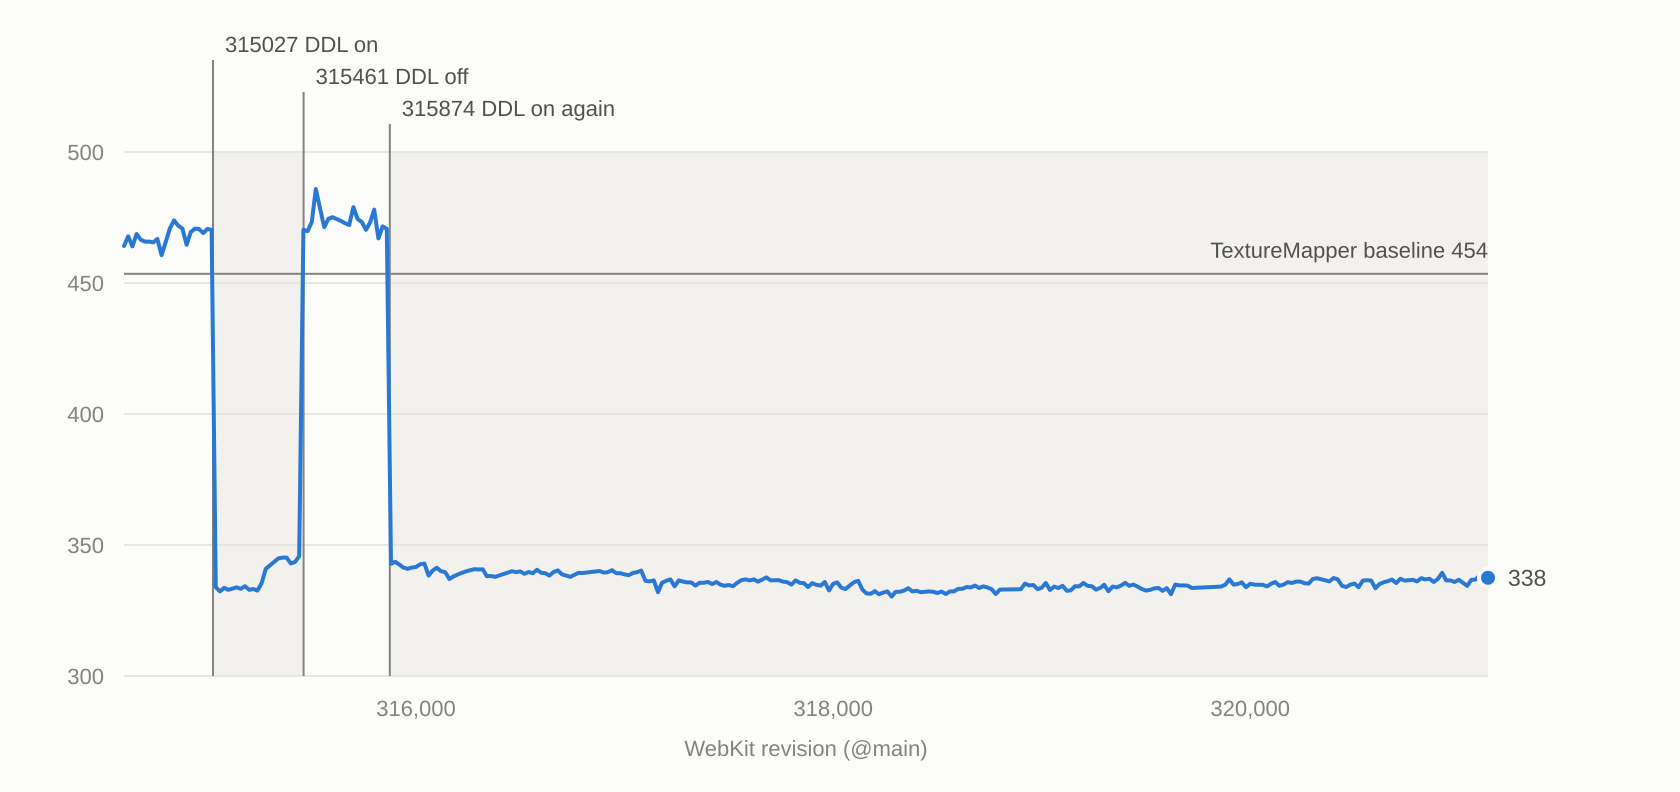
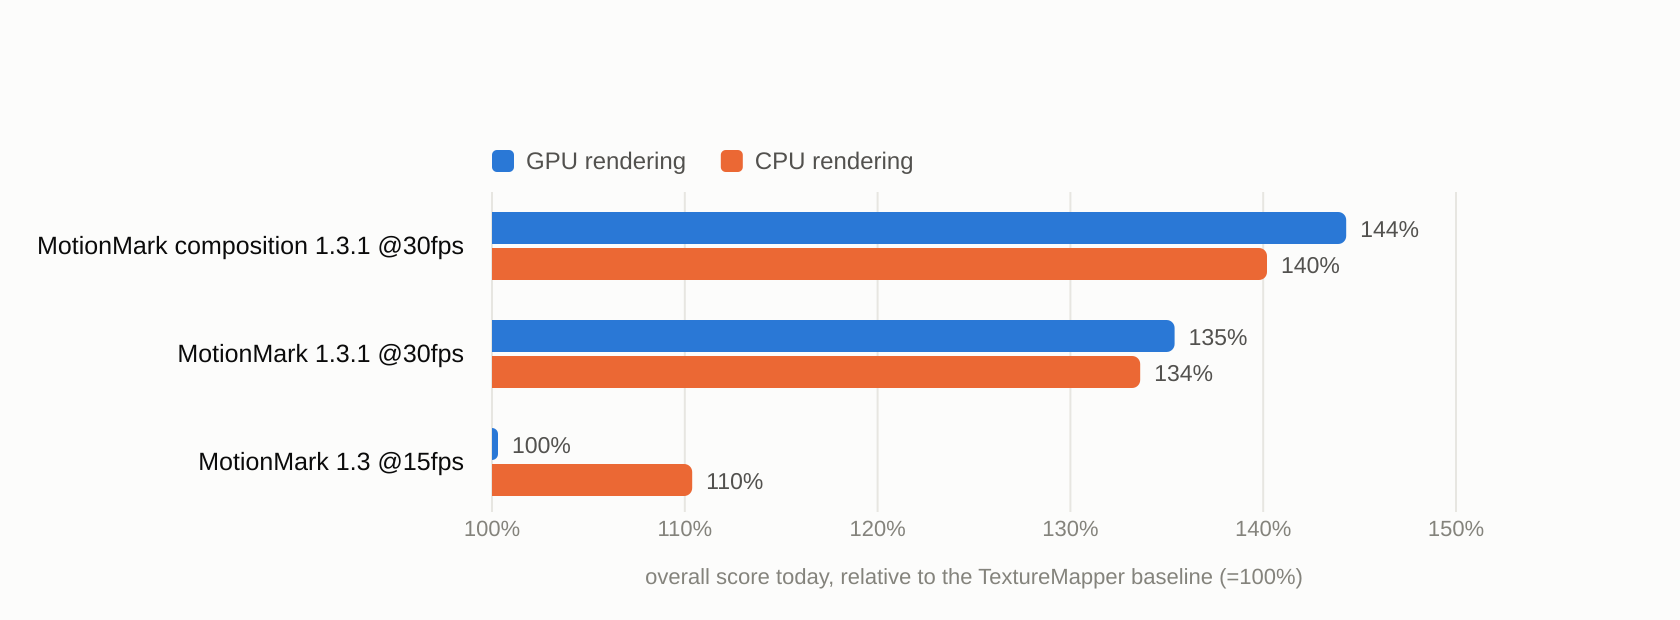
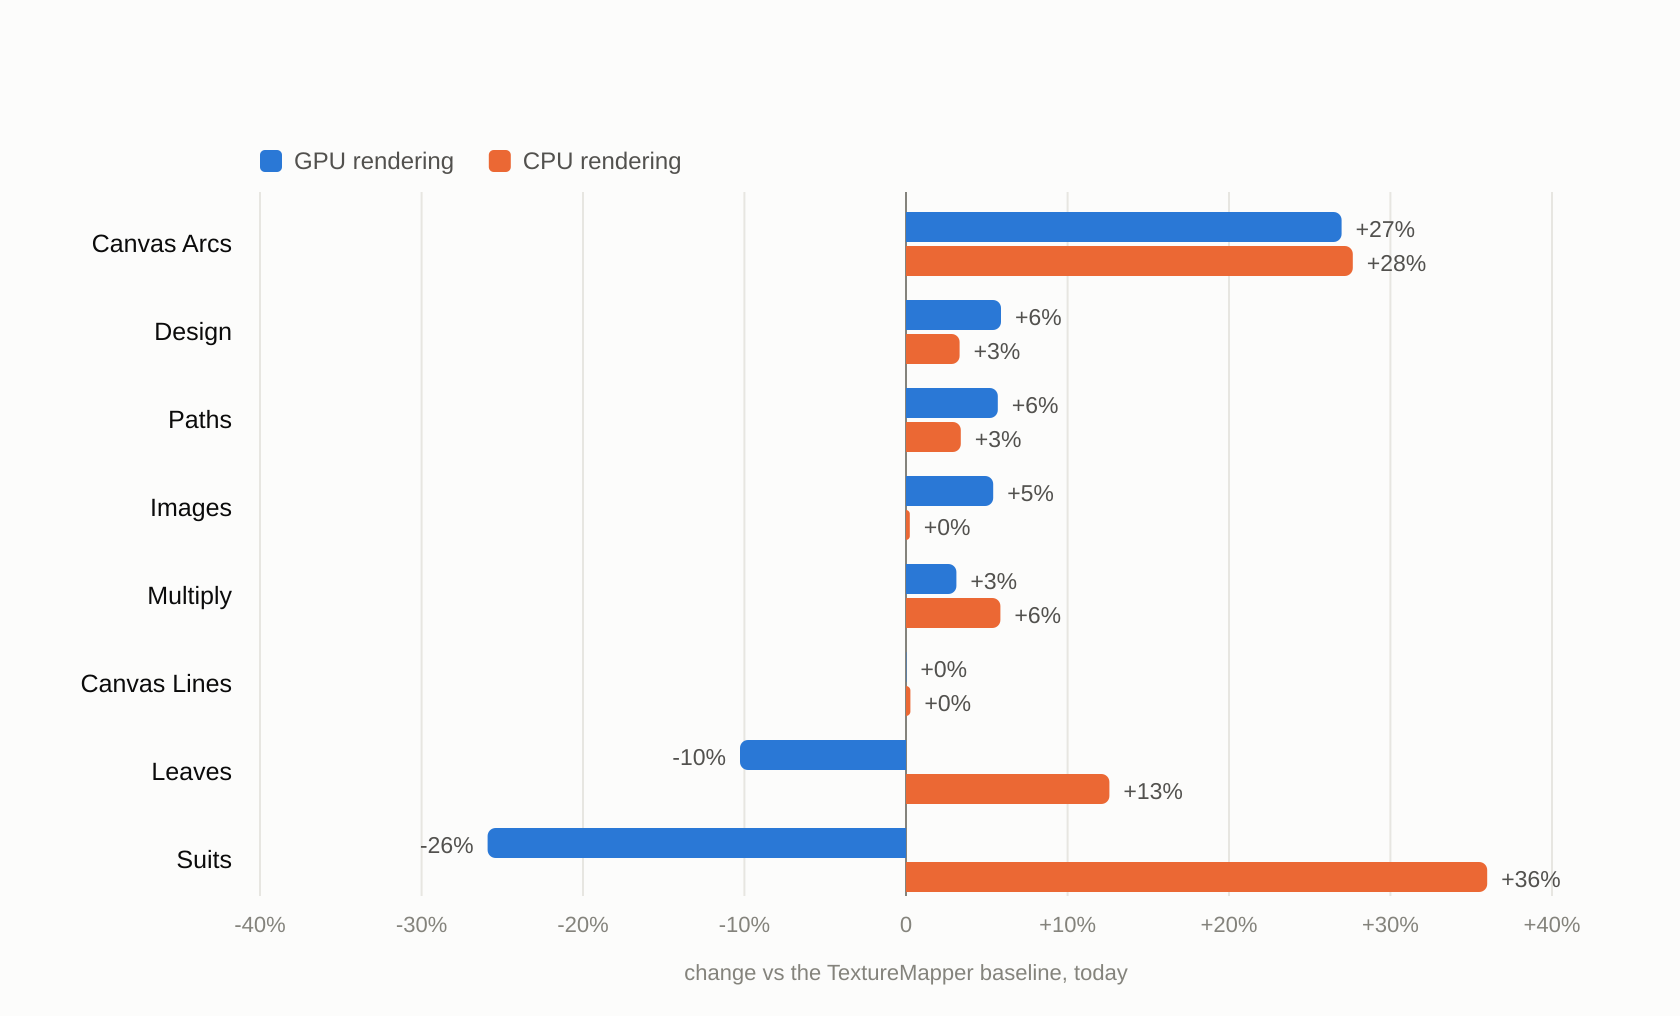
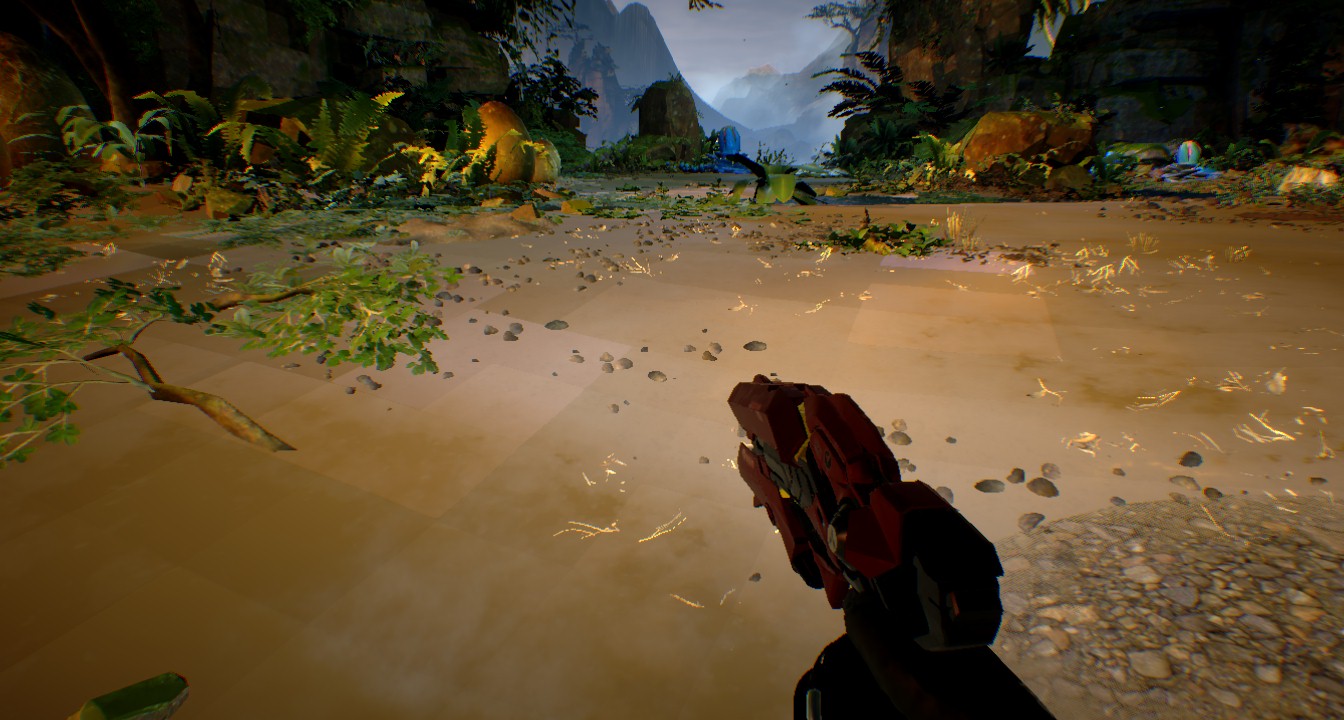
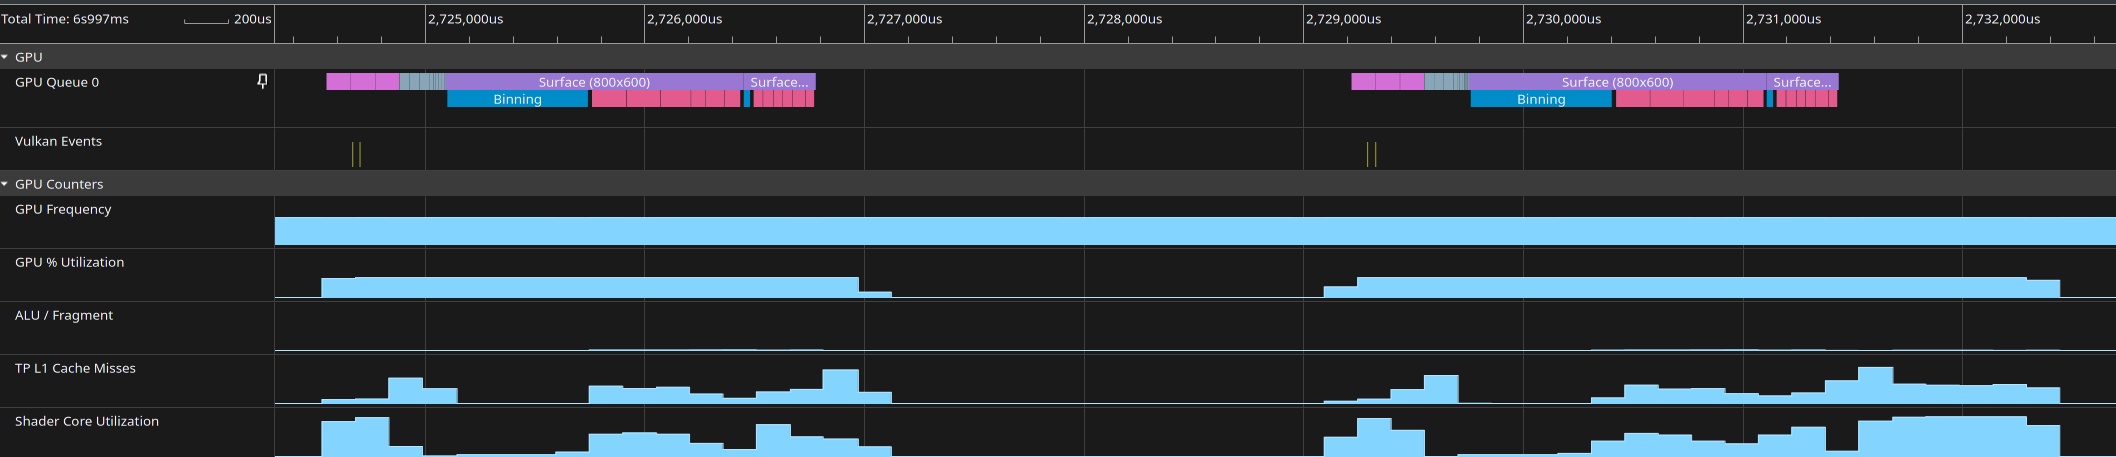



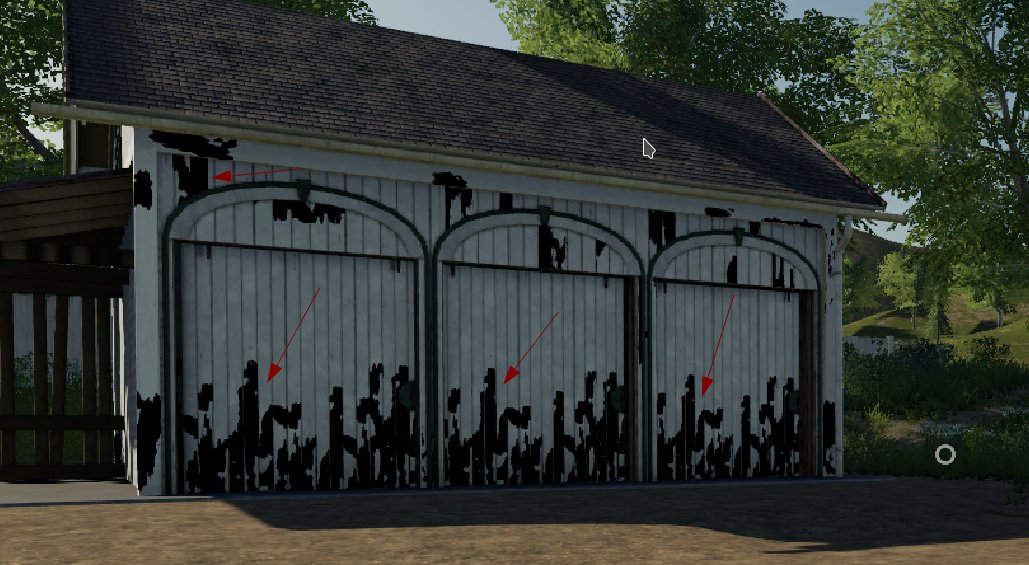
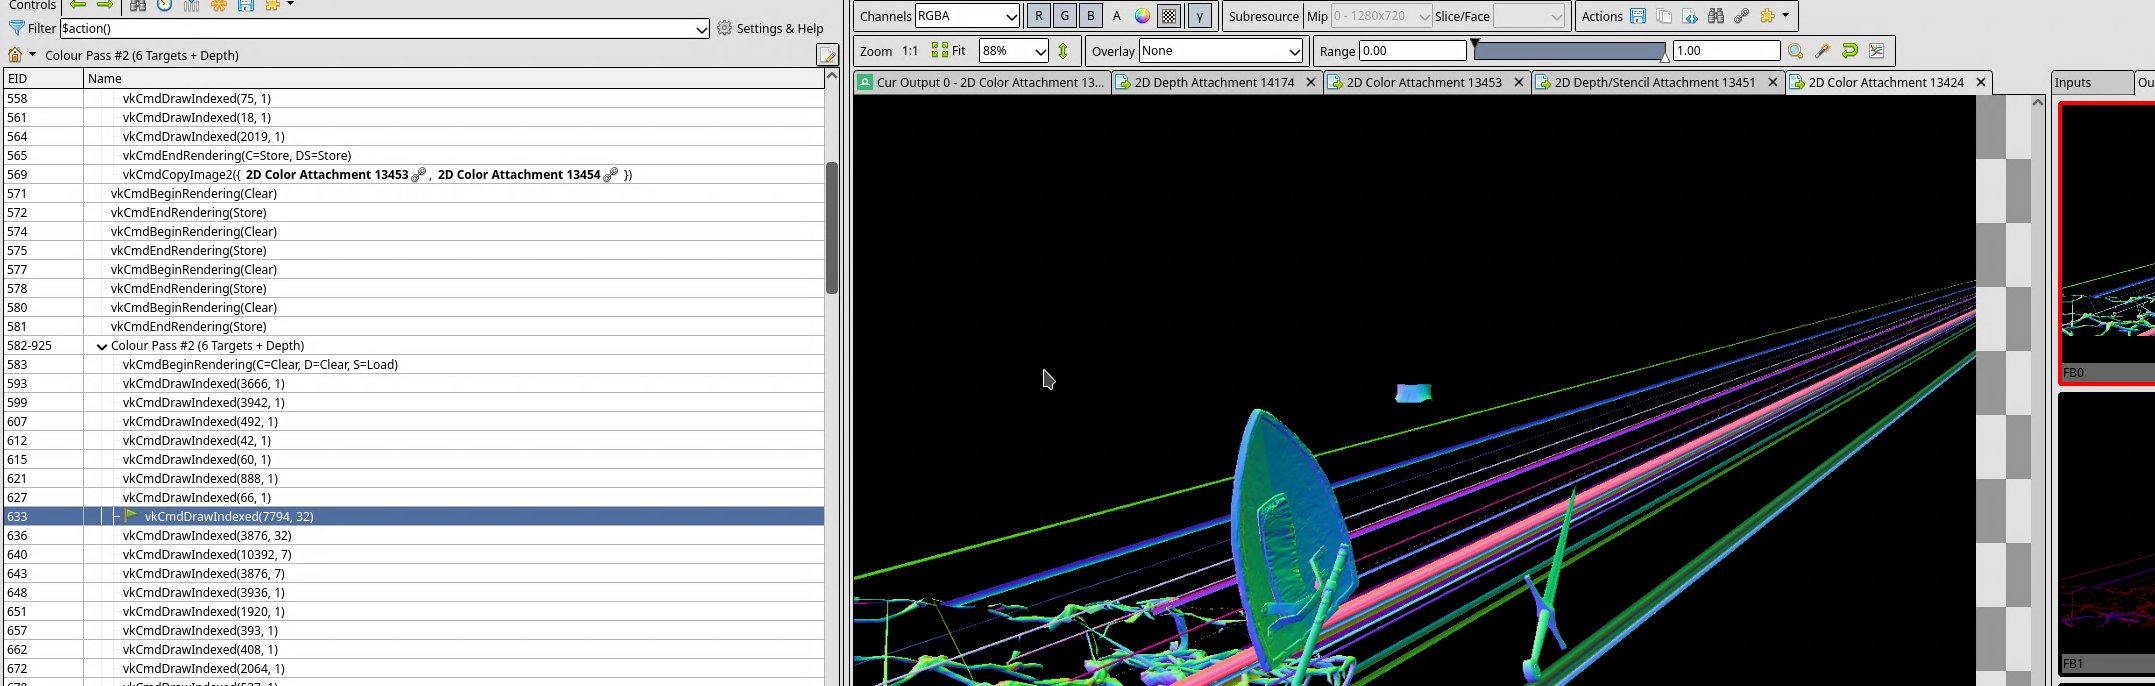

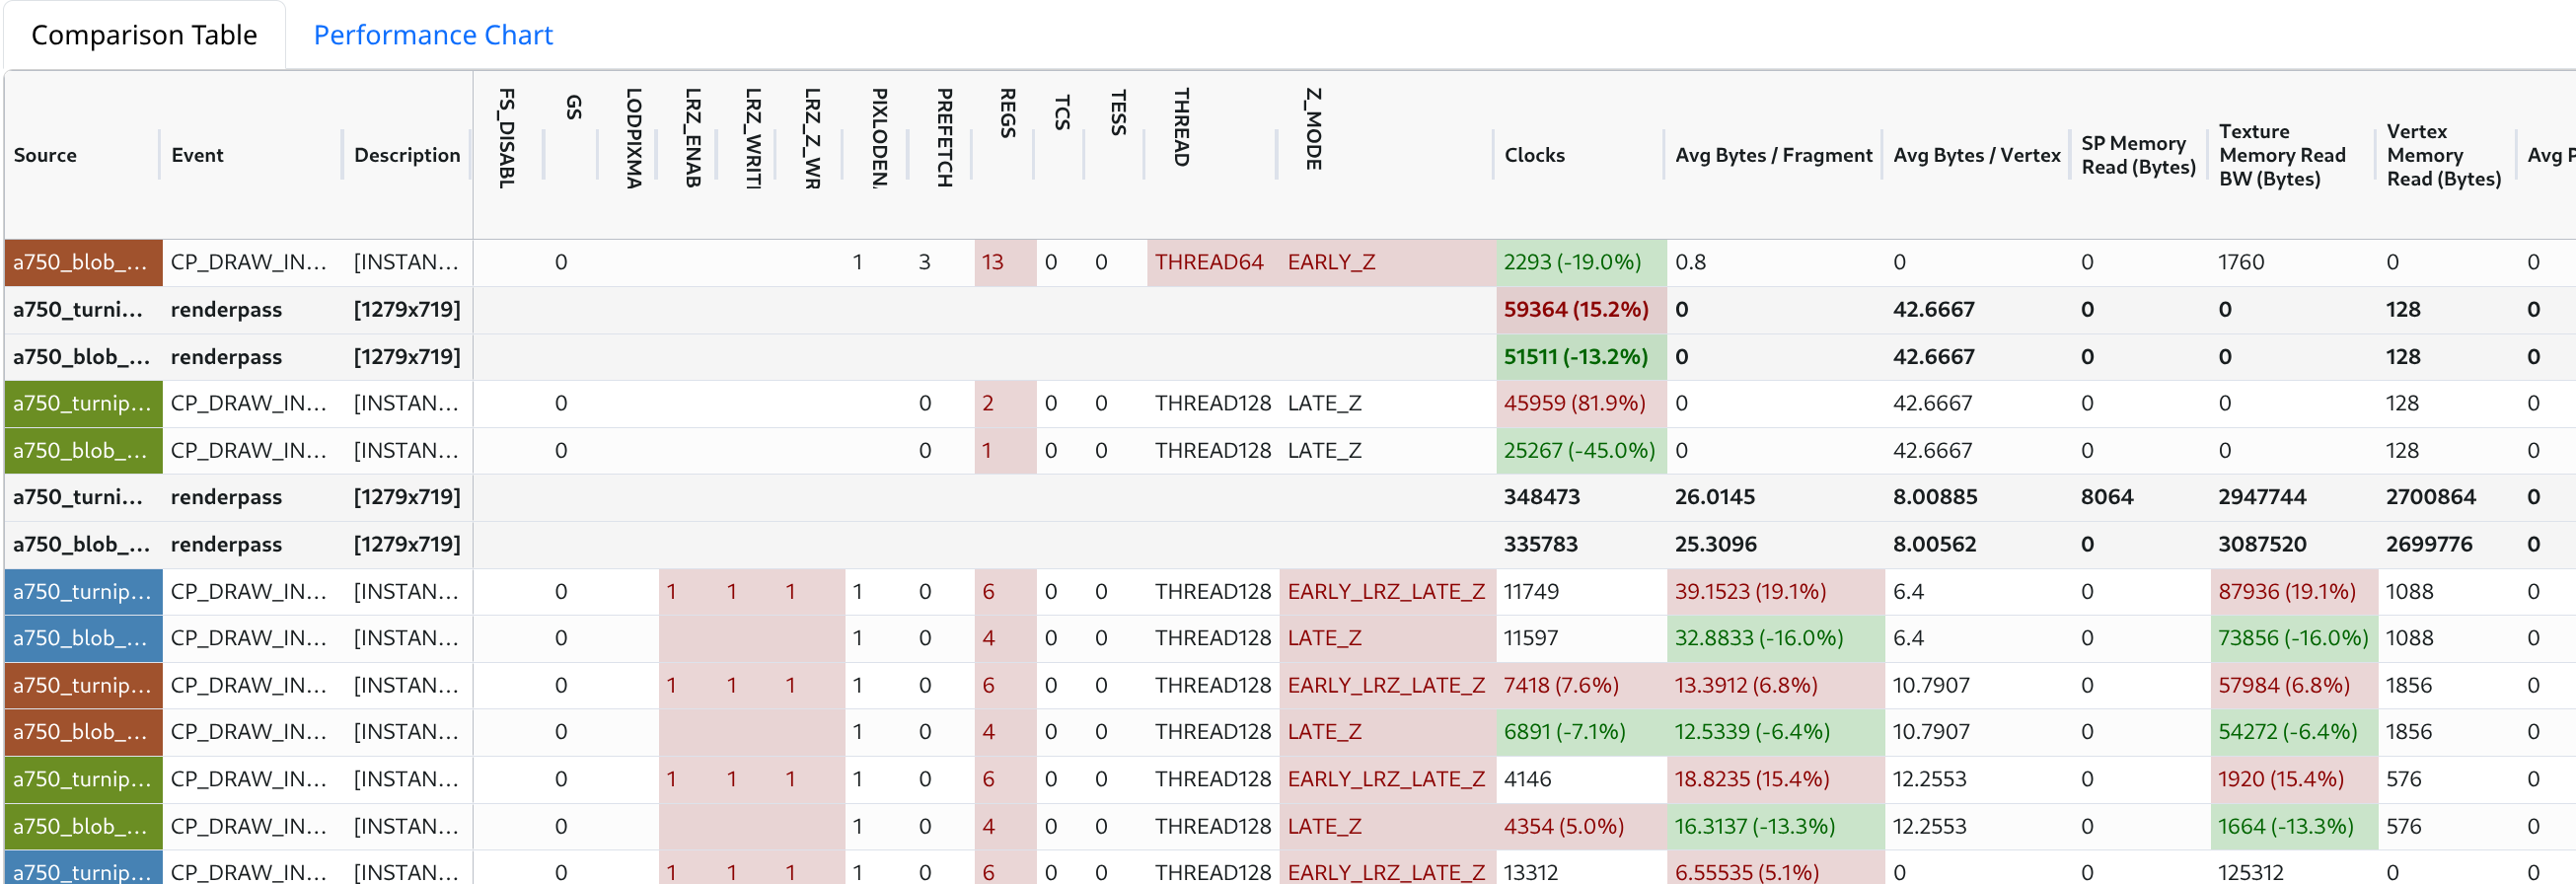
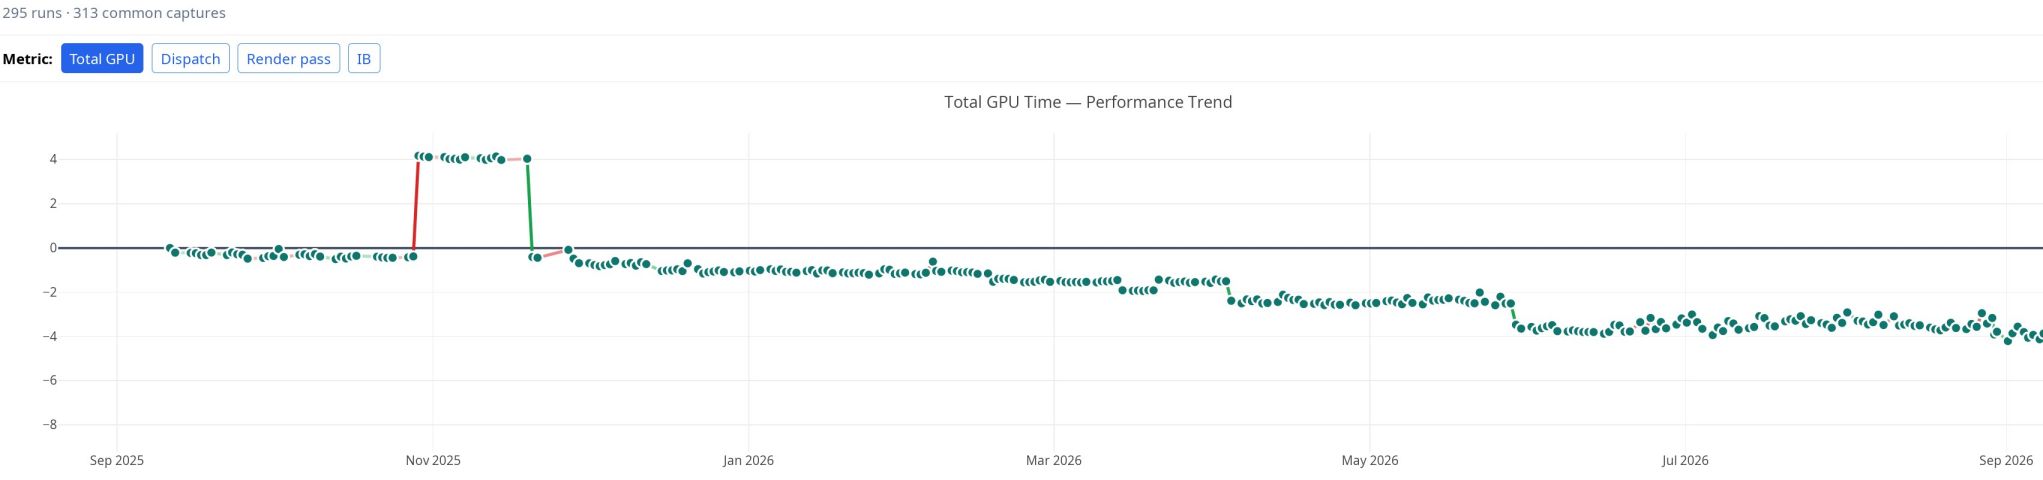

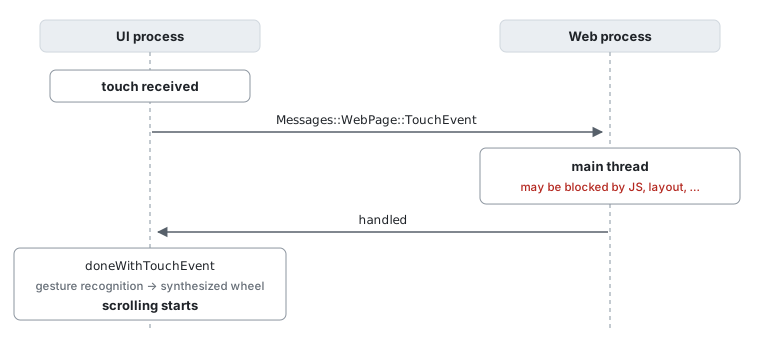
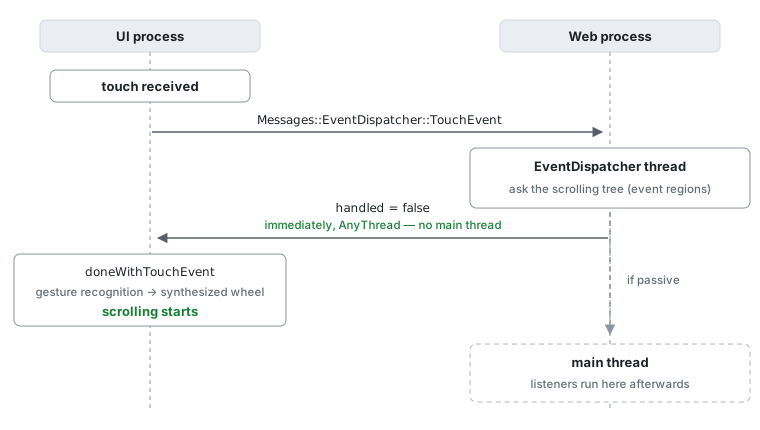

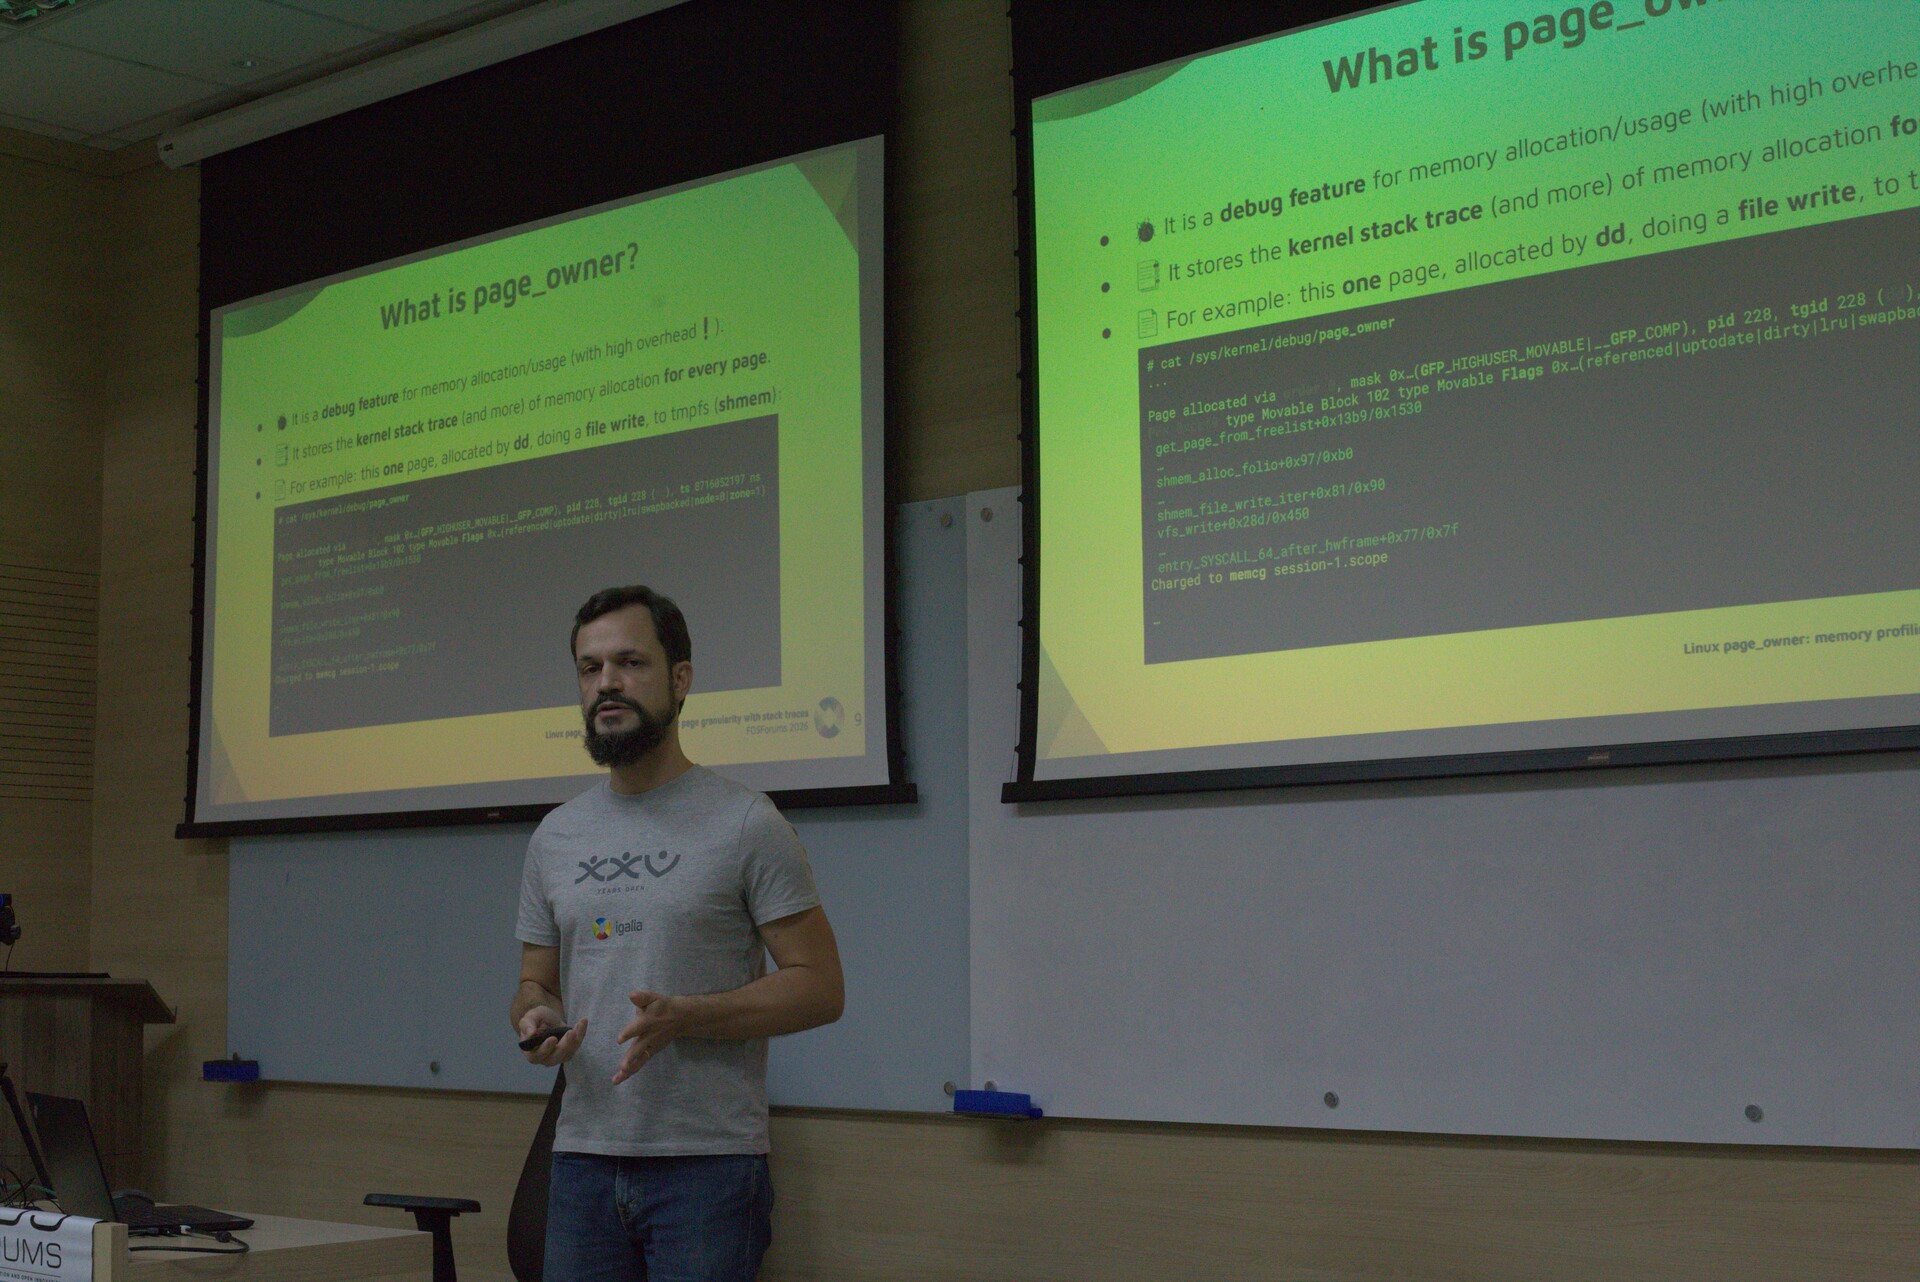
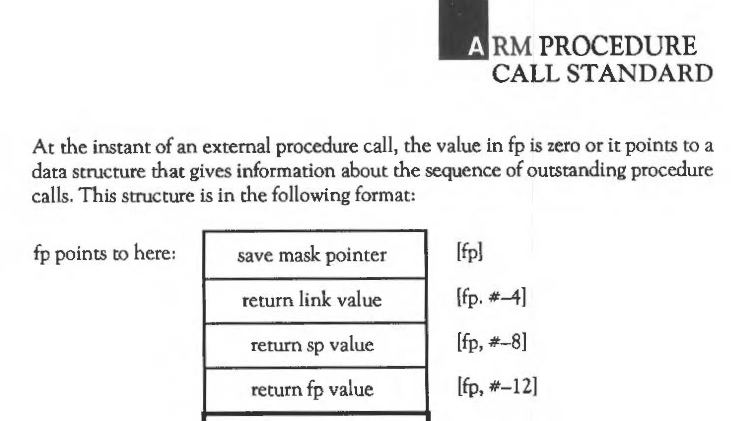
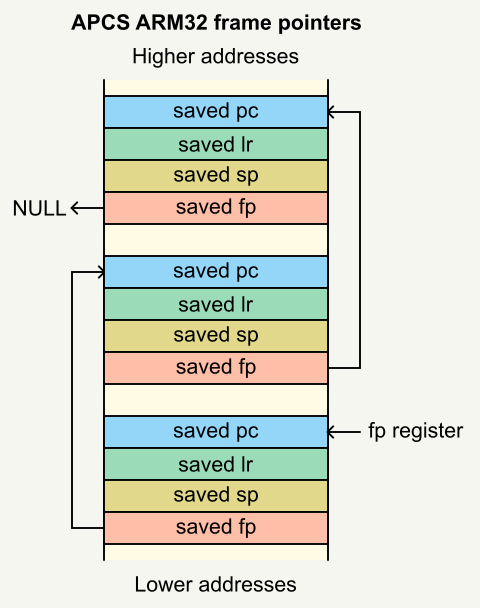
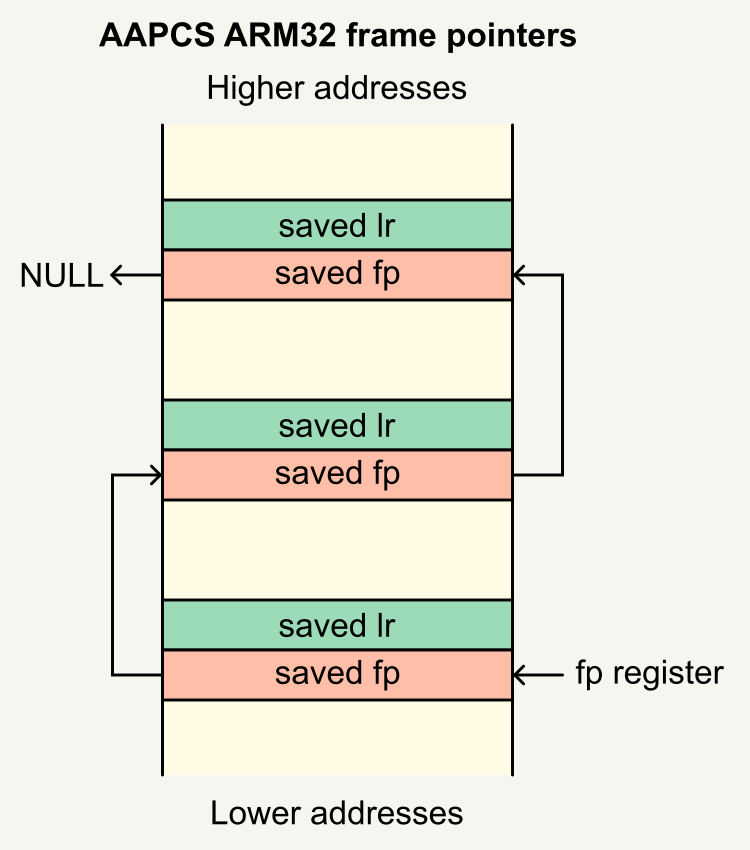
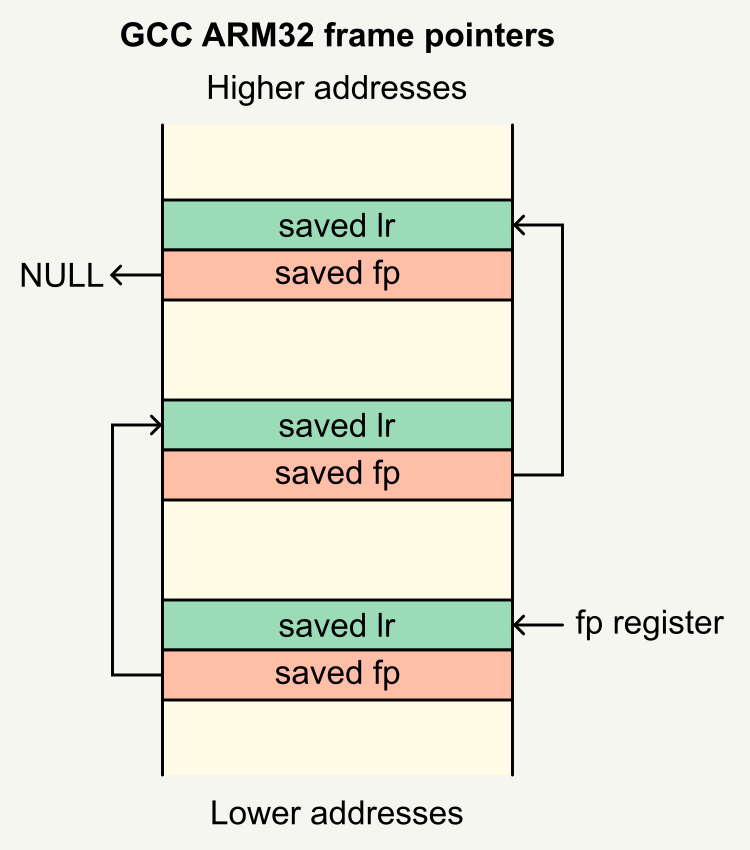
 ︎
︎