Hear ye, hear ye: Wastrel and Hoot means REPL!
Which is to say, Wastrel can now make native binaries out of WebAssembly files as produced by the Hoot Scheme toolchain, up to and including a full read-eval-print loop. Like the REPL on the Hoot web page, but instead of requiring a browser, you can just run it on your console. Amazing stuff!
try it at home
First, we need the latest Hoot. Build it from source, then compile a simple REPL:
echo '(import (hoot repl)) (spawn-repl)' > repl.scm
./pre-inst-env hoot compile -fruntime-modules -o repl.wasm repl.scm
This takes about a minute. The resulting wasm file has a pretty full standard library including a full macro expander and evaluator.
Normally Hoot would do some aggressive tree-shaking to discard any definitions not used by the program, but with a REPL we don’t know what we might need. So, we pass -fruntime-modules to instruct Hoot to record all modules and their bindings in a central registry, so they can be looked up at run-time. This results in a 6.6 MB Wasm file; with tree-shaking we would have been at 1.2 MB.
Next, build Wastrel from source, and compile our new repl.wasm:
wastrel compile -o repl repl.wasm
This takes about 5 minutes on my machine: about 3 minutes to generate all the C, about 6.6MLOC all in all, split into a couple hundred files of about 30KLOC each, and then 2 minutes to compile with GCC and link-time optimization (parallelised over 32 cores in my case). I have some ideas to golf the first part down a bit, but the the GCC side will resist improvements.
Finally, the moment of truth:
$ ./repl
Hoot 0.8.0

Enter `,help' for help.
(hoot user)> "hello, world!"
=> "hello, world!"
(hoot user)>
statics
When I first got the REPL working last week, I gasped out loud: it’s alive, it’s alive!!! Now that some days have passed, I am finally able to look a bit more dispassionately at where we’re at.
Firstly, let’s look at the compiled binary itself. By default, Wastrel passes the -g flag to GCC, which results in binaries with embedded debug information. Which is to say, my ./repl is chonky: 180 MB!! Stripped, it’s “just” 33 MB. 92% of that is in the .text (code) section. I would like a smaller binary, but it’s what we got for now: each byte in the Wasm file corresponds to around 5 bytes in the x86-64 instruction stream.
As for dependencies, this is a pretty minimal binary, though dynamically linked to libc:
linux-vdso.so.1 (0x00007f6c19fb0000)
libm.so.6 => /gnu/store/…-glibc-2.41/lib/libm.so.6 (0x00007f6c19eba000)
libgcc_s.so.1 => /gnu/store/…-gcc-15.2.0-lib/lib/libgcc_s.so.1 (0x00007f6c19e8d000)
libc.so.6 => /gnu/store/…-glibc-2.41/lib/libc.so.6 (0x00007f6c19c9f000)
/gnu/store/…-glibc-2.41/lib/ld-linux-x86-64.so.2 (0x00007f6c19fb2000)
Our compiled ./repl includes a garbage collector from Whippet, about which, more in a minute. For now, we just note that our use of Whippet introduces no run-time dependencies.
dynamics
Just running the REPL with WASTREL_PRINT_STATS=1 in the environment, it seems that the REPL has a peak live data size of 4MB or so, but for some reason uses 15 MB total. It takes about 17 ms to start up and then exit.
These numbers I give are consistent over a choice of particular garbage collector implementations: the default --gc=stack-conservative-parallel-generational-mmc, or the non-generational stack-conservative-parallel-mmc, or the Boehm-Demers-Weiser bdw. Benchmarking collectors is a bit gnarly because the dynamic heap growth heuristics aren’t the same between the various collectors; by default, the heap grows to 15 MB or so with all collectors, but whether it chooses to collect or expand the heap in response to allocation affects startup timing. I get the above startup numbers by setting GC_OPTIONS=heap-size=15m,heap-size-policy=fixed in the environment.
Hoot implements Guile Scheme, so we can also benchmark Hoot against Guile. Given the following test program that sums the leaf values for ten thousand quad trees of height 5:
(define (quads depth)
  (if (zero? depth)
      1
      (vector (quads (- depth 1))
              (quads (- depth 1))
              (quads (- depth 1))
              (quads (- depth 1)))))
(define (sum-quad q)
  (if (vector? q)
      (+ (sum-quad (vector-ref q 0))
         (sum-quad (vector-ref q 1))
         (sum-quad (vector-ref q 2))
         (sum-quad (vector-ref q 3)))
      q))

(define (sum-of-sums n depth)
  (let lp ((n n) (sum 0))
    (if (zero? n)
        sum
        (lp (- n 1)
            (+ sum (sum-quad (quads depth)))))))


(sum-of-sums #e1e4 5)
We can cat it to our repl to see how we do:
Hoot 0.8.0

Enter `,help' for help.
(hoot user)> => 10240000
(hoot user)>
Completed 3 major collections (281 minor).
4445.267 ms total time (84.214 stopped); 4556.235 ms CPU time (189.188 stopped).
0.256 ms median pause time, 0.272 p95, 7.168 max.
Heap size is 28.269 MB (max 28.269 MB); peak live data 9.388 MB.
That is to say, 4.44s, of which 0.084s was spent in garbage collection pauses. The default collector configuration is generational, which can result in some odd heap growth patterns; as it happens, this workload runs fine in a 15MB heap. Pause time as a percentage of total run-time is very low, so all the various GCs perform the same, more or less; we seem to be benchmarking eval more than the GC itself.
Is our Wastrel-compiled repl performance good? Well, we can evaluate it in two ways. Firstly, against Chrome or Firefox, which can run the same program; if I paste in the above program in the REPL over at the Hoot web site, it takes about 5 or 6 times as long to complete, respectively. Wastrel wins!
I can also try this program under Guile itself: if I eval it in Guile, it takes about 3.5s. Granted, Guile’s implementation of the same source language is different, and it benefits from a number of representational tricks, for example using just two words for a pair instead of four on Hoot+Wastrel. But these numbers are in the same ballpark, which is heartening. Compiling the test program instead of interpreting is about 10× faster with both Wastrel and Guile, with a similar relative ratio.
Finally, I should note that Hoot’s binaries are pretty well optimized in many ways, but not in all the ways. Notably, they use too many locals, and the post-pass to fix this is unimplemented, and last time I checked (a long time ago!), wasm-opt didn’t work on our binaries. I should take another look some time.
generational?
This week I dotted all the t’s and crossed all the i’s to emit write barriers when we mutate the value of a field to store a new GC-managed data type, allowing me to enable the sticky mark-bit variant of the Immix-inspired mostly-marking collector. It seems to work fine, though this kind of generational collector still baffles me sometimes.
With all of this, Wastrel’s GC-using binaries use a stack-conservative, parallel, generational collector that can compact the heap as needed. This collector supports multiple concurrent mutator threads, though Wastrel doesn’t do threading yet. Other collectors can be chosen at compile-time, though always-moving collectors are off the table due to not emitting stack maps.
The neat thing is that any language that compiles to Wasm can have any of these collectors! And when the Whippet GC library gets another collector or another mode on an existing collector, you can have that too.
missing pieces
The biggest missing piece for Wastrel and Hoot is some kind of asynchrony, similar to JavaScript Promise Integration (JSPI), and somewhat related to stack switching. You want Wasm programs to be able to wait on external events, and Wastrel doesn’t support that yet.
Other than that, it would be lovely to experiment with Wasm shared-everything threads at some point.
what’s next
So I have an ahead-of-time Wasm compiler. It does GC and lots of neat things. Its performance is state-of-the-art. It implements a few standard libraries, including WASI 0.1 and Hoot. It can make a pretty good standalone Guile REPL. But what the hell is it for?
Friends, I... I don’t know! It’s really cool, but I don’t yet know who needs it. I have a few purposes of my own (pushing Wasm standards, performance work on Whippet, etc), but you or someone you know needs a wastrel, do let me know at wingo@igalia.com: I would love to be able to spend more time hacking in this area.
Until next time, happy compiling to all!


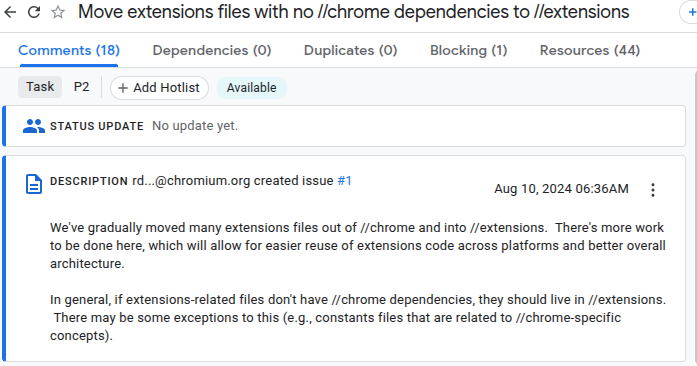

 Migrating Unpacked directory installation from //chrome to //extensions
 Moving .crx installation code from //chrome → //extensions